Tag: AI Marketing

  • I Vibe-Coded a Personalized AI Phone-Case App That Makes $1,000 in 1–2 Evening Hours. Here’s How

    I Vibe-Coded a Personalized AI Phone-Case App That Makes $1,000 in 1–2 Evening Hours. Here’s How

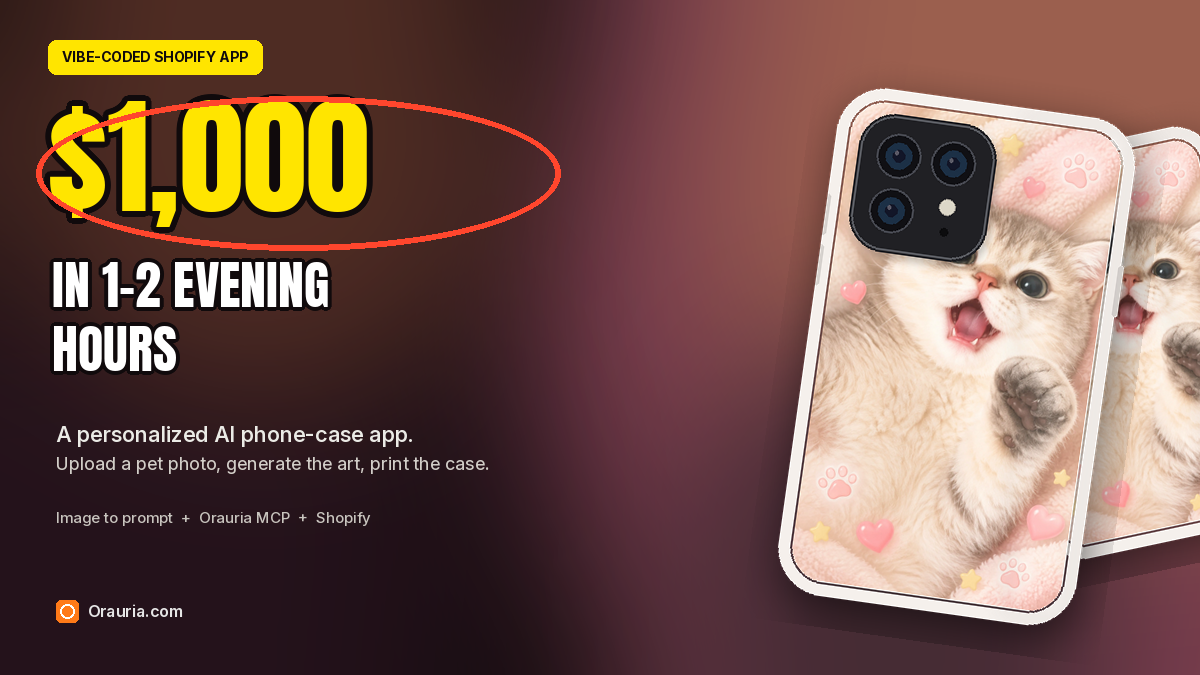
    I did not want a catalog of cases already sitting on a shelf. I wanted a shop that starts with a photo a customer already has: their cat, their dog, a scribble of an idea. So I vibe-coded a small Shopify app. The shopper uploads a picture. The app calls Orauria to turn that picture into a detailed prompt, rewrites it as printable phone-case artwork, generates the file, and previews it on an iPhone case. When they pay $24.99, the file goes to print-on-demand.

    This walk-through uses a real photo of a wide-eyed cream kitten — one paw up, mouth open mid-meow — as the stand-in for a shopper upload, a real Image to prompt run on a public cat collage pin to show that step, and a real file from Orauria Studio — task #225830817 — generated with the kitten photo as a reference. The shop around it, PawCase Studio, is a fictional demo of the app I would wire up next.

    The playbook at a glance

    1. Install the Chrome extension.
    2. Start with a photo you have the right to use — a customer’s own pet is the point of the shop.
    3. Run Image to prompt to get a detailed brief (the app would call this on the upload; below, we demonstrate the step on a public pin).
    4. Rewrite a 9:16 case brief for that pet, attach the photo as a reference, and generate it in Orauria Studio.
    5. Vibe-code a small Shopify app: upload → Image to prompt API → rewritten brief → Orauria MCP (generate_image, then get_task) → case preview → print-on-demand.
    6. Keep the token on the server. Treat a week of evening totals as a worked example, not a promise.

    First, install the extension

    Image to prompt only works after you install the Chrome extension AI Assistant Copilot – Orauria. Get it from the Chrome Web Store before you go looking for a reference, or before you run it on an upload. Once it is on, you can right-click a photo and pull a prompt from it.

    The shopper’s photo

    The useful photo for a case shop is already doing the work a product has to do: a face you can recognize at a glance, an expression that will still read on a four-inch back, and a pose you can turn into a character rather than a crop. This cream kitten does that job. It lies on its back, huge dark eyes on the camera, a tiny pink nose, mouth open in a happy meow, one grey-tipped paw reaching up — the kind of picture a customer would actually pull off their phone.

    That photo is the upload. It is not a file to reprint onto a case. The app’s job is to write a new piece of illustrated artwork from it, with the photo as a reference, not as the print file.
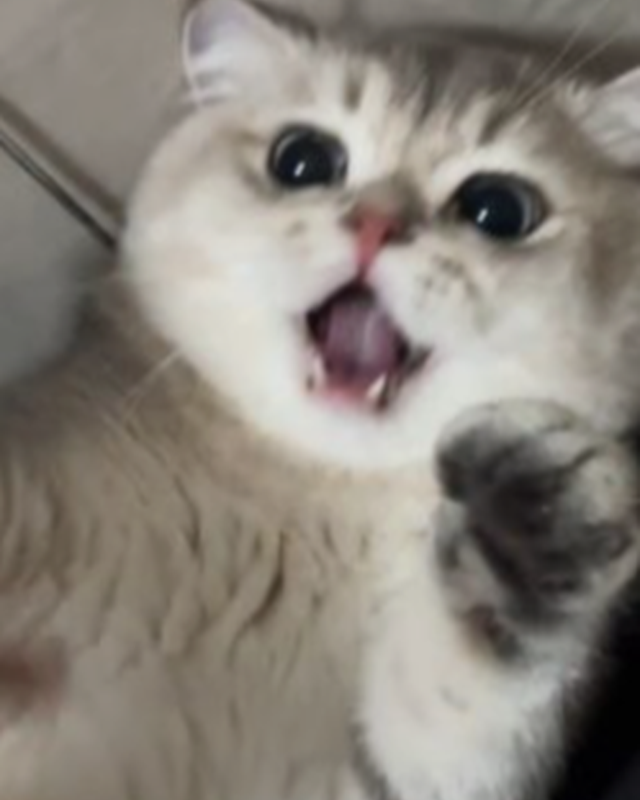
    A close-up photo of a cream British-shorthair kitten lying on its back, looking at the camera with wide dark eyes, a pink nose, an open mouth, and one grey-tipped paw raised.
    The shopper-upload stand-in: a cream kitten, one paw up, mid-meow.

    How Image to prompt works — the step the app calls

    In the live app, the first call after an upload is Orauria’s Image to prompt API. To show what that step actually looks like, we ran the Chrome extension on a public cat collage pin: cream-white, round-faced cats with sleepy green eyes, grassy sticker cutouts, and a sage-and-ivory checkerboard. Credit the pin. It is a style-and-subject teacher, not a product you are allowed to resell, and it is not the customer photo above.
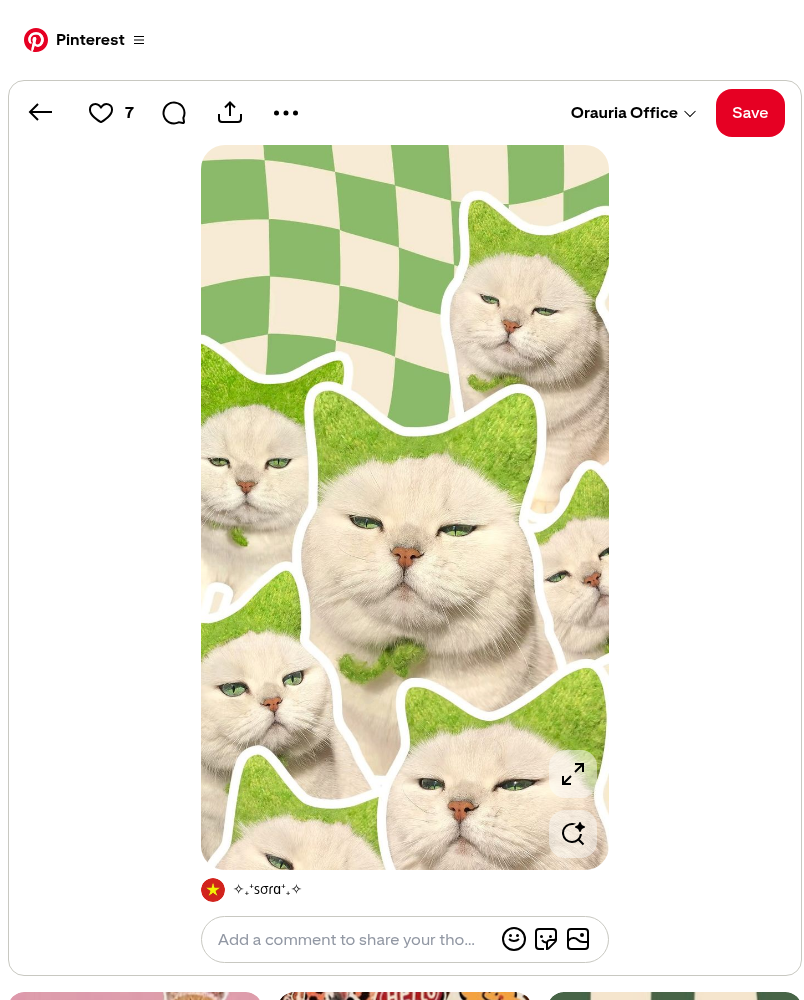
    A Pinterest pin of a vertical sticker collage of cream-white, round-faced cats with green eyes, grassy cutouts, and a sage-and-ivory checkerboard.
    The public pin used to demonstrate Image to prompt. Credit the pin.

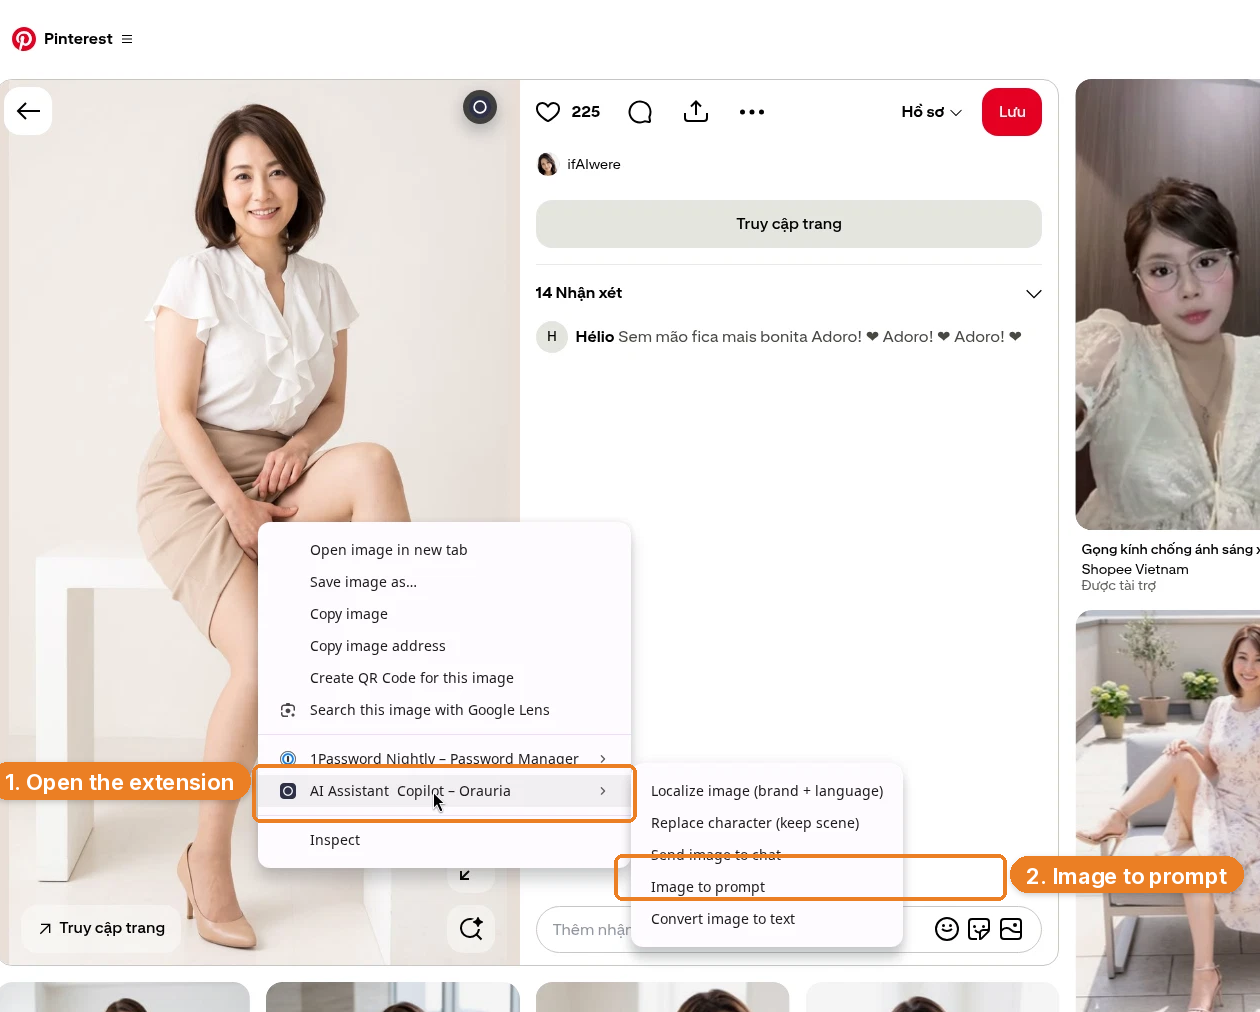
    Right-click the image, open AI Assistant Copilot – Orauria, and choose Image to prompt. The extension analyzes the picture and writes a brief you can actually reuse.
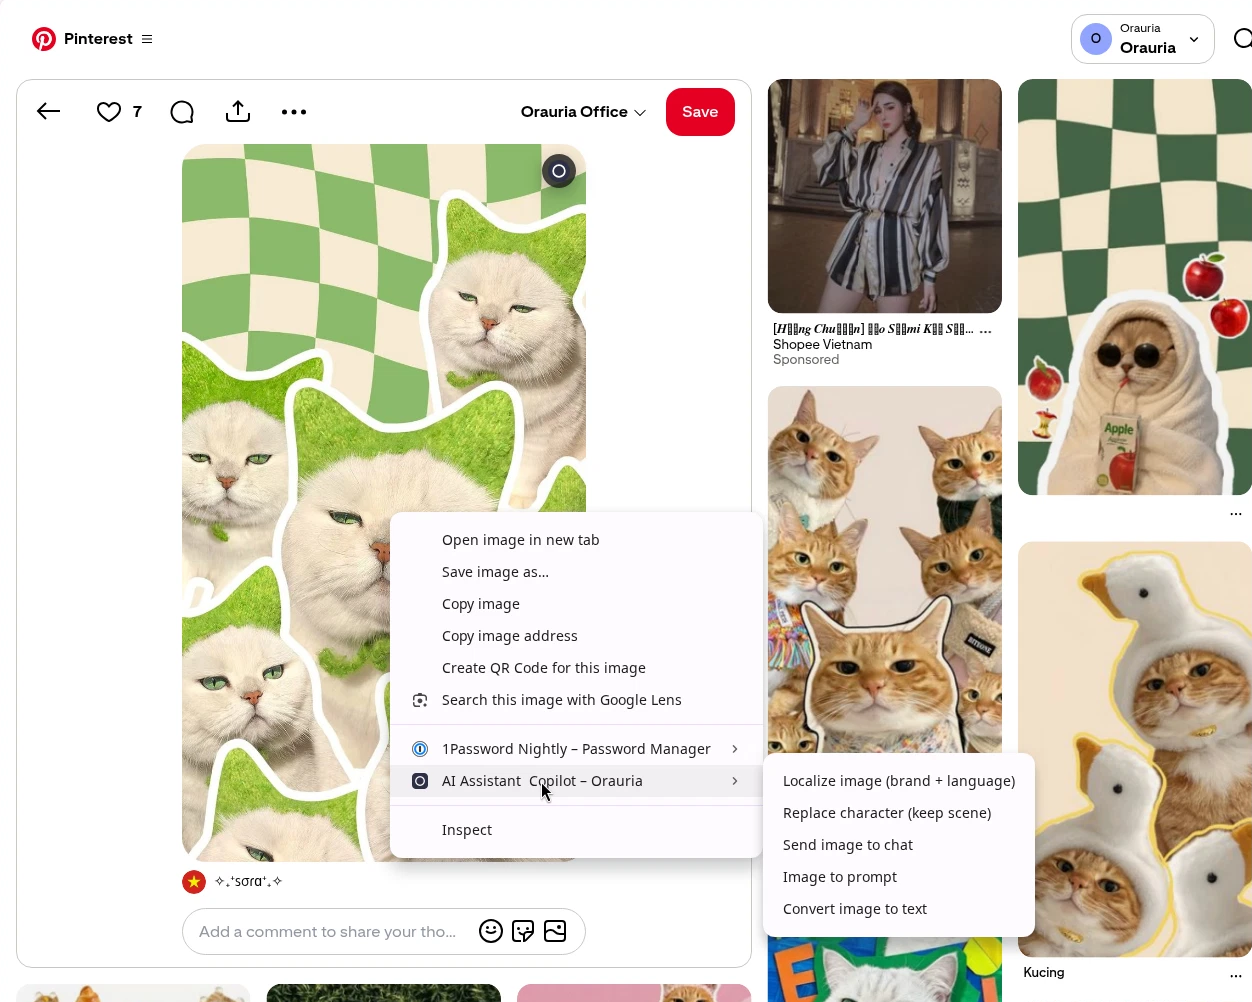
    The Pinterest context menu open on the cat collage pin, with AI Assistant Copilot – Orauria expanded and Image to prompt in the submenu.
    Right-click the pin, open AI Assistant Copilot – Orauria, and choose Image to prompt.
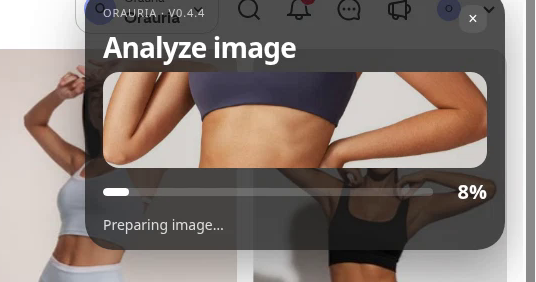
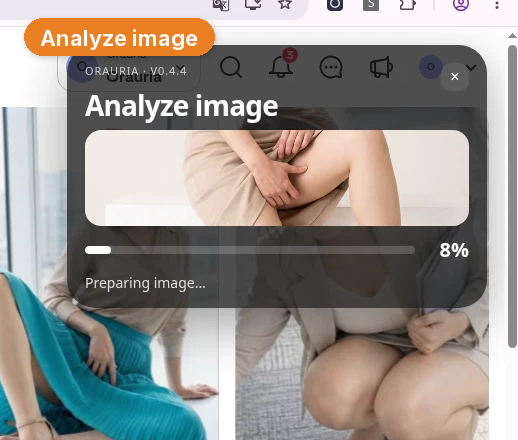
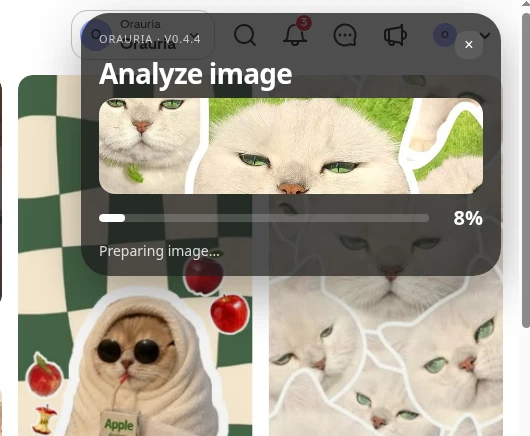
    The Orauria Analyze image modal at 8 percent, with Preparing image… under a crop of the cream-white cats.
    The extension analyzes the image and prepares a brief.

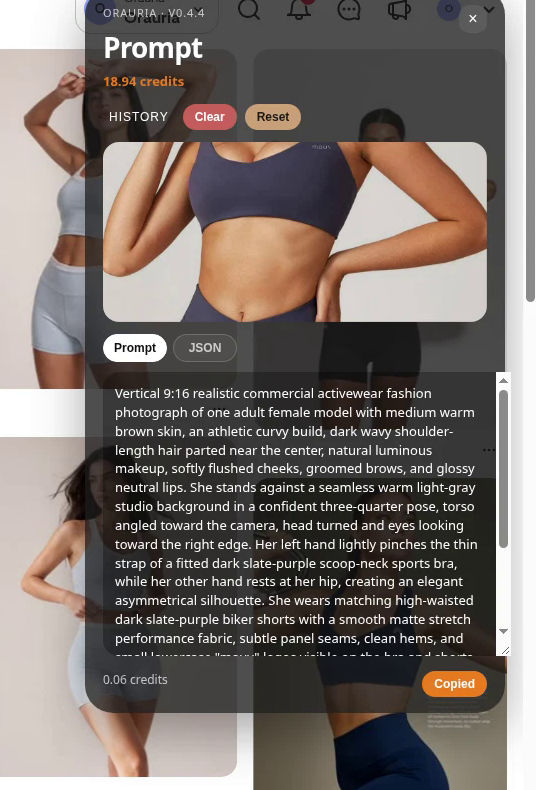
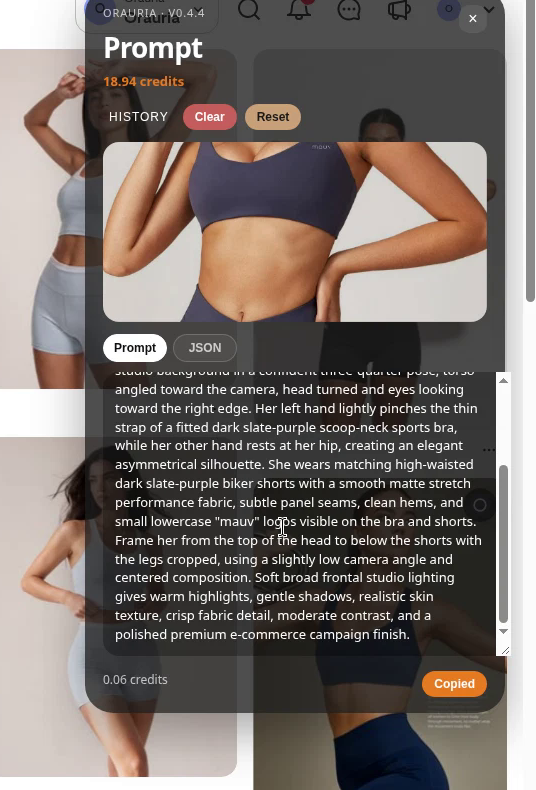
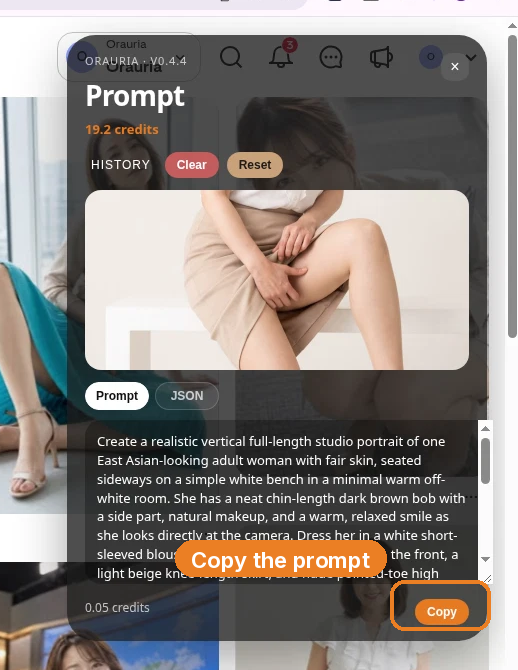
    This run cost 0.06 credits. The brief that came back is an example of the kind of document the tool writes — a detailed visual description, not a license to reprint the pin, and not the brief we later used for the customer’s kitten. This is the extracted prompt, copied in full:

    Create a vertical 9:16 surreal sticker collage featuring multiple cream-white, round-faced short-haired cats with dense pale fur, rounded cheeks, narrow vivid green eyes, pink-brown noses, fine whiskers, and sleepy mildly grumpy expressions. Place one very large frontal cat in the center as the dominant focal point, then arrange several similar cat portraits around it at varied scales, overlapping and cropped by every edge of the frame. Surround every cat with a thick, uneven hand-cut white outline. Include vivid bright green fibrous grass texture inside the irregular cutout regions and around portions of the cats, as though the portraits are pasted over grassy sticker shapes. Fill the background with a warped retro checkerboard of alternating sage-green and warm ivory squares, the grid bending in soft organic waves. Use soft diffuse frontal lighting, realistic fur and facial texture, crisp graphic layering, gentle shadows, straight-on close portrait framing, playful uncanny editorial collage design, clean print-like finish, no text, no logos, no humans, no extra species.
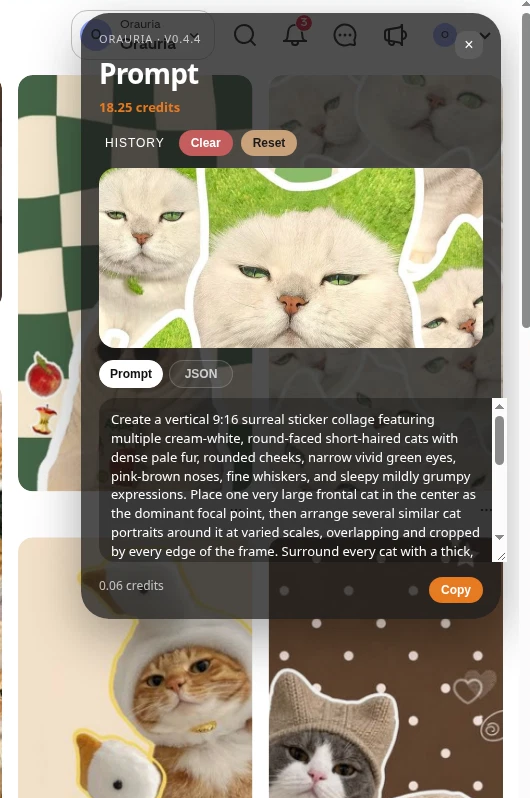
    The Orauria Prompt modal showing the extracted Image to prompt brief for the cream-white cat collage, 0.06 credits, with a Copy button.
    The extracted Image to prompt brief from the pin demo, 0.06 credits. This is not the brief used for the customer’s kitten.

    Rewrite a brief for the customer’s kitten

    A case shop should not sell the upload. It should sell a new piece of art that the upload inspired — the same cream kitten, redrawn as a full-bleed 9:16 illustration a printer can put on the back of a case. In the app, that rewrite would start from the Image to prompt brief. For this walk-through I wrote the case brief from the customer photo, kept the pose and the face (the wide eyes, the open mouth, the raised grey-tipped paw), and asked for soft pastel kawaii artwork, not a 3D phone mockup, with no name, text, or logos on the file.

    This is the Studio prompt, copied in full:

    Create a vertical 9:16 adorable phone-case artwork of the SAME kind of kitten as in the reference photo: a fluffy cream-white British-shorthair kitten with huge round shiny dark eyes, a tiny pink nose, soft chubby cheeks, mouth wide open in a happy little meow showing a pink tongue, one small grey-tipped paw raised toward the viewer as if waving, lying on a soft beige cushion. Render it in a soft pastel kawaii cute 3D illustrated style with silky fluffy fur, gentle glossy highlights and a sweet, heart-melting expression. Surround it with small pastel pink hearts, tiny paw prints and little yellow stars on a soft cream and pastel pink background, balanced full-bleed vertical composition for printable smartphone-case art, not a phone mockup. No text, no letters, no logos, no watermark.

    Generate the case art in Orauria Studio

    I pasted that brief into Orauria Studio, attached the customer photo as a reference, and set Image, Single, TT Image 2.5, aspect 9:16 Portrait, and Adaptive for resolution and quality. The composer showed about 0.0208 credits for the generation.
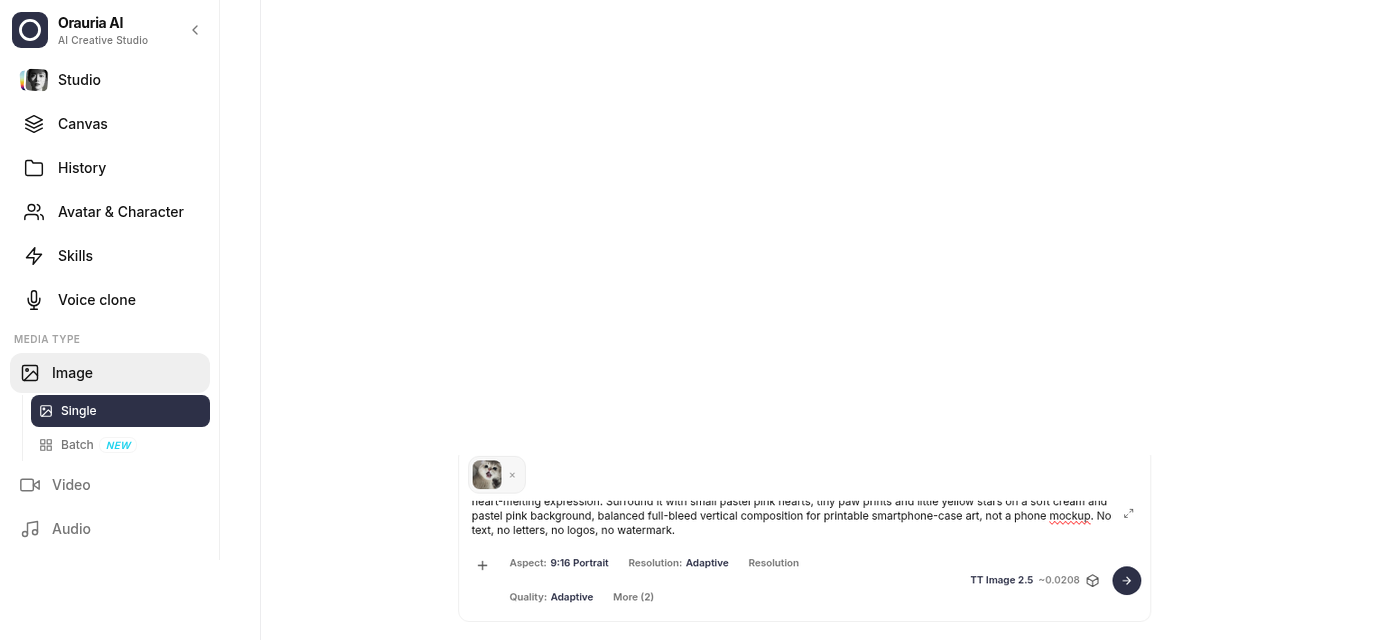
    Orauria Studio with Image and Single selected, the customer kitten as a reference thumbnail in the composer, aspect 9:16 Portrait, Adaptive resolution and quality, and TT Image 2.5 at about 0.0208 credits.
    Studio settings for the case file: the customer photo as a reference, TT Image 2.5, 9:16 Portrait, Adaptive, about 0.0208 credits.

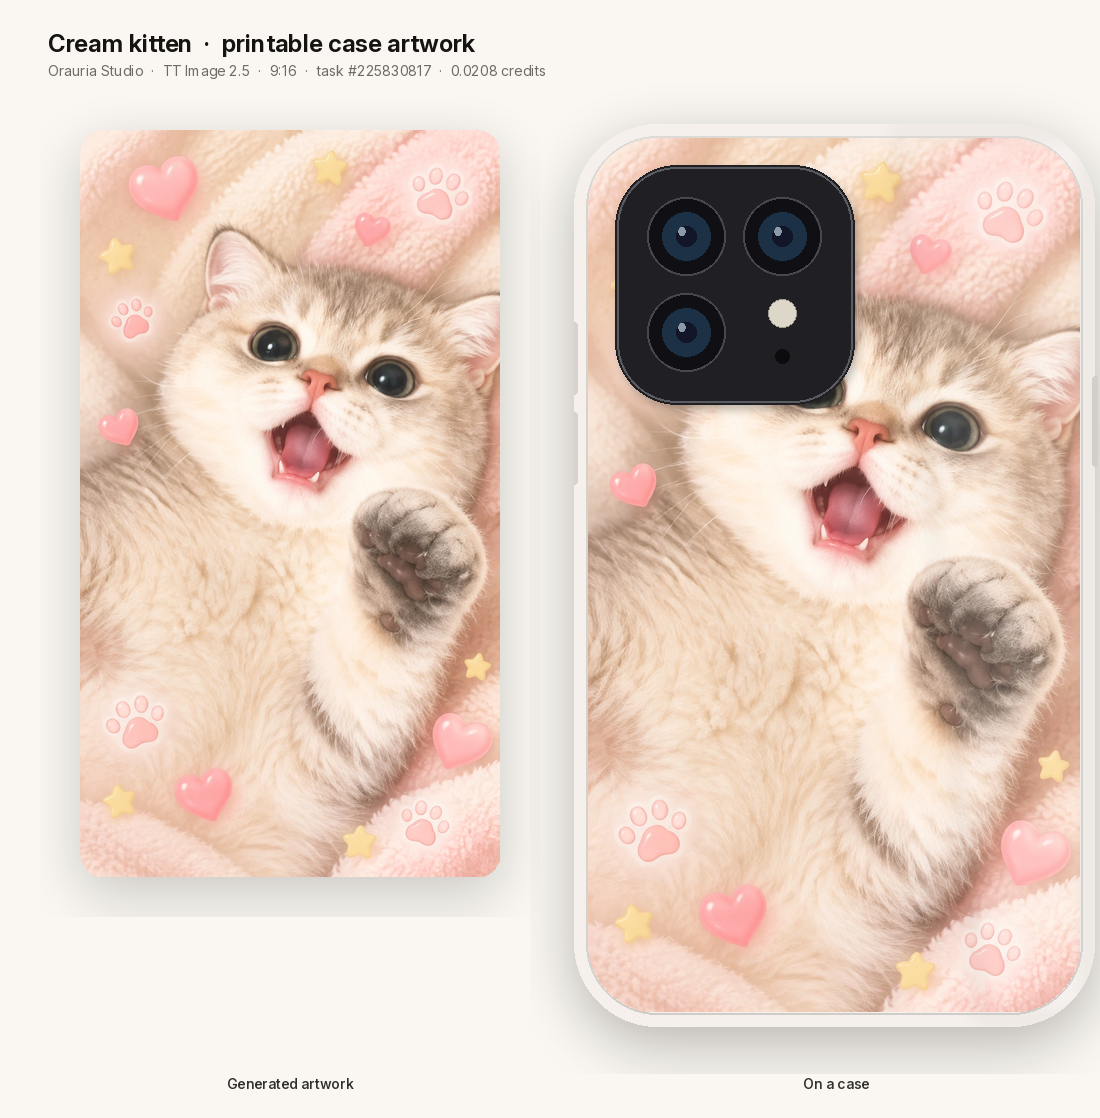
    The file that came back is the same kitten as case art: fluffy cream fur, the open-mouth meow, the raised paw, pastel hearts, paw prints, and yellow stars on a soft pink cushion. Task #225830817. That is the printable back of the case.
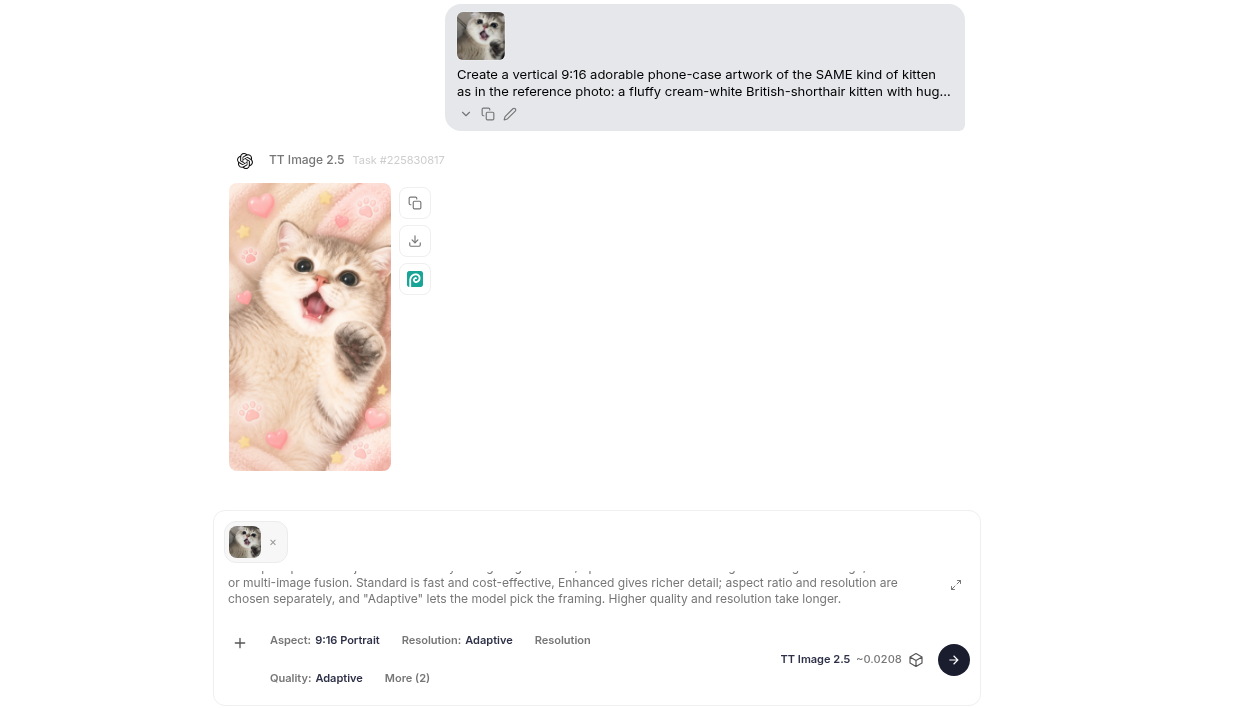
    Orauria Studio result for the cream-kitten case artwork, task #225830817, TT Image 2.5, 9:16, about 0.0208 credits, with the customer photo attached as a reference and the rewritten prompt visible above the image.
    The Studio result for the cream-kitten case artwork. Task #225830817.
    The cream-kitten 9:16 artwork from Orauria Studio, task #225830817, shown as a flat file and composited onto an iPhone case.
    The generated artwork, task #225830817, and the same file on a case.

    That is as far as the browser needs to go for a first sample. A shop that takes a new photo on every order needs a second door: an app that can run the same loop when the upload arrives, without opening Studio again.

    The app architecture

    The Shopify piece is a custom app, or a theme app extension, that you vibe-code in Remix and Node. It is not a Shopify app Orauria ships. The flow is one straight line.
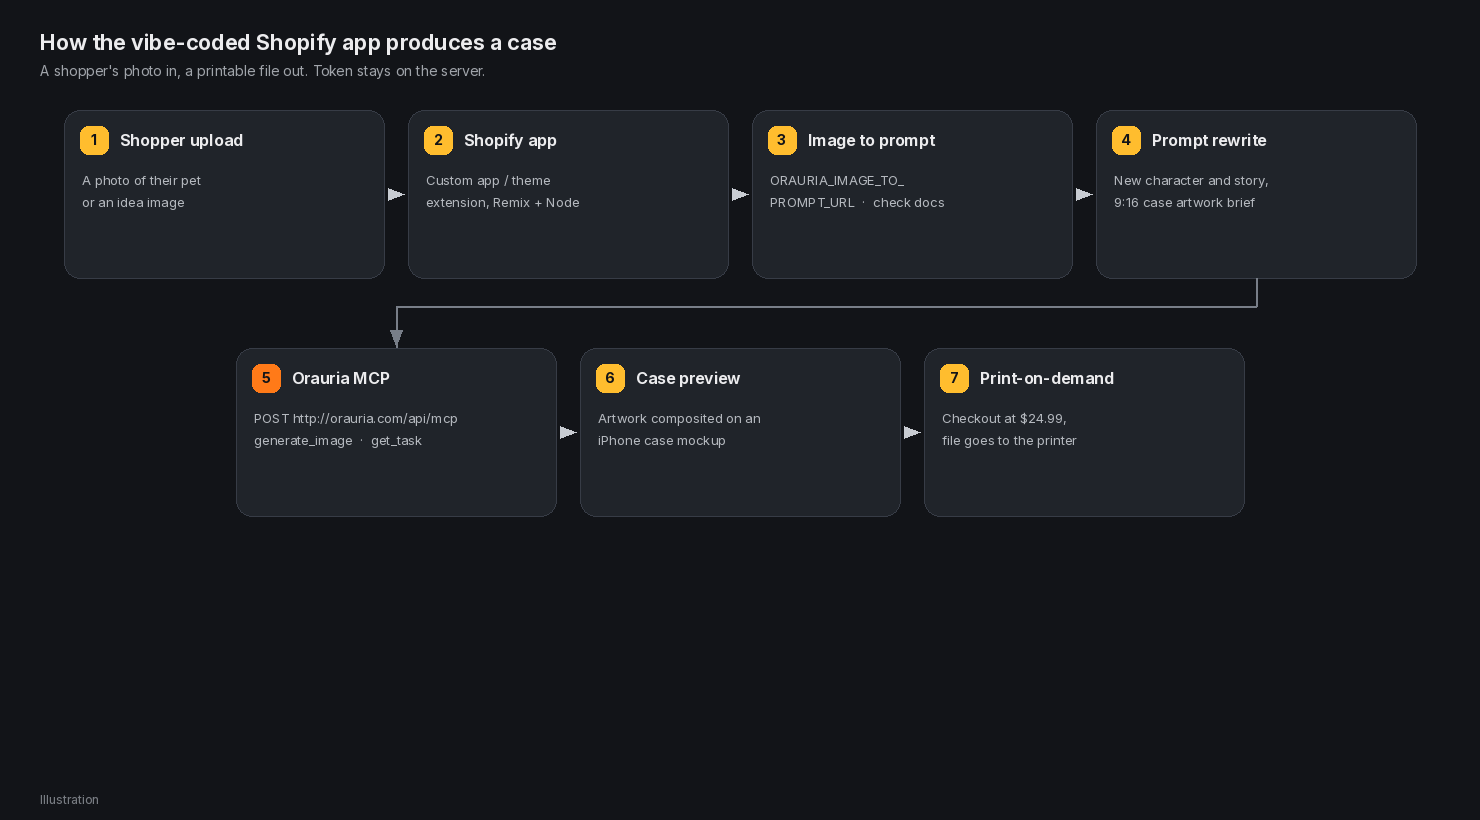
    A seven-step architecture diagram: shopper upload, Shopify app, Image to prompt, prompt rewrite, Orauria MCP generate_image and get_task, case preview, and print-on-demand.
    Illustration. How the vibe-coded Shopify app produces a case.

    A shopper drops a photo on a Design your own case page. The app sends that photo to Orauria’s Image to prompt API, using a URL you store as ORAURIA_IMAGE_TO_PROMPT_URL and confirm in the Orauria docs — this post does not invent an exact path. The returned brief is rewritten into a new 9:16 case prompt, the way this cream kitten was rewritten from the upload. The app then calls the Orauria MCP server at http://orauria.com/api/mcp with Bearer-token auth and the generate_image tool, polls get_task until is_final is true, and composites the PNG onto a case mockup. Checkout at $24.99 hands the file to a print-on-demand partner. The token never leaves the server.

    The same MCP surface also exposes list_models and get_wallet, which are useful while you are wiring the client, not something the shopper needs to see.

    A vibe-coding prompt you can paste

    If you are scaffolding this in Cursor, Claude, or another coding tool, start with a prompt like this and then check every URL against current Orauria docs:

    Build a Shopify app in Remix and Node called PawCase Studio.
    
    Add a storefront page, "Design your own case," where a shopper uploads a photo of their pet or an idea.
    
    When they upload:
    1. POST the image to process.env.ORAURIA_IMAGE_TO_PROMPT_URL with
       Authorization: Bearer process.env.ORAURIA_TOKEN.
       Confirm the exact path in the Orauria docs. Do not hard-code a guessed URL.
    2. Rewrite the returned prompt into a new phone-case brief: keep the pet recognizable,
       invent a fresh 9:16 composition, no text or logos,
       printable case artwork (not a 3D mockup).
    3. Call the Orauria MCP server at http://orauria.com/api/mcp with the same Bearer
       token. Use the generate_image tool, model tt-image-2.5, params.aspect_ratio "9:16".
       Poll get_task until is_final is true.
    4. Preview the artwork on an iPhone case mockup. When the shopper checks out at
       $24.99, send the file to a print-on-demand partner.
    
    Keep the token in process.env. Never put it in the theme, the client, or the repo.

    Call Image to prompt and Orauria MCP from a Shopify route

    The shape of the server route is small. Use process.env.ORAURIA_TOKEN in your app. The YOUR_ORAURIA_TOKEN string below is a placeholder for the illustration, never a real key.

    // app/routes/api.design.tsx
    import { json, type ActionFunctionArgs } from "@remix-run/node";
    
    const TOKEN = process.env.ORAURIA_TOKEN;
    const IMAGE_TO_PROMPT_URL = process.env.ORAURIA_IMAGE_TO_PROMPT_URL;
    const MCP_URL = "http://orauria.com/api/mcp";
    
    export async function action({ request }: ActionFunctionArgs) {
      const form = await request.formData();
      // 1. Turn the shopper's photo into a detailed prompt.
      //    Confirm IMAGE_TO_PROMPT_URL in the Orauria docs.
      const promptRes = await fetch(IMAGE_TO_PROMPT_URL!, {
        method: "POST",
        headers: { Authorization: `Bearer ${TOKEN}` },
        body: form,
      });
      const { prompt: extracted } = await promptRes.json();
      const designPrompt = rewriteForCase(extracted);
    
      // 2. Generate the artwork through Orauria MCP.
      const gen = await fetch(MCP_URL, {
        method: "POST",
        headers: {
          Authorization: `Bearer ${TOKEN}`, // never hard-code YOUR_ORAURIA_TOKEN
          "Content-Type": "application/json",
        },
        body: JSON.stringify({
          // Tool: generate_image
          model: "tt-image-2.5",
          prompt: designPrompt,
          params: { aspect_ratio: "9:16" },
        }),
      });
      const created = await gen.json();
      const art = await pollTask(created.taskId); // get_task until is_final
      return json({ prompt: designPrompt, artUrl: art.result_url });
    }

    The JSON body around generate_image should follow whatever your MCP client already sends. The illustration below is the argument shape we actually use for this kind of call — a model, a prompt, and params.aspect_ratio — with a placeholder token and a placeholder task id. The kitten file in this post was generated in Studio (task #225830817), not through a live MCP task, so this diagram is the wiring, not a second receipt.
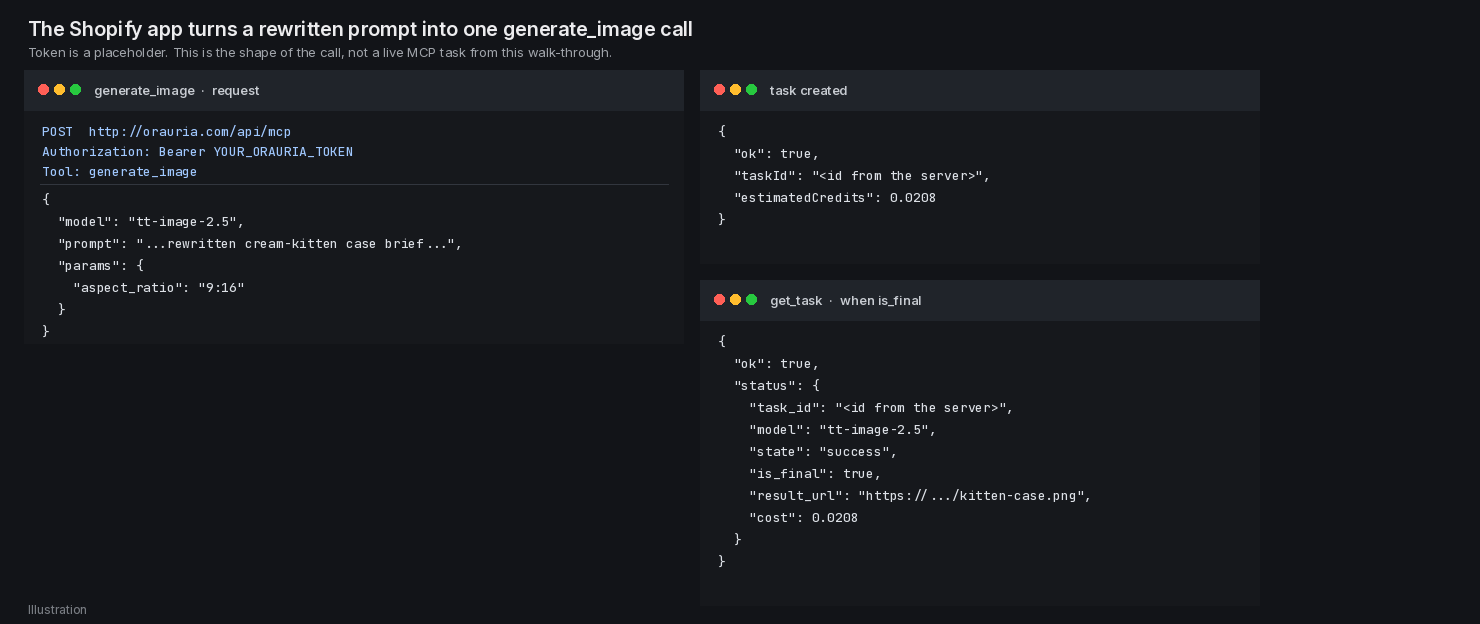
    A dark, screenshot-style illustration of a generate_image request to http://orauria.com/api/mcp with a YOUR_ORAURIA_TOKEN placeholder, a task-created response, and a get_task result when is_final is true.
    Illustration of the generate_image call the app would make. The token is a placeholder.

    You create an sk- key under Profile → API keys and put Authorization: Bearer YOUR_ORAURIA_TOKEN in the server config. Never paste a real key into a blog, a theme file, or a public repo.

    What the shopper sees

    On the storefront, the page is Design your own case. The left column is the work: the upload (here, my-cat.jpg, the cream kitten), a short subject line from the photo, the rewritten case prompt, and the generation status. The right column is the product: the artwork already sitting on an iPhone 16 Pro case, $24.99, print-on-demand, ships in about 5–8 business days.
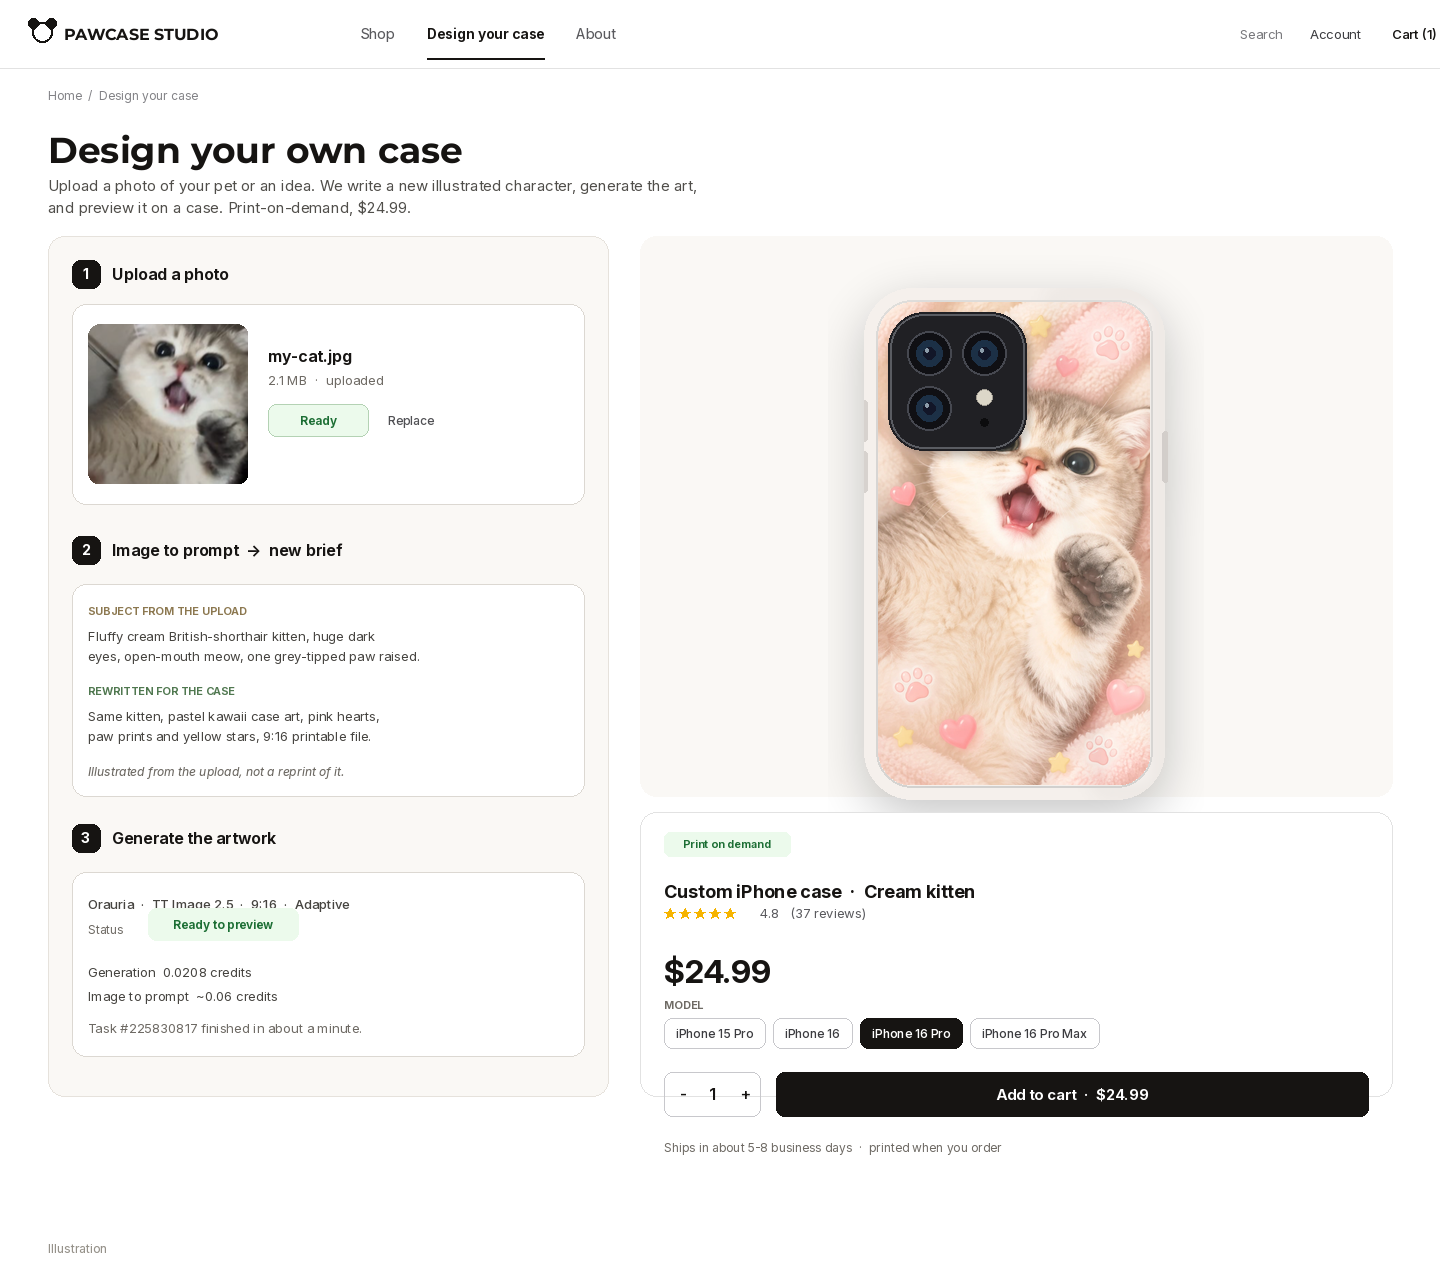
    A Shopify-style Design your own case page for the fictional shop PawCase Studio, with the uploaded cream-kitten photo, the rewritten case brief, and the generated artwork previewed on an iPhone case at $24.99.
    Illustration. A Design your own case page for the fictional demo shop PawCase Studio.

    What you see in admin

    The same evening work shows up as generation jobs inside the Shopify admin: who uploaded, which design came back, what Image to prompt and generate_image each cost, and whether the file has been sent to print. A job that is still polling get_task stays in Generating. One you want to look at before it ships stays in In review.
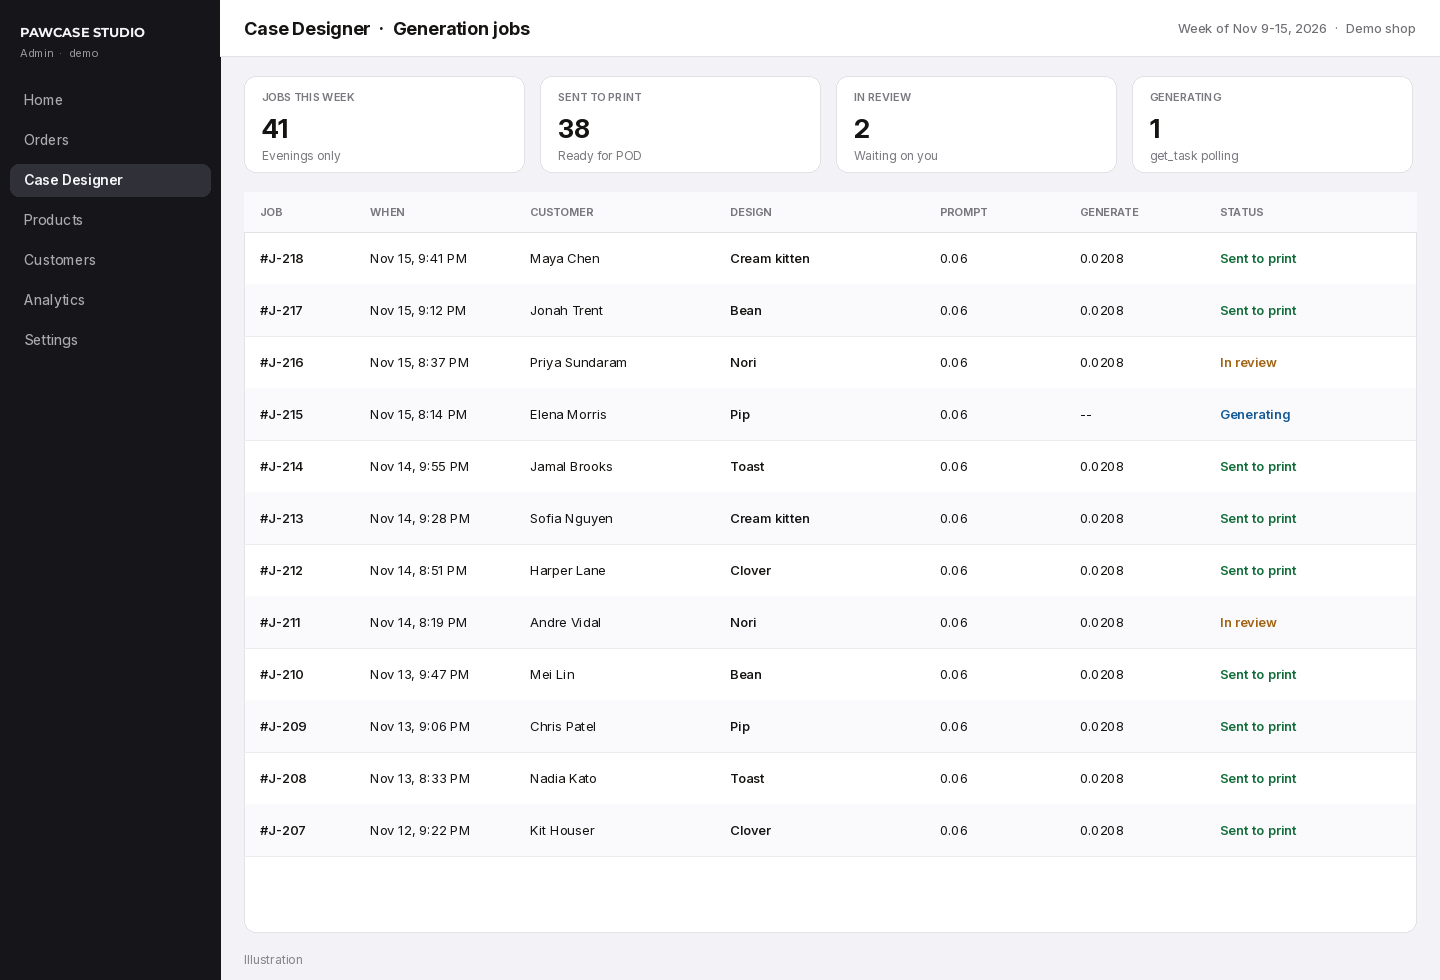
    A Shopify admin screen for the fictional PawCase Studio Case Designer app, listing generation jobs from evening hours in mid-November 2026, with prompt and generate credit costs and statuses such as Sent to print, In review, and Generating.
    Illustration. Generation jobs in a Shopify-style admin for the fictional demo shop.

    What the evenings cost

    The expensive part of this loop is not the generation. On the Image to prompt demo above, the pin brief cost 0.06 credits. The Studio generation with TT Image 2.5, Adaptive, and 9:16 cost about 0.0208 credits — the same figure the composer showed before we ran task #225830817. Those are the Orauria costs we actually saw, or the same price the composer lists.

    What you will feel instead is everything around the file: Shopify fees, print-on-demand and shipping, a minute of QA so the case art is actually new, and the 1–2 evening hours you spend reviewing jobs and answering a shopper who sent a blurry photo. Price the case for that, not for the credit line.

    A week of evenings, illustrated

    At $24.99 a case, 41 orders add up to $1,024.59. That is one way to picture a week of evenings — about six orders a night, seven nights, mixed between fulfilled, in production, and still unfulfilled. It is a layout of a plausible week for PawCase Studio, not a sales report.
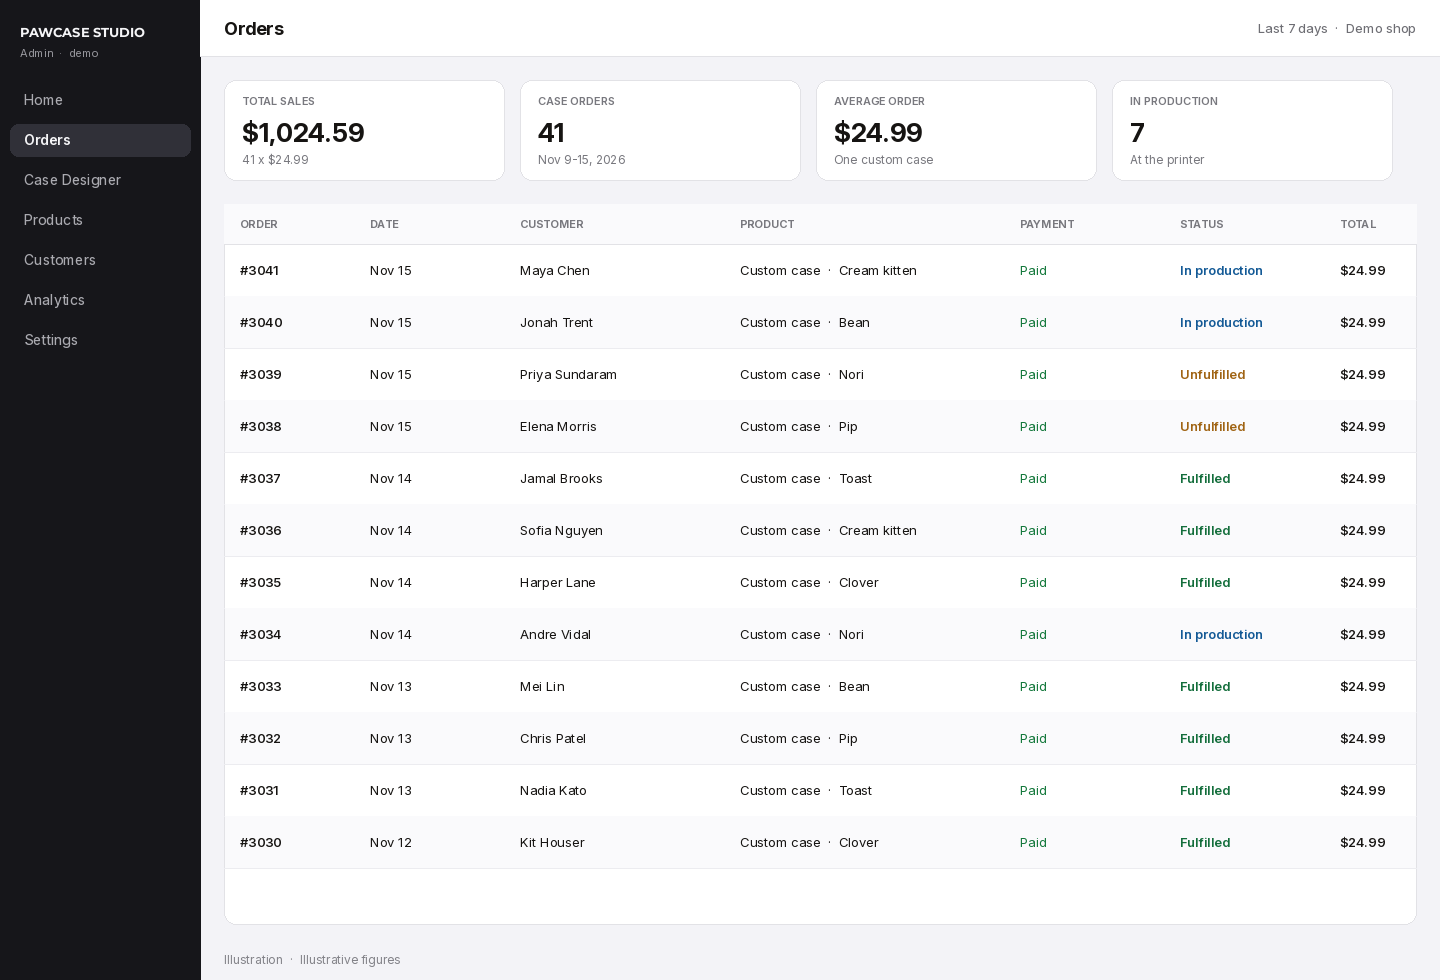
    A Shopify-style orders dashboard for the fictional PawCase Studio shop showing $1,024.59 in total sales from 41 custom case orders at $24.99 during November 9–15, 2026.
    Illustrative figures.

    The Instagram post is the other half of the same illustration: the cream-kitten case, a caption that tells people to upload a photo of their pet, and a comments thread asking about dogs, shipping, and a cat named Bean.
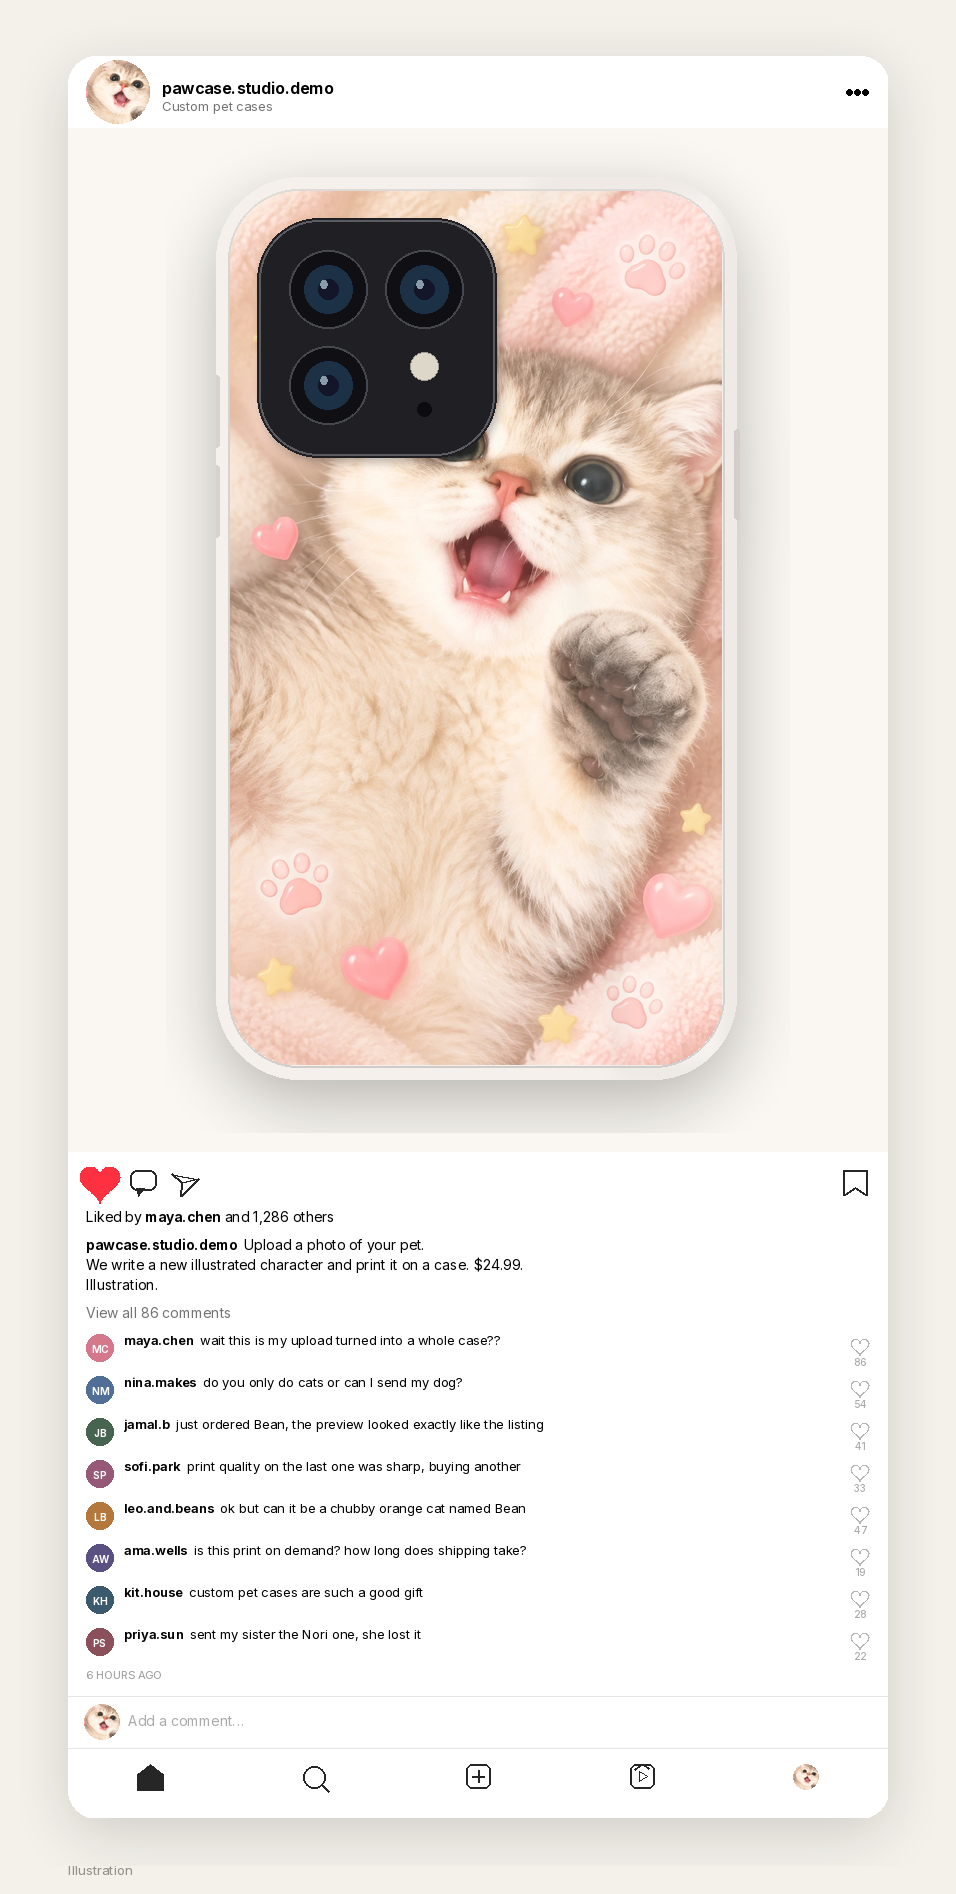
    An Instagram post mockup for pawcase.studio.demo showing the cream-kitten iPhone case, 1,286 likes, and comments about custom pet cases.
    Illustration. An Instagram post for the fictional demo shop.

    If you would rather sell a named wallpaper file than a printed case, we walked through that loop, including Orauria’s AI Phone Wallpaper module, in How to Build a Personalized Phone Wallpaper Shop on Shopify With Orauria (and Its MCP).

    Start here

    Install AI Assistant Copilot – Orauria from the Chrome Web Store, pick a pet photo you have the right to use, and run Image to prompt. Rewrite the brief as printable case art, paste it into Orauria Studio with the photo as a reference, and generate a 9:16 you would actually print on a case. Then vibe-code the Shopify route: ORAURIA_IMAGE_TO_PROMPT_URL from the docs, http://orauria.com/api/mcp for generate_image and get_task, and a token you keep in process.env.

    Start here: orauria.com, Orauria Studio, and the Chrome Web Store listing for AI Assistant Copilot – Orauria.
  • I Vibe-Coded a Cute Personalized Pet Pillow App on Shopify That Makes $1,000 in 1–2 Evening Hours — Here’s How

    I Vibe-Coded a Cute Personalized Pet Pillow App on Shopify That Makes $1,000 in 1–2 Evening Hours — Here’s How

    Pet parents do not need another photo print on a cushion. They want a character that still feels like their dog — a chubby corgi in a sleep mask, bounding across a cream 18×18 pillow on the sofa — and they want it in time for housewarmings, birthdays, and the holiday gifting rush. I vibe-coded a small Shopify app for that loop, and I run it in one or two hours in the evening.

    A shopper uploads a photo of their own pet, or a rough idea of the mood they want. The app calls Orauria’s Image to prompt API to turn that photo into a detailed brief, rewrites the brief into a new cute pillow-design prompt (a new character and a short story, not a reprint of the upload), then calls the Orauria API or the Orauria MCP server to generate the artwork. The shopper previews the art on a pillow mockup. A print-on-demand partner prints and ships the cushion.

    This playbook starts with one Pinterest pin — a tuxedo cat in a pink sleep mask — and follows the real Image to prompt and Orauria Studio steps that produced Biscuit, a golden-and-white corgi pillow, as task #225818220. Then it shows how that same loop lives inside a vibe-coded Shopify app for a fictional cozy shop I named Snuggle Paws Co.

    The playbook at a glance

    1. Install the Chrome extension.
    2. Find a pin that teaches a style you can own — a character, a palette, a motif — not a file to reprint.
    3. Run Image to prompt, copy the brief, and credit the person who posted the pin.
    4. Rewrite the brief into a new pillow-design prompt: a fresh character, a short story, and a 1:1 product shot of an 18×18 cushion.
    5. Generate the artwork in Orauria Studio (or later, from the app through Orauria MCP).
    6. Vibe-code a small Shopify app that accepts a pet photo, calls Image to prompt, rewrites the brief, generates the art, and previews it on a pillow mockup.
    7. When the shopper approves, send the print file to a print-on-demand partner.

    First, install the extension

    Image to prompt only works after you install the Chrome extension AI Assistant Copilot – Orauria. Get it from the Chrome Web Store before you go looking for a reference. Once it is on, you can right-click a pin and pull a prompt from it.

    Find the pin and extract the prompt

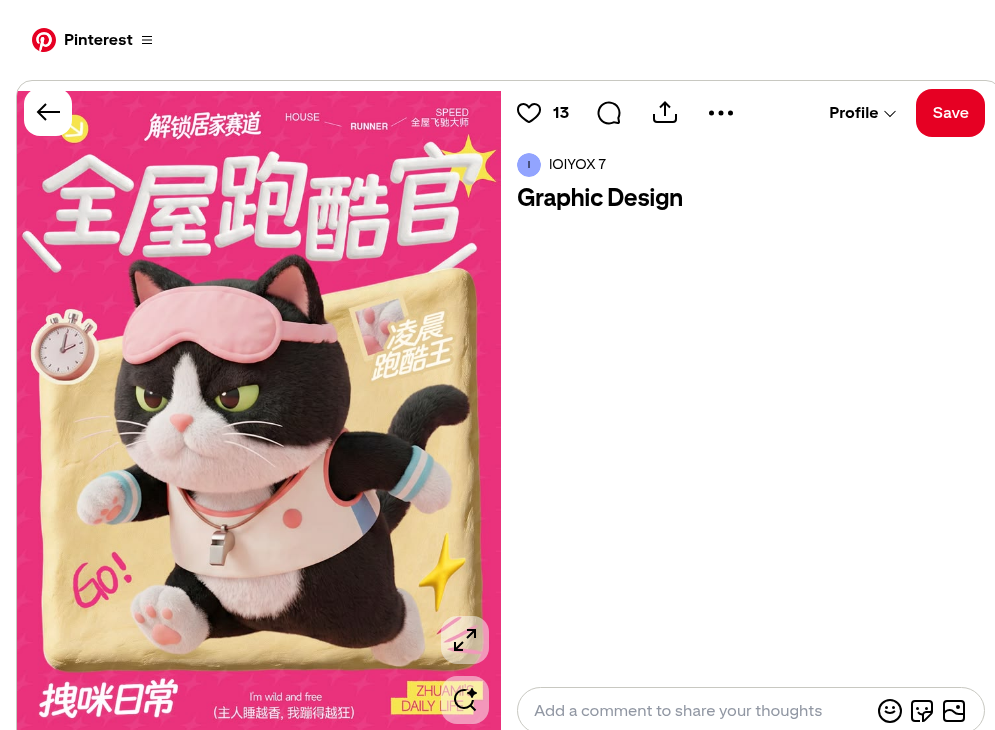
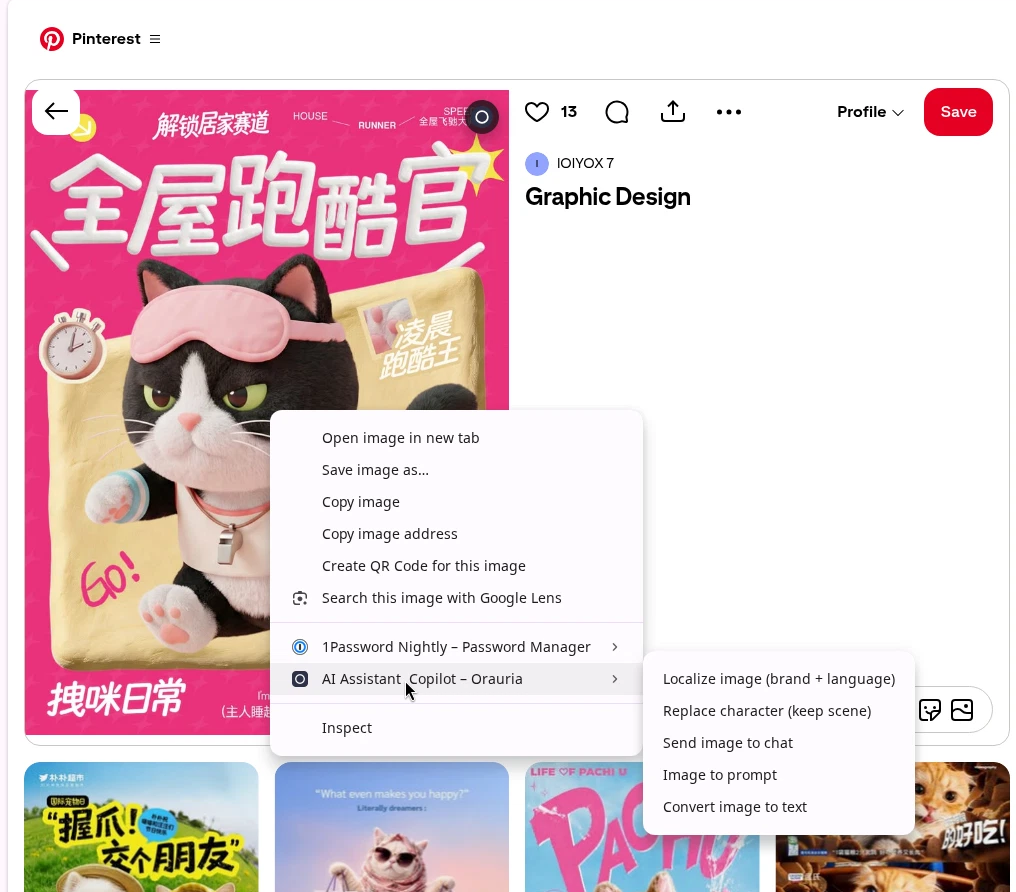
    The useful pin for a pillow shop is already thinking like a character designer: a single animal you can recognize at a glance, a costume or motif you can carry into a new story, and a finish that will still read when it is printed on fabric and sat on a sofa. This one does that job. A tuxedo cat fills the frame, a pale pink sleep mask sits on its forehead, and the plush-toy polish is distinctive enough to become a series of home gifts — as long as you write a new character, rather than reprint the poster.

    Credit the person who posted it. This pin is by IOIYOX 7, titled “Graphic Design”: pinterest.com/pin/362469470041837578. It is a strong style teacher. It is also someone else’s picture, with large typography that does not belong on a cushion. The pillow in this post is a new 1:1 product file, generated from a rewritten brief. It is not a crop of the pin, and a real shop should not treat the pin image as a product you are allowed to resell.

    A Pinterest pin by IOIYOX 7 titled Graphic Design, showing an anthropomorphic tuxedo cat in a pale pink sleep mask and cream athletic shirt on a hot-pink poster with Chinese typography.
    The reference pin by IOIYOX 7. Keep the plush-toy finish, the sleep-mask motif, and the energetic forward leap. The pin image itself is not the product, and the typography should not be printed on a pillow.

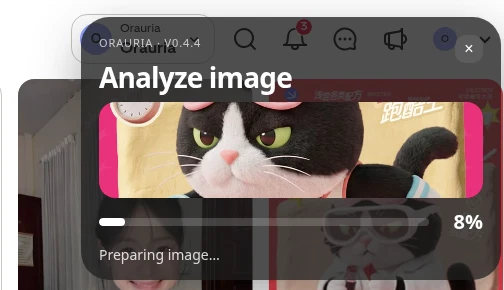
    Right-click the image, open AI Assistant Copilot – Orauria, and choose Image to prompt.

    Right-click menu on the tuxedo-cat pin, with AI Assistant Copilot – Orauria open and Image to prompt visible in the submenu.
    Right-click the pin, open the extension, then click Image to prompt.

    The panel analyzes the picture, then returns a prompt you can copy. Generation takes a few seconds; the result appears in the same panel.

    The Orauria extension analyzing the pin, with Analyze image, a progress bar at 8 percent, and the message Preparing image.
    Analyze image is the wait state. The prompt arrives in the same panel.
    The Image to prompt panel showing the extracted tuxedo-cat brief, with the Prompt tab and the Copy button.
    Copy the prompt, then rewrite it for a pillow. Do not treat this brief as a license to reprint the pin.

    This is the brief the extension wrote from the pin, quoted in full:

    Create a vertical 3:4 commercial poster in polished stylized 3D plush-toy realism. Center one oversized anthropomorphic black-and-white tuxedo cat sprinting directly toward the viewer, with soft short fur, a round white muzzle and chest, green narrowed eyes, pink nose, upright pointed ears, and a determined sleepy expression. Place a pale pink sleep mask across its forehead, and dress it in a cream athletic shirt with pink trim, pastel blue shoulder and sleeve details, blue-striped cuffs, pink paw pads, and a small metallic whistle pendant. Show both front paws thrust forward with strong foreshortening, hind legs trailing behind, and a curled tail in the background. Set the cat over a tilted rounded rectangle of wrinkled golden fabric, surrounded by stopwatch, yellow starbursts, pink motion lines, and a small inset label. Use a vivid hot-pink repeating patterned background and large dimensional white Chinese typography: “解锁居家赛道” at top and “全屋跑酷官” across the upper center. Include “HOUSE”, “RUNNER”, “SPEED”, “GO!”, “拽咪日常”, “I’m wild and free”, “(主人睡越香,我蹦得越狂)”, and “ZHUAMI’S DAILY LIFE”. Use soft frontal studio light, gentle shadows, warm highlights, crisp readable layout, and cheerful energetic advertising polish.

    The useful part is the style: stylized 3D plush-toy realism, a determined sleepy expression, a pale pink sleep mask, yellow starbursts, and a forward leap. The part you should not ship is the pin itself — the typography, the poster layout, and someone else’s cat. A pillow shop needs a new character and a square product photograph, not a download of a vertical ad.

    Rewrite the brief for a pillow, then generate it in Studio

    This is where the app’s “secret sauce” lives, and you can practice it by hand in Orauria Studio before you write any code. Keep the plush finish and the sleep-mask motif. Change the species, the story, and the format. I rewrote the brief around Biscuit: a chubby golden-and-white corgi puppy, joyfully bounding forward, printed on a cream 18×18 cotton-linen pillow and photographed on a cozy sofa. No words on the fabric.

    The Studio settings were 1:1 Square, TT Image 2.5, Adaptive quality, about 0.0208 credit per image.

    Orauria Studio composer showing 1:1 Square, Adaptive quality, and TT Image 2.5 at about 0.0208 credits.
    1:1 Square, TT Image 2.5, Adaptive quality, about 0.0208 credit. That is the cost of one pillow artwork in Studio.

    This is the rewritten brief, quoted in full:

    Create a square 1:1 product photograph of a soft printed throw pillow displayed on a cozy, inviting sofa. The pillow is a plump, square cream cotton-linen cushion with clearly visible woven fabric and a beautifully printed original cute character design: Biscuit, a chubby golden-and-white corgi puppy with a round cream muzzle, soft plush fur, big warm brown eyes, short legs, oversized paws, and perky ears, joyfully bounding forward with a pale blush-pink sleep mask pushed up on the forehead and a tiny teal scarf. Make the artwork feel cheerful and polished, with Biscuit as the clear center; add small pink paw prints, sunny yellow starbursts, soft peach and sage accents, and delicate curved motion lines around the puppy. Keep the illustration charming and tactile, like premium stylized 3D plush-toy art printed cleanly on the pillow fabric, with crisp edges and rich but gentle color. Show the entire pillow front-facing and in focus, resting against textured oatmeal upholstery on a warm neutral sofa, with a soft knit throw and one muted accent cushion nearby. Use natural window light, gentle shadows, a calm cozy living-room background with subtle depth of field, and a high-end home-decor product-photography finish. The pillow print must contain no words, letters, numbers, logos, watermark, or real brands.

    Studio returned this still as task #225818220.

    Orauria Studio result for task 225818220: a cream throw pillow on a sofa, printed with Biscuit the corgi in a pink sleep mask and teal scarf, with TT Image 2.5 at about 0.0208 credits.
    Biscuit, generated in Orauria Studio as task #225818220. TT Image 2.5, 1:1, about 0.0208 credit.
    A square product photograph of the Biscuit pillow: a plump cream cushion on a warm sofa, printed with a golden-and-white corgi in a pink sleep mask and teal scarf.
    The finished pillow still. This is the file a print-on-demand partner can print on an 18×18 cushion.

    A custom 18×18 pillow is a physical gift, so the art is only half of the product. You still need a fulfillment partner, a shipping window you can actually keep (in this shop, about five to eight business days), and a human check that the character looks like the shopper’s pet before you send it to print.

    What one image costs

    In this run, Studio showed TT Image 2.5 at about 0.0208 credit per image, with Adaptive quality and a 1:1 square frame. That is cheap enough to iterate in an evening: generate a preview, reject a pose that feels off, and try again before the shopper ever sees it. When the same call later moves into the Shopify app, the MCP get_task result reports that same cost on the finished task.

    Wire the loop into a vibe-coded Shopify app

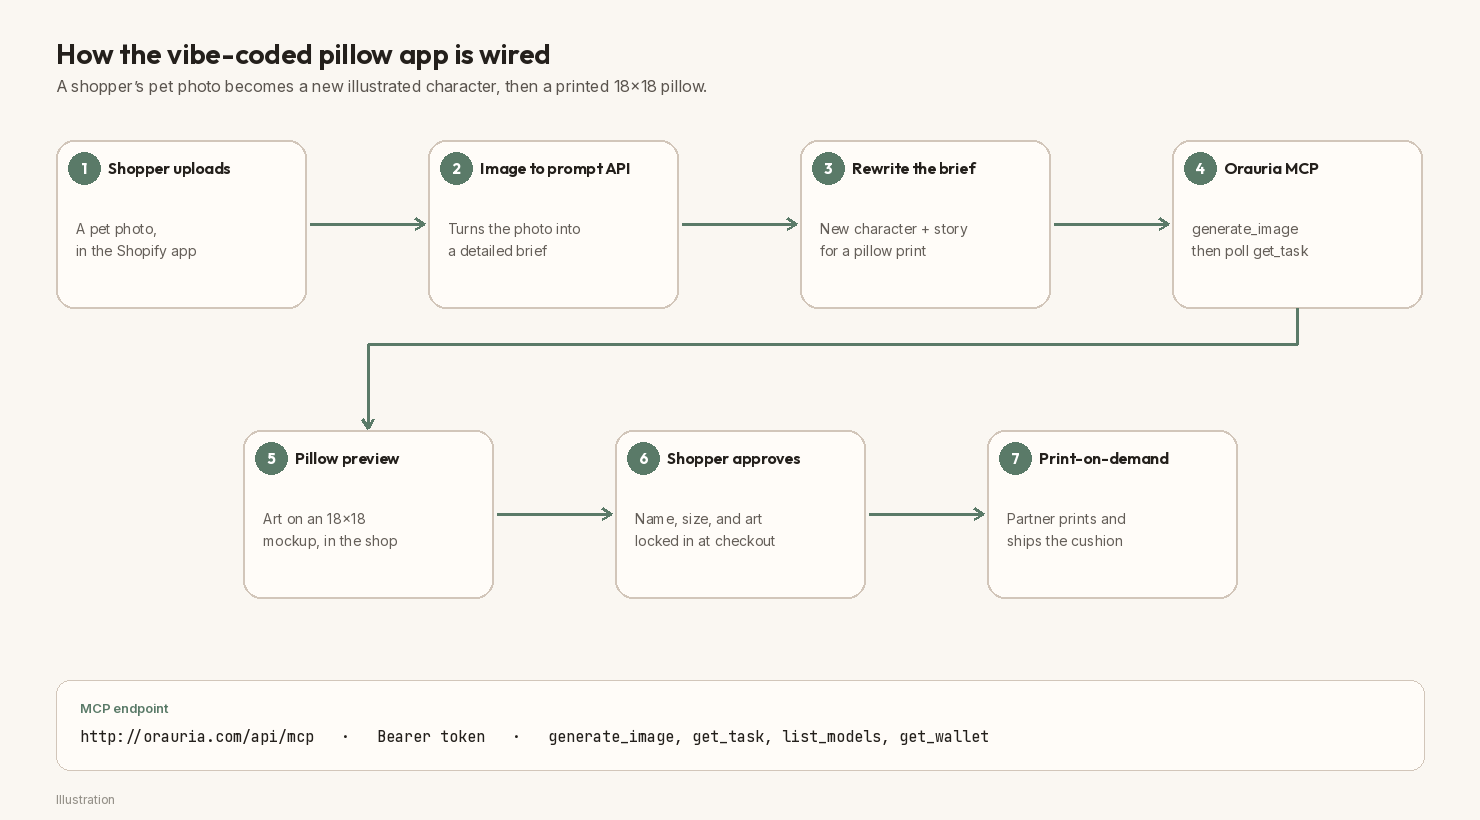
    Once the rewrite works in Studio, the app is a short pipeline, not a mysterious platform. A shopper uploads a pet photo in the storefront. The Shopify app sends that photo to Orauria’s Image to prompt API, rewrites the returned brief into a new pillow prompt, and calls the Orauria MCP server at http://orauria.com/api/mcp with a Bearer token. The tools you need are generate_image, get_task, list_models, and get_wallet. When get_task reports that the task is final, the app shows the artwork on a pillow mockup. After the shopper approves, a print-on-demand partner fulfills the order.

    A seven-step architecture diagram of the pillow app: shopper upload, Image to prompt API, rewrite the brief, Orauria MCP, pillow preview, shopper approval, and print-on-demand, with the MCP endpoint http://orauria.com/api/mcp.
    How the vibe-coded pillow app is wired. The Image to prompt URL should come from Orauria’s current docs, not from a guessed path.

    Do not invent an exact Image to prompt endpoint and treat it as a public fact. Store it as ORAURIA_IMAGE_TO_PROMPT_URL (or process.env.ORAURIA_IMAGE_TO_PROMPT_URL) and look up the current path in Orauria’s documentation when you build.

    A vibe-coding prompt you can paste

    If you want an AI coding tool to scaffold the app with you, paste a brief like this and work from a development store, not a live checkout:

    Build a small Shopify app called “Pillow Studio” for a cozy home-gift shop named Snuggle Paws Co. Shoppers upload a photo of their own pet and type a character name. The app should: (1) send the photo to Orauria’s Image to prompt API using process.env.ORAURIA_IMAGE_TO_PROMPT_URL and process.env.ORAURIA_TOKEN — look up the current path in Orauria’s docs, do not invent one; (2) rewrite the returned brief into a new cute illustrated pillow-design prompt (a new character and a short story, not a photo print of the upload, and no typography on the fabric); (3) call the Orauria MCP server at http://orauria.com/api/mcp with a Bearer token to run generate_image (model tt-image-2.5, aspect 1:1), then poll get_task until is_final; (4) preview the artwork on an 18×18 throw-pillow mockup in the shop; (5) when the shopper approves, create the Shopify order and send the print file to a print-on-demand partner. Also support list_models and get_wallet. Keep secrets in environment variables, never in the theme. Add an admin generation-jobs table so I can review previews in 1–2 evening hours.

    Keep the key in process.env.ORAURIA_TOKEN or a secret store. In public examples, use the placeholder YOUR_ORAURIA_TOKEN. Never paste a real token into a blog post, a theme file, or a chat log you do not control.

    The Shopify route and the MCP call

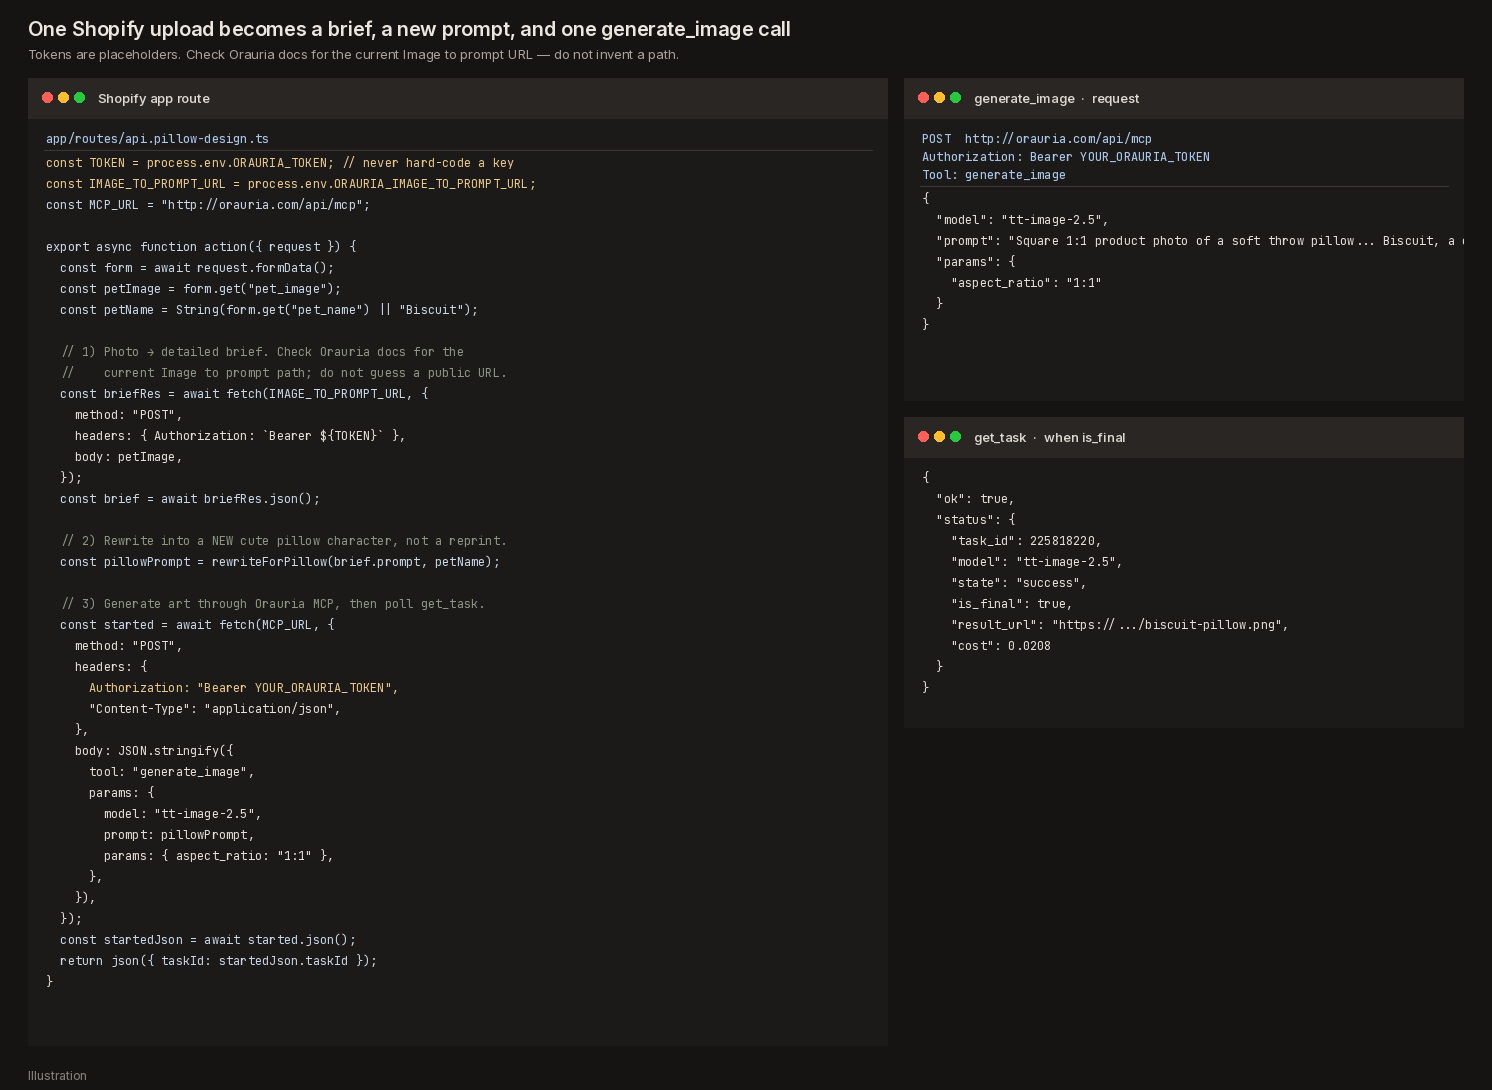
    The route is short on purpose. One action handles the upload, the Image to prompt call, the rewrite, and the generate_image request. A second step polls get_task and then renders the pillow preview.

    A dark code illustration of a Shopify app route using process.env.ORAURIA_TOKEN and ORAURIA_IMAGE_TO_PROMPT_URL, plus a generate_image request to http://orauria.com/api/mcp with a YOUR_ORAURIA_TOKEN placeholder and a get_task success payload for task 225818220.
    Illustration. Tokens are placeholders. Check Orauria docs for the current Image to prompt URL.

    A compact version of that route looks like this:

    // app/routes/api.pillow-design.ts
    const TOKEN = process.env.ORAURIA_TOKEN; // never hard-code a key
    const IMAGE_TO_PROMPT_URL = process.env.ORAURIA_IMAGE_TO_PROMPT_URL;
    const MCP_URL = "http://orauria.com/api/mcp";
    
    export async function action({ request }) {
      const form = await request.formData();
      const petImage = form.get("pet_image");
      const petName = String(form.get("pet_name") || "Biscuit");
    
      // 1) Photo → detailed brief. Check Orauria docs for the current path.
      const briefRes = await fetch(IMAGE_TO_PROMPT_URL, {
        method: "POST",
        headers: { Authorization: `Bearer ${TOKEN}` },
        body: petImage,
      });
      const brief = await briefRes.json();
    
      // 2) Rewrite into a NEW cute pillow character, not a reprint.
      const pillowPrompt = rewriteForPillow(brief.prompt, petName);
    
      // 3) Generate art through Orauria MCP, then poll get_task.
      const started = await fetch(MCP_URL, {
        method: "POST",
        headers: {
          Authorization: "Bearer YOUR_ORAURIA_TOKEN",
          "Content-Type": "application/json",
        },
        body: JSON.stringify({
          tool: "generate_image",
          params: {
            model: "tt-image-2.5",
            prompt: pillowPrompt,
            params: { aspect_ratio: "1:1" },
          },
        }),
      });
      const startedJson = await started.json();
      return json({ taskId: startedJson.taskId });
    }

    When get_task returns is_final: true, download result_url, composite the art onto your 18×18 pillow mockup, and show that preview to the shopper. If the character comes back looking generic, or nothing like the uploaded pet, do not send it to print — rewrite the brief and generate again.

    Put a “Turn your pet into a pillow” page on the shop

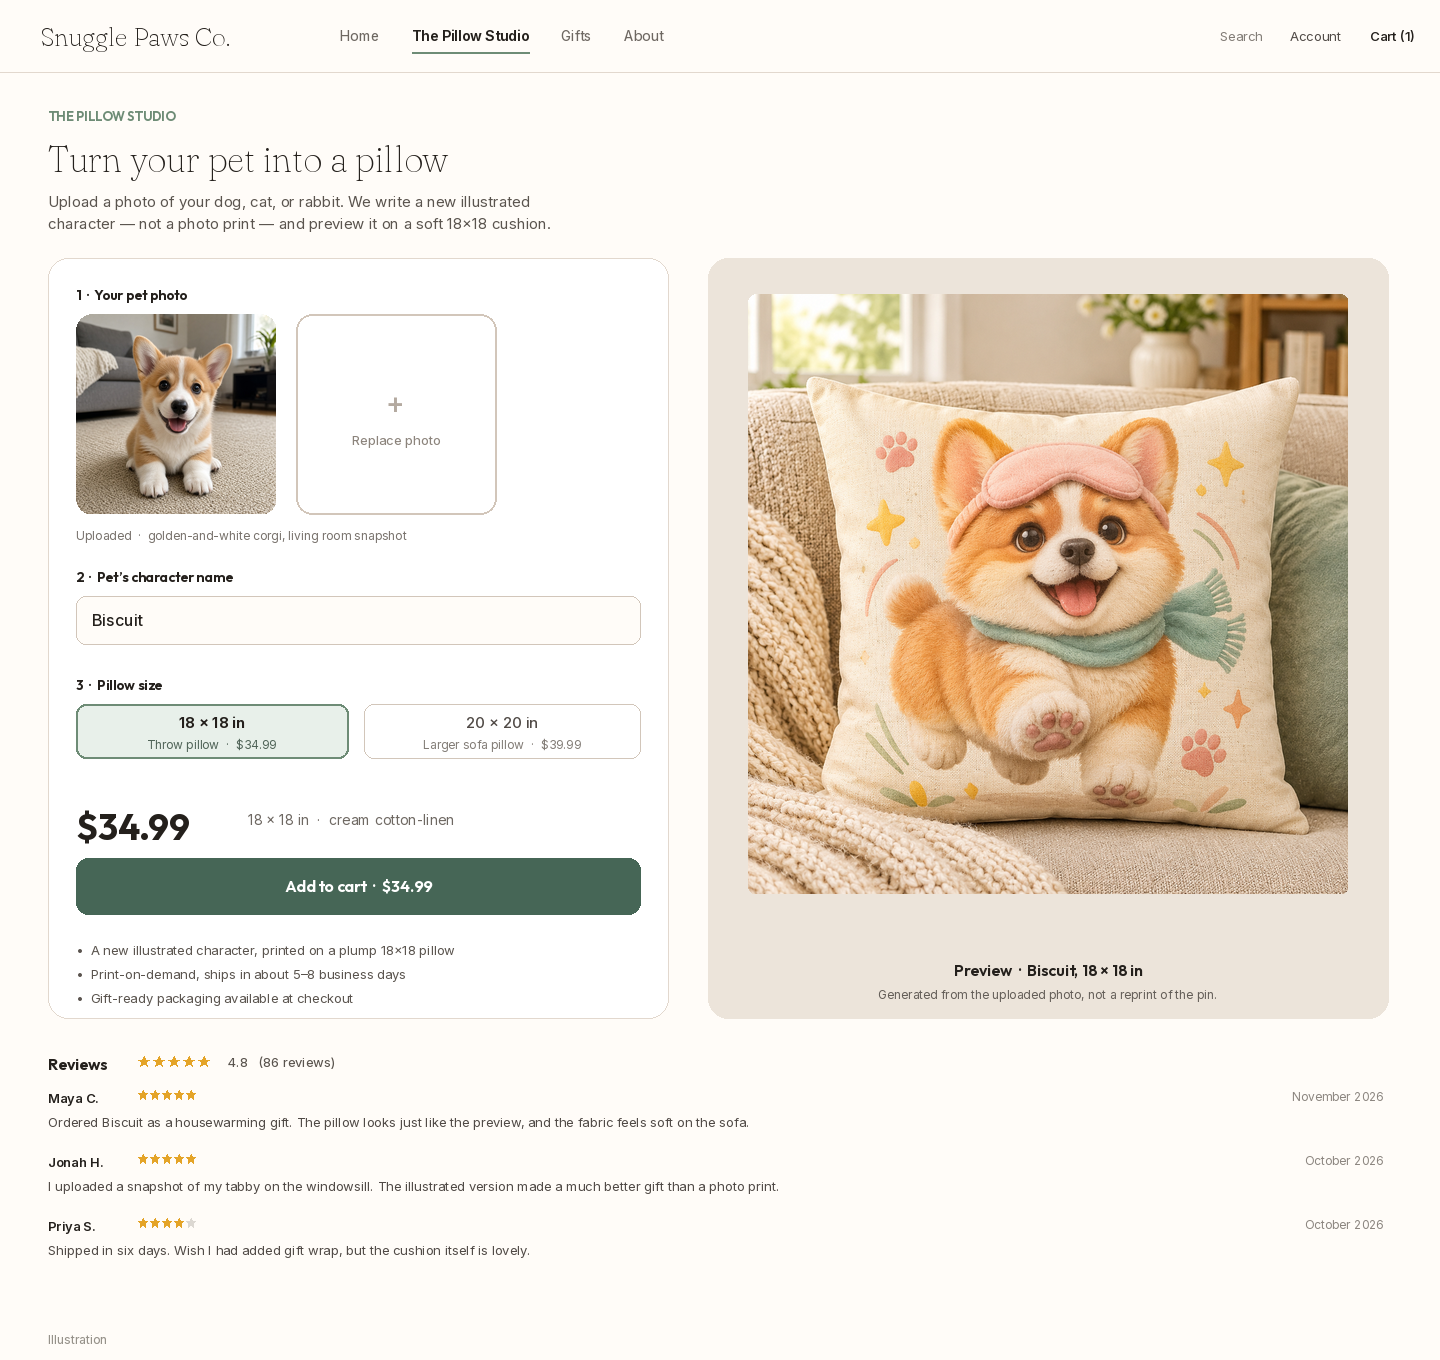
    The storefront should feel like a small studio, not a generic catalog tile. The shopper uploads a photo, types a character name, picks an 18×18 throw pillow at $34.99, and sees the generated preview before they add it to the cart. Gift-ready packaging and a five-to-eight-day shipping window belong on that page, because this is a present for a sofa, not a digital download.

    The product page below is a Shopify-style illustration for the fictional Snuggle Paws Co. shop. It is not a live checkout.

    A Shopify-style storefront for Snuggle Paws Co. titled Turn your pet into a pillow, with an uploaded photo of a golden-and-white corgi, the character name Biscuit, an 18×18 size selected at $34.99, and a preview of the generated Biscuit pillow.
    Illustration. $34.99 for an 18×18 personalized pet pillow. The reviews are invented for the mockup, in a natural range.

    Review the evening’s jobs in Shopify admin

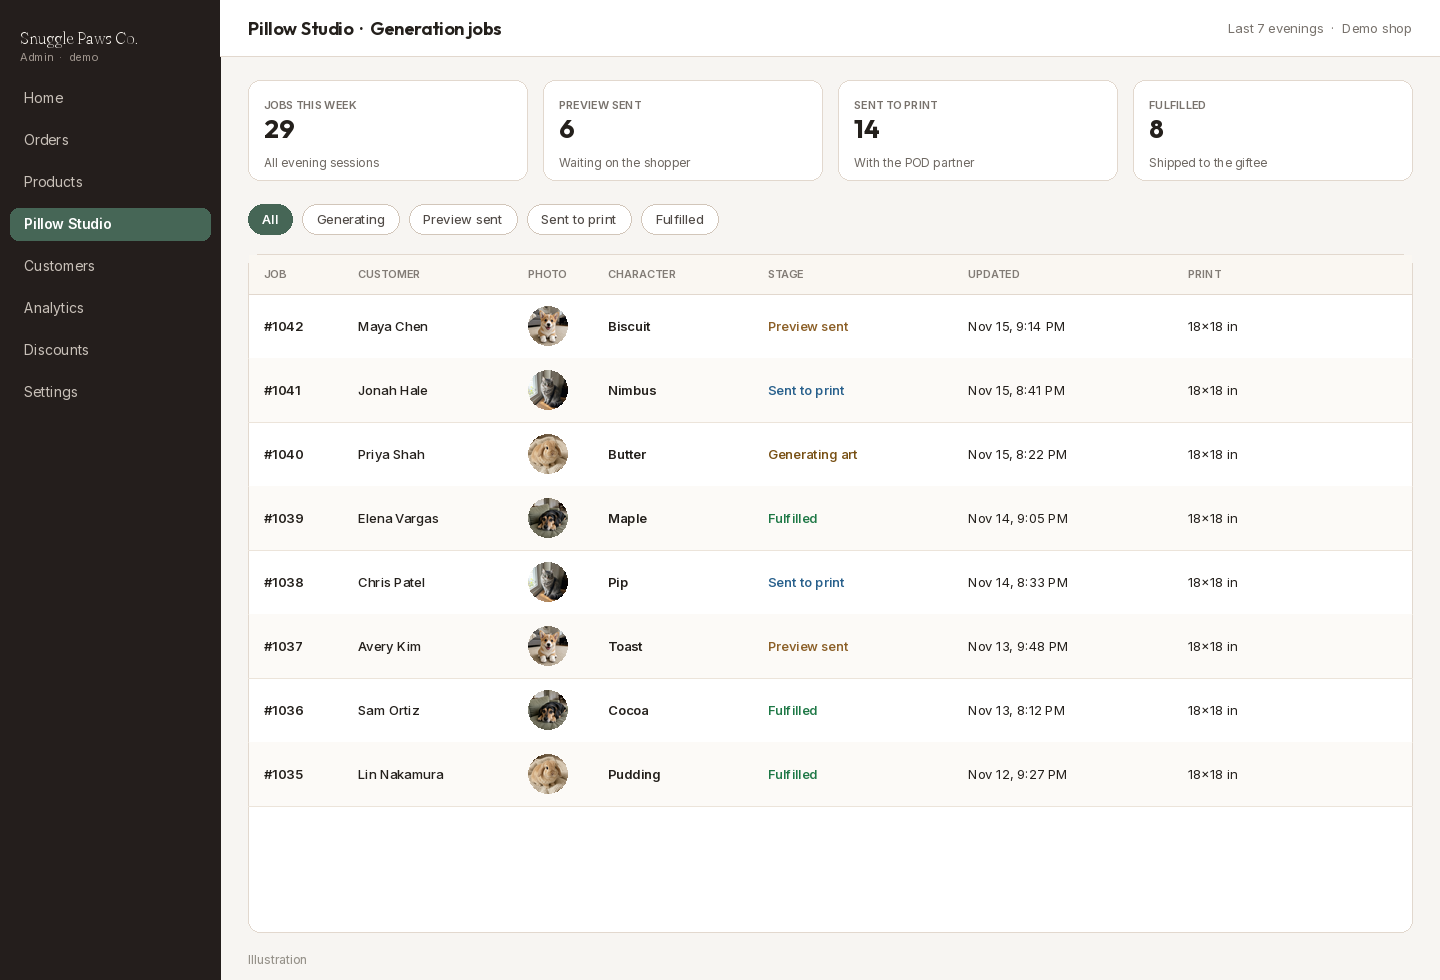
    The reason this fits into 1–2 hours a night is that you are not drawing each pillow by hand. You are reviewing a jobs table: photo received, prompt ready, art generating, preview sent, sent to print, fulfilled. In an evening session you approve the previews that look like the shopper’s pet, reject the ones that drifted, and let the print partner take the rest.

    A Shopify-style admin screen for Pillow Studio generation jobs, with 29 jobs in the week, stages such as Preview sent, Sent to print, Generating art, and Fulfilled, plus pet photo thumbnails and evening timestamps.
    Illustration. A generation-jobs queue for a fictional demo shop, reviewed in the evening.

    Post the pillow where gift-shoppers already look

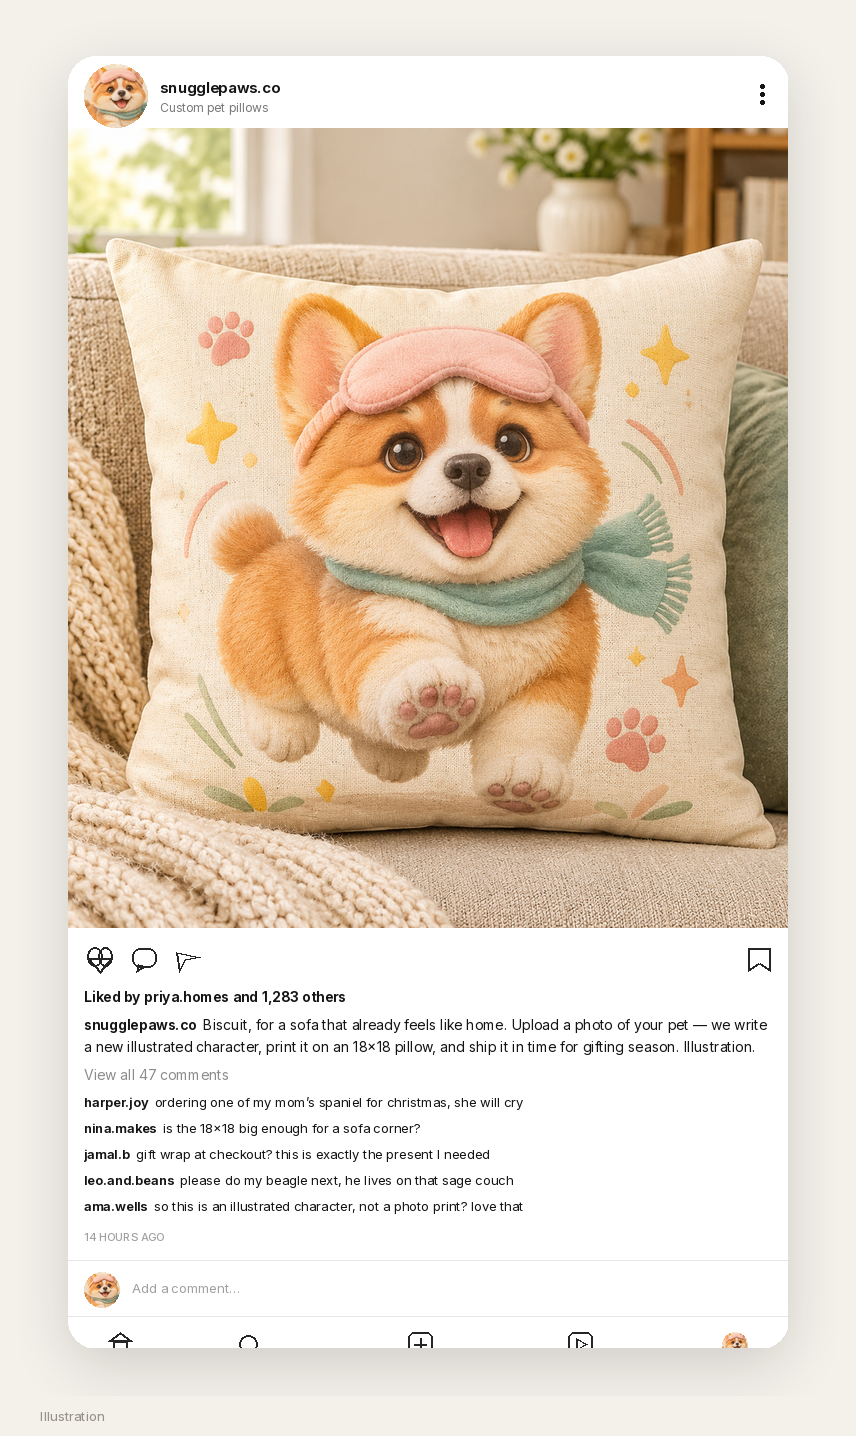
    A first audience for a personalized pet-pillow shop is people who are already shopping for a housewarming, a parent, or a December gift. The Instagram post below is an illustration for a demo account, snugglepaws.co: Biscuit on the sofa, a caption about uploading a pet photo, and comments that sound like questions a real gift shop would get.

    A realistic Instagram post illustration for snugglepaws.co, showing the Biscuit pillow on a sofa, 1,284 likes, and comments asking about Christmas gifts, 18×18 size, and gift wrap.
    Illustration. A gift-season post for a fictional demo account, not a live post.

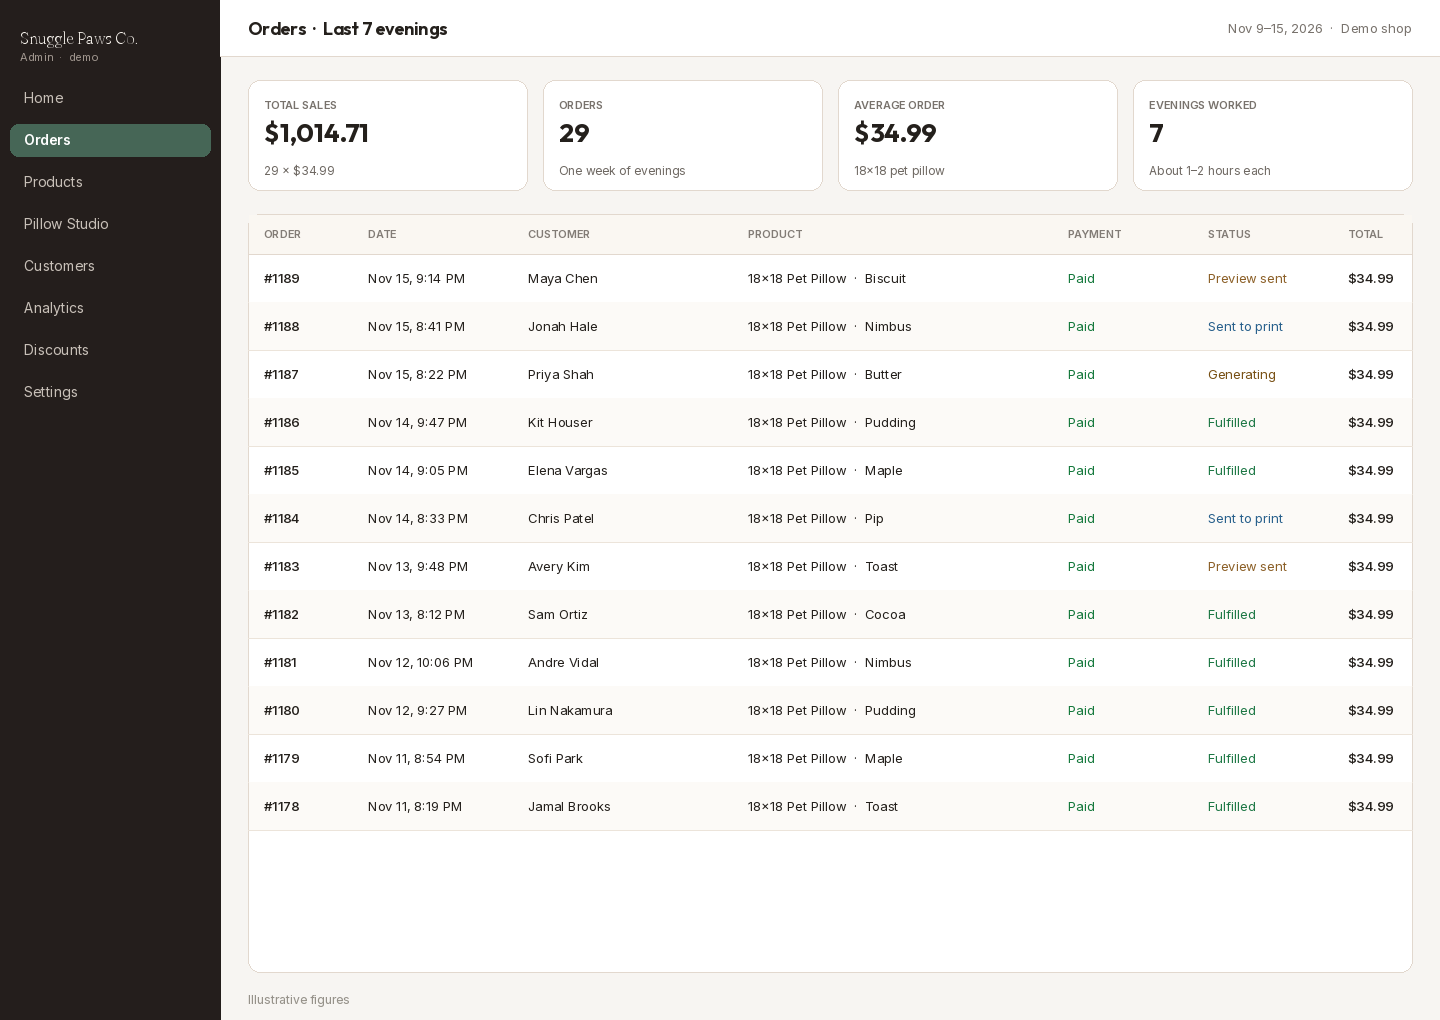
    A week of evenings on the dashboard

    If you want a picture of what a week of 1–2 evening hours can look like at $34.99 an 18×18 pillow, the arithmetic is simple: 29 orders come to $1,014.71. The admin screen below uses that mix. Print-and-ship costs still come out of the sales total, and the first evenings are often spent getting the rewrite, the mockup, and the fulfillment handoff right.

    A Shopify-style admin orders dashboard for Snuggle Paws Co., showing $1,014.71 in total sales, 29 orders, an average order of $34.99, and seven evenings worked, with a list of evening orders from November 9–15, 2026.
    Illustrative figures.

    A short note on licensing

    Use your own art, or art you generated for the shop, as the product. The pin was a style reference in this demo. It was not copied onto a listing, and it should not be. Credit the creator — IOIYOX 7 — when you show the source, then ship a new character on a new pillow. Disclose that the artwork is AI-generated. Keep a human in the loop for the first orders, even if the webhook and the MCP call are automatic. And do not put a real Orauria token, a real Shopify secret, or a customer’s pet photo into a public post or a theme file.

    Start here

    Install AI Assistant Copilot – Orauria from the Chrome Web Store, find a pin that teaches a style rather than a file to copy, and run Image to prompt. Rewrite the brief for a cozy 1:1 pillow — a new character, no typography on the fabric — and generate it in Orauria Studio. Then vibe-code a small Shopify app that sends a shopper’s pet photo through Image to prompt and Orauria MCP, previews the art on an 18×18 mockup, and hands a print file to a fulfillment partner.

    Start here: orauria.com, Orauria Studio, and the Chrome Web Store listing for AI Assistant Copilot – Orauria.
  • How to Build a Personalized Phone Wallpaper Shop on Shopify With Orauria (and Its MCP)

    How to Build a Personalized Phone Wallpaper Shop on Shopify With Orauria (and Its MCP)

    A personalized wallpaper shop does not start with a print run. It starts with a style you can repeat, a name a customer can type at checkout, and a file you can actually deliver: a 9:16 iPhone wallpaper, and, if you want a second product, a matching phone case printed with the same art. This playbook uses one cute-cat pin to build that loop for a fictional demo shop we named Kittyvibes.

    The Image to prompt steps, the stills from Orauria’s new AI Phone Wallpaper module, and the “Sophie” wallpaper from Orauria MCP are real. We ran them, and the task numbers are below. The Instagram likes, the Shopify-style product pages, and the $1,648.22 example month — 140 wallpaper orders at $4.99 plus 38 cases at $24.99 — are illustrations of a plausible catalog, not figures from a store we operate, and not a promise that the same numbers will show up in yours.

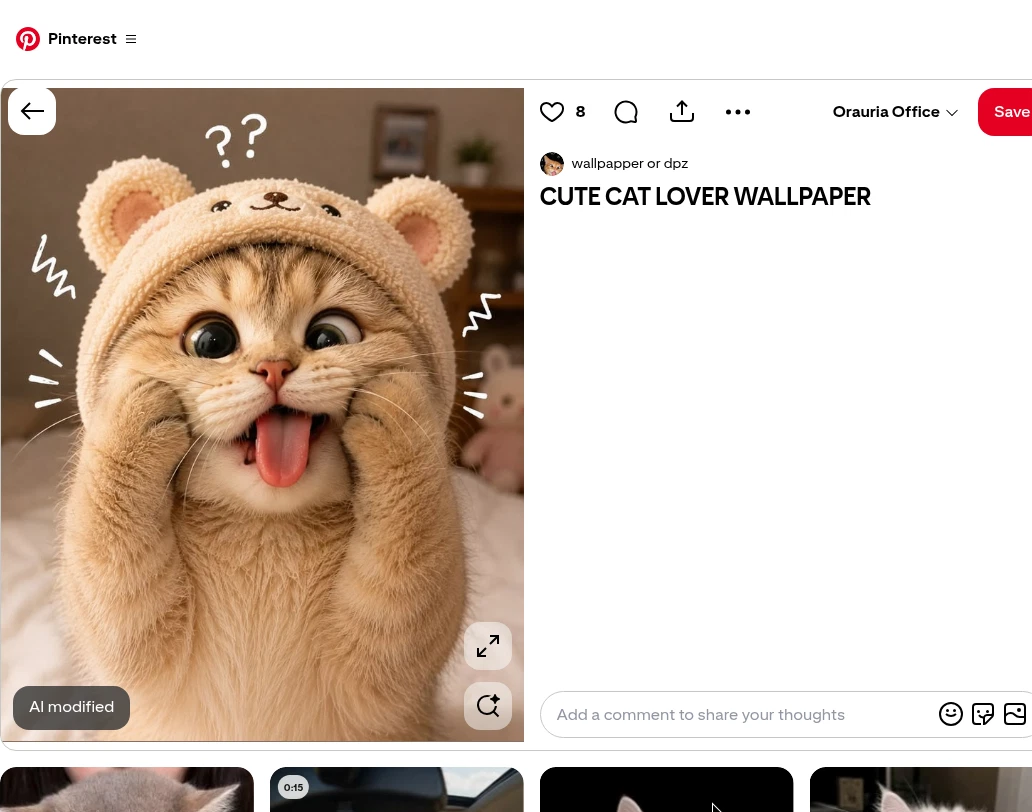
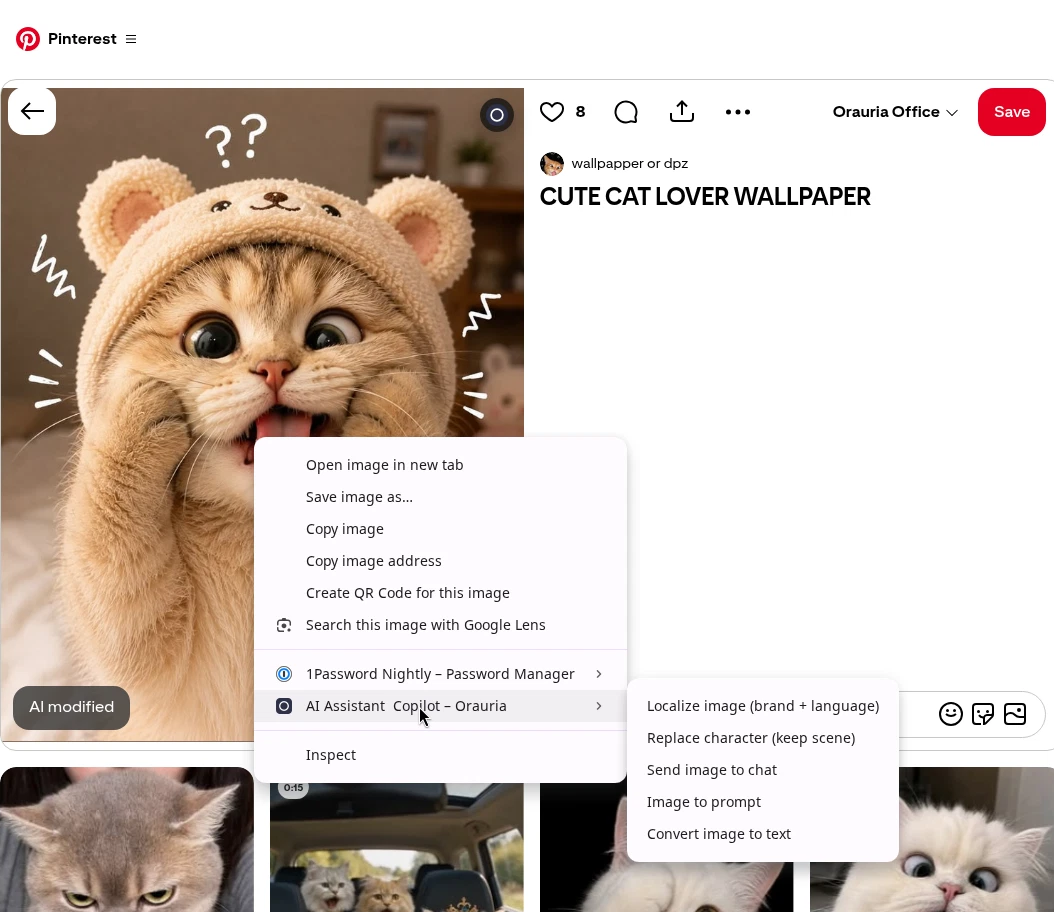
    The reference is this pin by wallpapper or dpz, titled “CUTE CAT LOVER WALLPAPER”: a golden-brown tabby kitten in a plush bear hood, paws at its cheeks, tongue out, already labelled AI modified. It is a strong style teacher. It is also someone else’s picture. The wallpapers in this post are new collage files, generated from a rewritten brief and a style reference. They are not a crop of the pin, and a real shop should not treat the pin image as a product you are allowed to resell.

    The playbook at a glance

    1. Install the Chrome extension.
    2. Find a pin that teaches a style you can own — a character, a palette, a lettering habit — not a file to reprint.
    3. Run Image to prompt, copy the brief, and credit the person who posted the pin.
    4. Open Orauria’s AI Phone Wallpaper module, paste the brief, attach a reference, and generate in 9:16.
    5. Personalize the same style with a name (“Mia”, “Leo”), then sell the file as a digital download and, if you want, a matching print-on-demand case.
    6. When a Shopify customer types a name, send that name to Orauria MCP with a small script or an agent — not a built-in Shopify app — and deliver the file. Treat the first month as an example, not a guaranteed income.

    First, install the extension

    Image to prompt only works after you install the Chrome extension AI Assistant Copilot – Orauria. Get it from the Chrome Web Store before you go looking for a reference. Once it is on, you can right-click a pin and pull a prompt from it.

    Find the pin and extract the prompt

    The useful pin for a wallpaper shop is already thinking in a phone frame: a tall crop, a character you can recognize at a glance, and lettering or stickers that still read at lock-screen size. This one does that job. A single kitten fills the frame, the bear hood gives you a repeatable costume, and the startled expression is distinctive enough to become a series.

    It is also labelled AI modified. Believe the label. You are looking at a picture of a picture, not a photograph you can claim, and not a file you should upload to a product page. Credit the person who posted it — here, wallpapper or dpz — and then write a new composition in a style you can stand behind.

    A Pinterest pin by wallpapper or dpz titled CUTE CAT LOVER WALLPAPER, showing a golden-brown tabby kitten in a plush bear hood with its tongue out, labelled AI modified.
    The reference pin by wallpapper or dpz. Keep the kitten’s costume, the close crop, and the playful energy. The pin image itself is not the product, and the AI modified badge is part of what you are looking at.

    Right-click the image, open AI Assistant Copilot – Orauria, and choose Image to prompt.

    Right-click menu on the cute-cat pin, with AI Assistant Copilot – Orauria open and Image to prompt visible in the submenu.
    Right-click the pin, open the extension, then click Image to prompt.

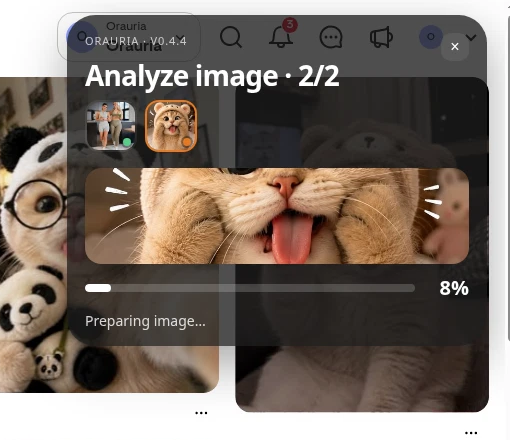
    The panel analyzes the picture, then returns a prompt you can copy. Generation takes a few seconds; the result appears in the same panel.

    The Orauria extension analyzing the pin, with Analyze image, a progress bar at 8 percent, and the message Preparing image.
    Analyze image is the wait state. The prompt arrives in the same panel.
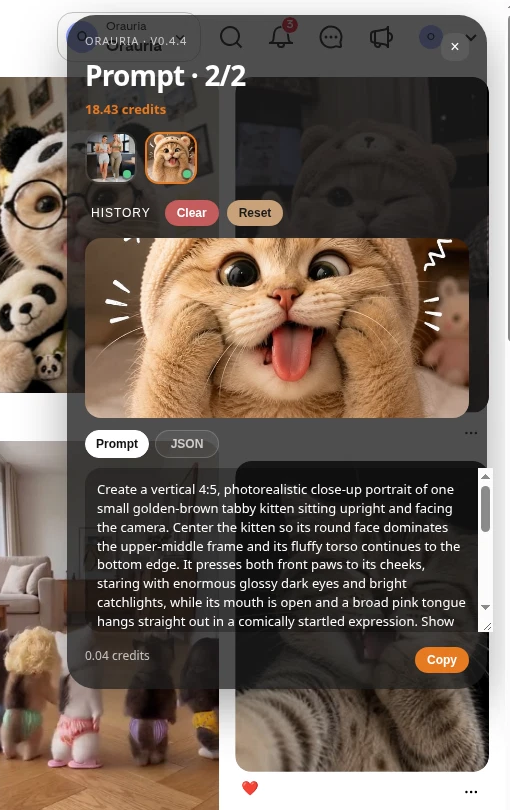
    The Image to prompt panel showing the extracted kitten brief, with the Prompt tab and the Copy button.
    Copy the prompt, then take it into the wallpaper module. Do not treat this brief as a license to reprint the pin.

    This is the brief the extension wrote from the pin, quoted in full:

    Create a vertical 4:5, photorealistic close-up portrait of one small golden-brown tabby kitten sitting upright and facing the camera. Center the kitten so its round face dominates the upper-middle frame and its fluffy torso continues to the bottom edge. It presses both front paws to its cheeks, staring with enormous glossy dark eyes and bright catchlights, while its mouth is open and a broad pink tongue hangs straight out in a comically startled expression. Show fine whiskers, a tiny pink nose, soft tabby markings across the forehead, and realistic delicate fur. The kitten wears a cream, nubby plush bear hood with round ears, pink inner ear fabric, and a small embroidered bear face on the forehead. Add white hand-drawn question marks above the hood and simple playful zigzags and short emphasis strokes beside the face. Set the scene in a cozy bedroom with pale bedding in the foreground and indistinct wooden furniture and framed decor blurred behind. Use gentle warm indoor light, soft shadows, shallow depth of field, sharp facial focus, natural plush and fur texture, and a cute humorous pet-photography finish.

    The useful part is the character: a golden-brown tabby, a cream bear hood, paws at the cheeks, a broad pink tongue, and a close, slightly comical crop. The part you should not ship is the pin itself. A shop needs a new file — a collage, a name, a layout that can change when a customer types “Mia” or “Leo” — not a download of someone else’s wallpaper.

    Open the AI Phone Wallpaper module

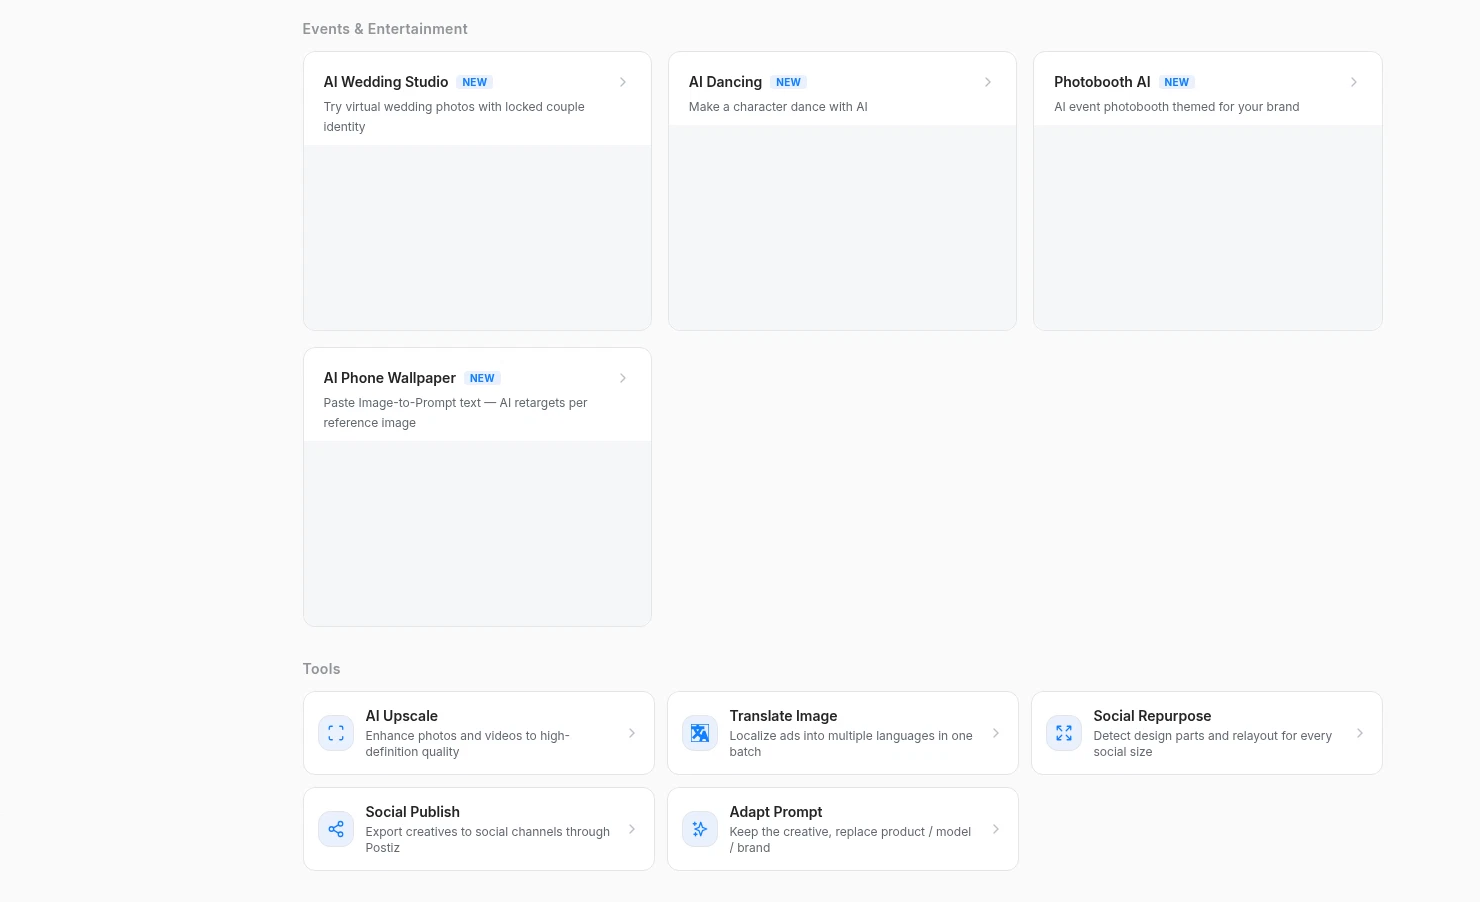
    Orauria now has a dedicated wallpaper tool at orauria.com/studio/wallpaper. On the Studio AI home it sits under Events & Entertainment, with a NEW badge. The module’s own line is the point of this playbook: paste an Image to prompt brief, attach a reference, and the AI retargets the brief to that reference — same structure, updated subject cues — then generates a wallpaper.

    Orauria Studio AI home, Events and Entertainment section, with the AI Phone Wallpaper module and a NEW badge. The description reads Paste Image-to-Prompt text — AI retargets per reference image.
    The new AI Phone Wallpaper module, on the Studio AI home under Events & Entertainment.

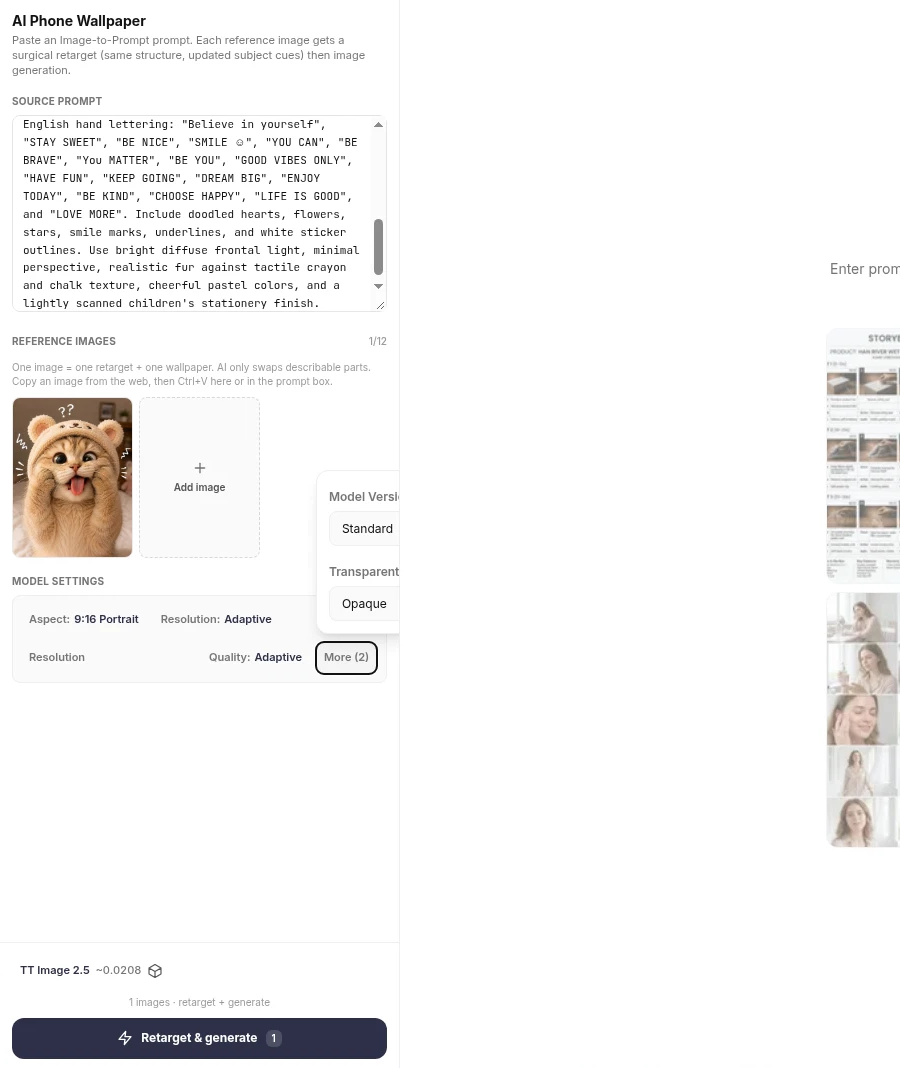
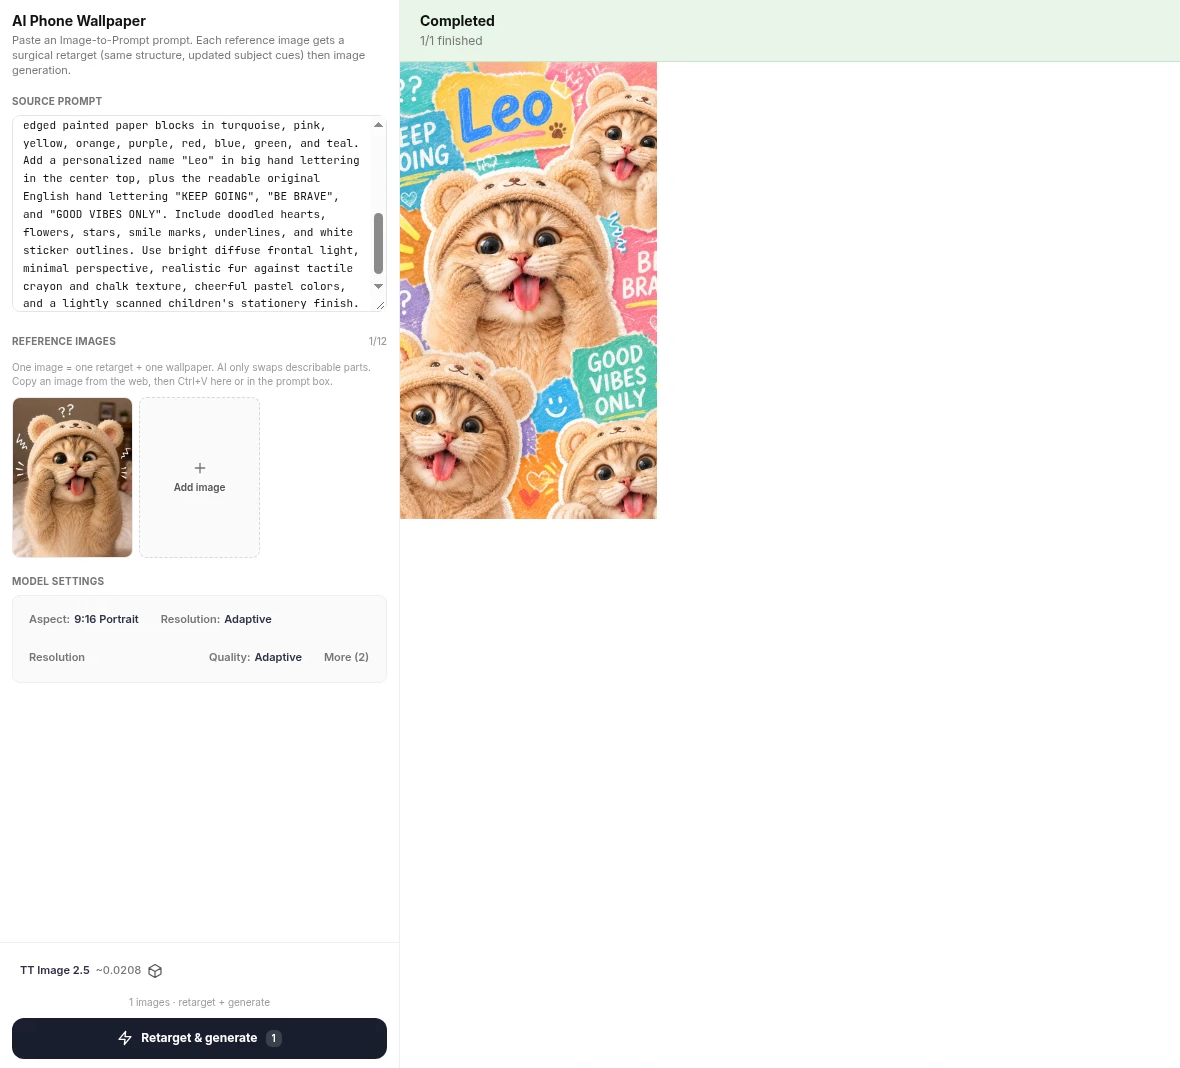
    We pasted a tall handmade motivational-collage brief — overlapping painted paper blocks, hand lettering such as “Believe in yourself”, “STAY SWEET”, and “DREAM BIG”, doodled hearts and stars — and attached the kitten from the pin as the reference. The settings were 9:16 Portrait, TT Image 2.5, Adaptive quality, about 0.02 credit per image (the panel showed ~0.0208). Then Retarget & generate.

    The AI Phone Wallpaper module with the collage brief in the source prompt, the kitten reference attached, 9:16 Portrait, TT Image 2.5 at about 0.0208 credits, and the Retarget and generate button.
    One reference image, one 9:16 wallpaper, TT Image 2.5. The brief asked for a scrapbook collage; the kitten in the reference is what the module is supposed to keep.

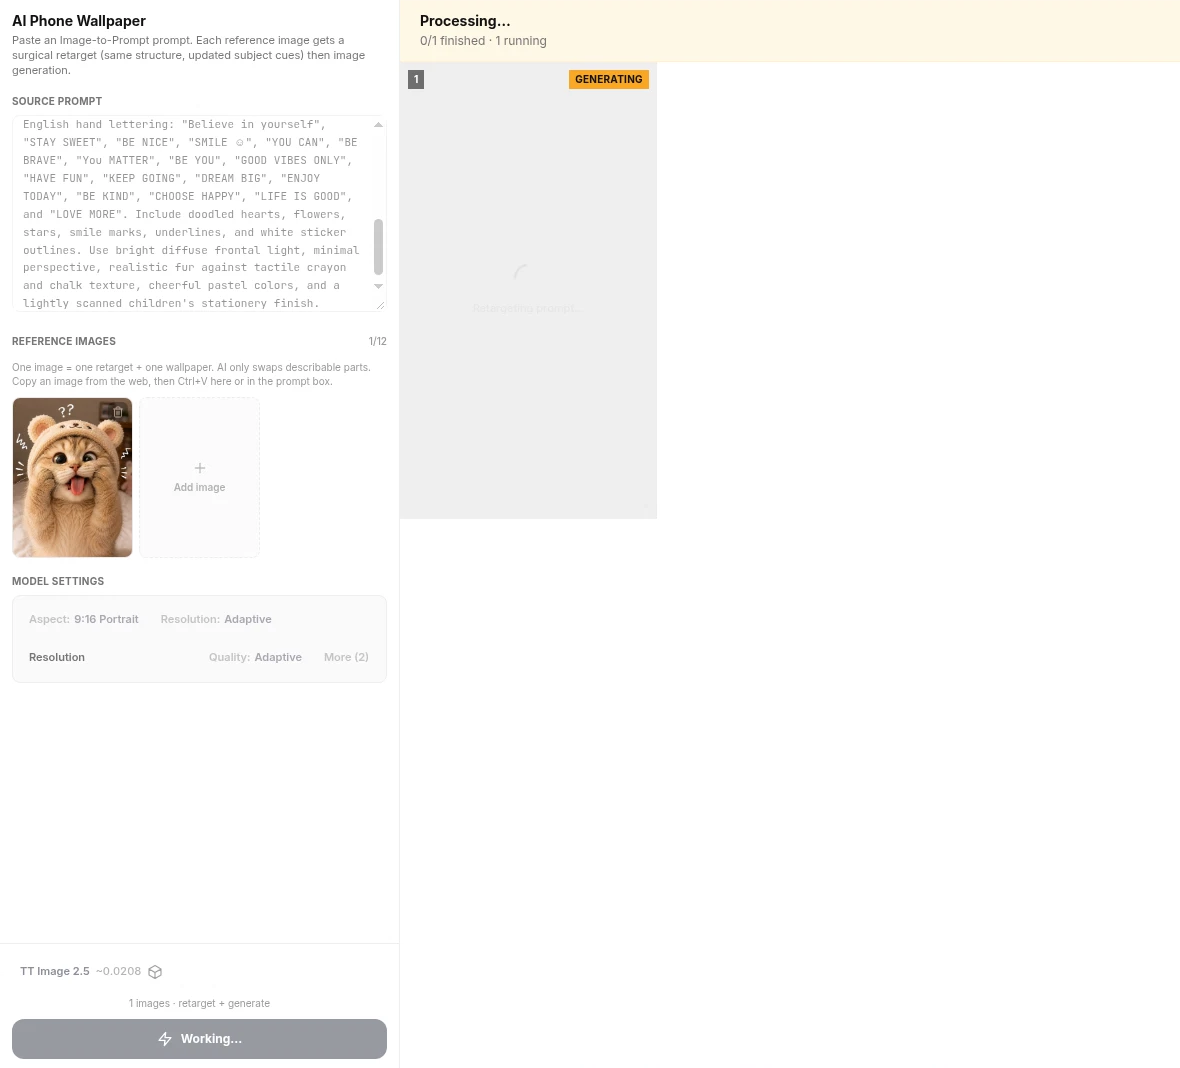
    The module runs as a short batch. A yellow GENERATING badge appears on the result card while the button reads Working….

    The AI Phone Wallpaper module in a Processing state, with a GENERATING badge on the result card and Working on the generate button.
    The wait is short. The first still opens in the same module.

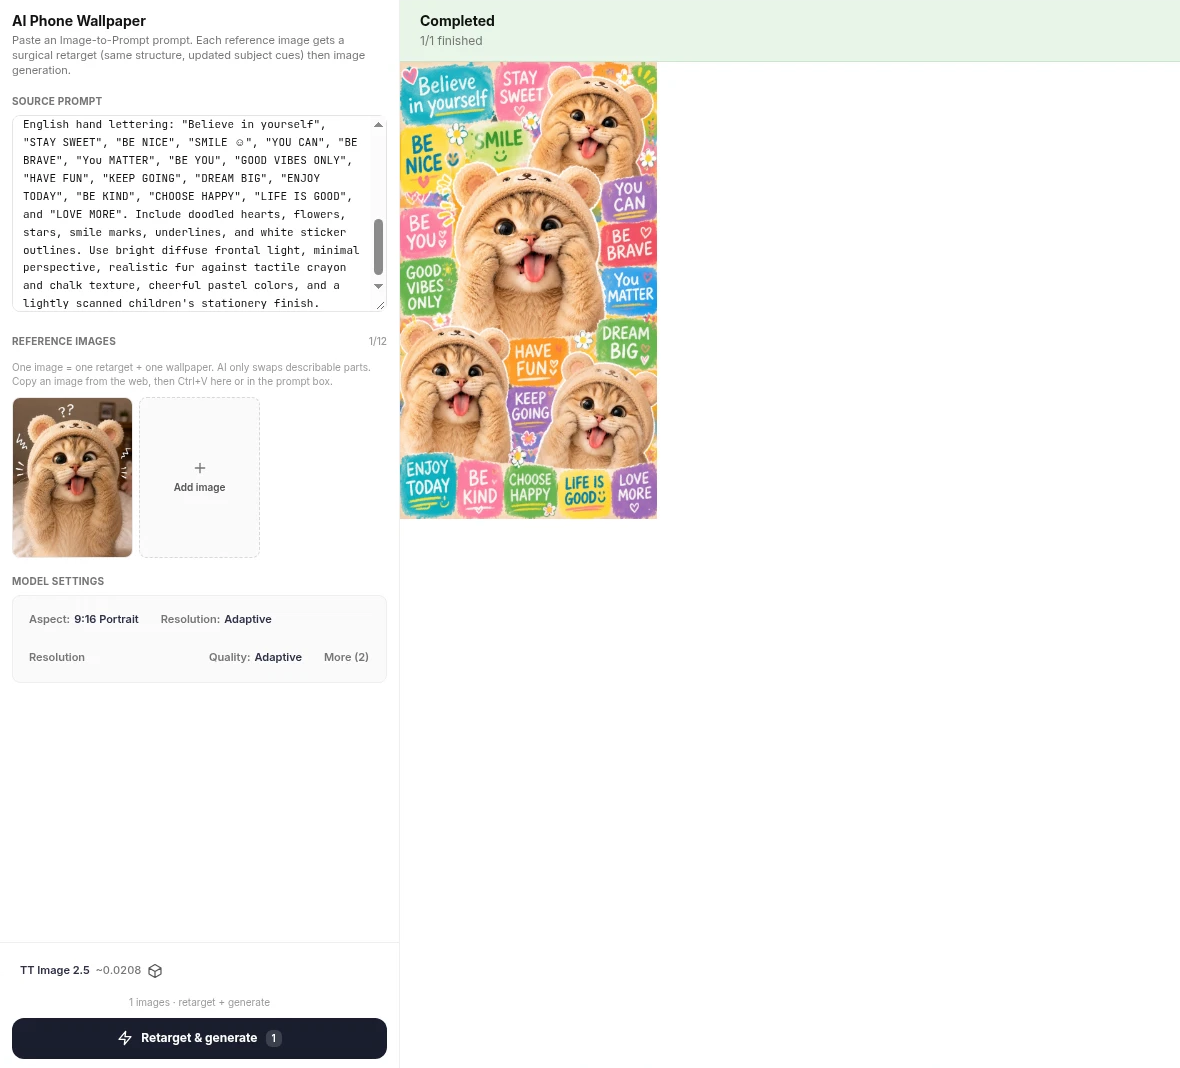
    What came back is the important lesson. The brief we pasted described four fluffy white Persian-like cats in bonnets. The module did not print that. It kept the collage structure — the paper blocks, the hand lettering, the scrapbook density — and retargeted the subject onto the reference kitten: the same golden-brown tabby, the same bear hood, the same startled tongue-out face, now tiled into a 9:16 poster. That is the module doing what it says it does. Task #225385414, 720×1280, about 0.02 credit.

    The AI Phone Wallpaper module after a completed run, showing the first 9:16 collage wallpaper of the bear-hood kitten with affirmation lettering, and the reference still attached on the left.
    The first wallpaper. The lettering is readable. The cats in the brief were rewritten to match the reference. This file is a new collage, not a crop of the pin.

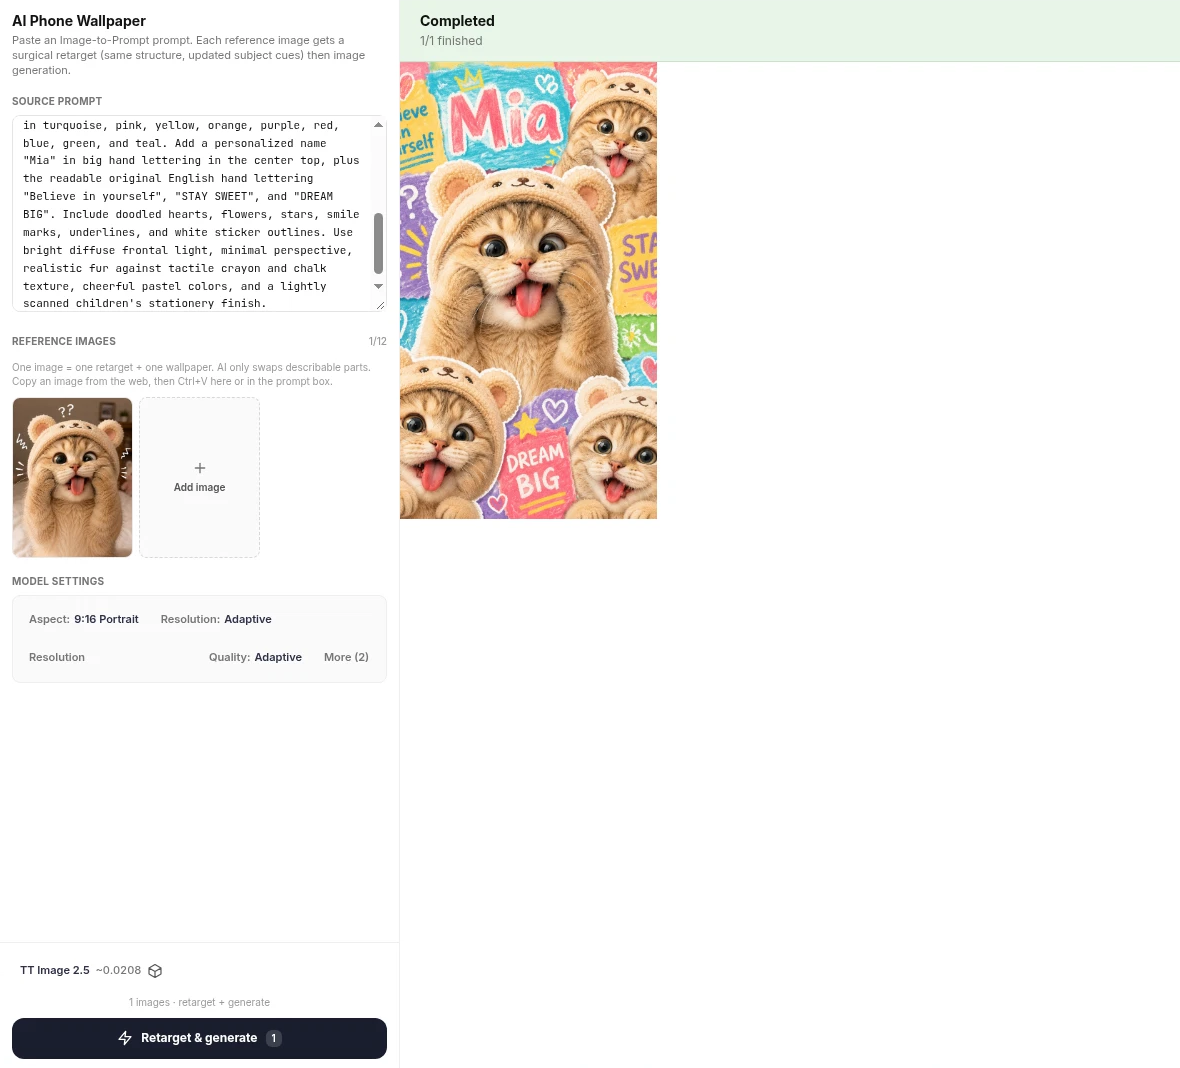
    A shop becomes interesting when the same style can take a name. We ran the module twice more, still at 9:16 and TT Image 2.5, and asked for a large hand-lettered “Mia” on one file and “Leo” on the other. Those are tasks #225390478 and #225396373, also 720×1280.

    The module result for the personalized Mia wallpaper, with the name Mia in large hand lettering at the top.
    “Mia”, written large enough to read on a lock screen. Same kitten, same collage language.
    The module result for the personalized Leo wallpaper, with the name Leo in large hand lettering at the top.
    “Leo”, in the same series. A catalog is just this, repeated for the next name.

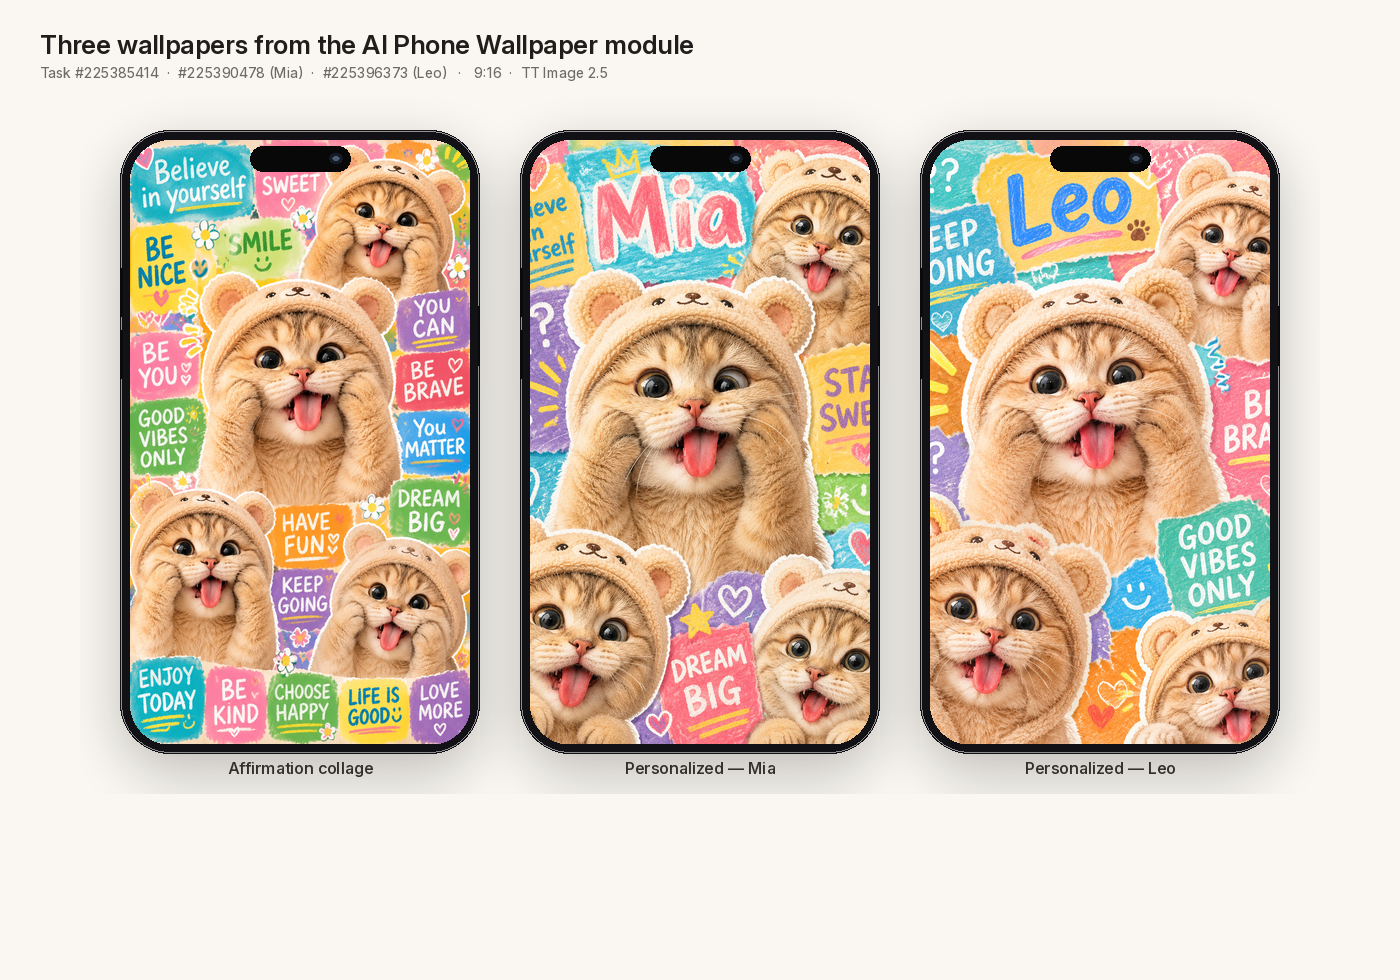
    Together, the three files already look like a product line: one generic affirmation collage, then two named versions a customer could have typed at checkout.

    Three iPhone frames showing the affirmation collage, the Mia wallpaper, and the Leo wallpaper, generated in Orauria’s AI Phone Wallpaper module.
    Three 9:16 wallpapers from the module: a generic collage, then Mia, then Leo. Tasks #225385414, #225390478, and #225396373.

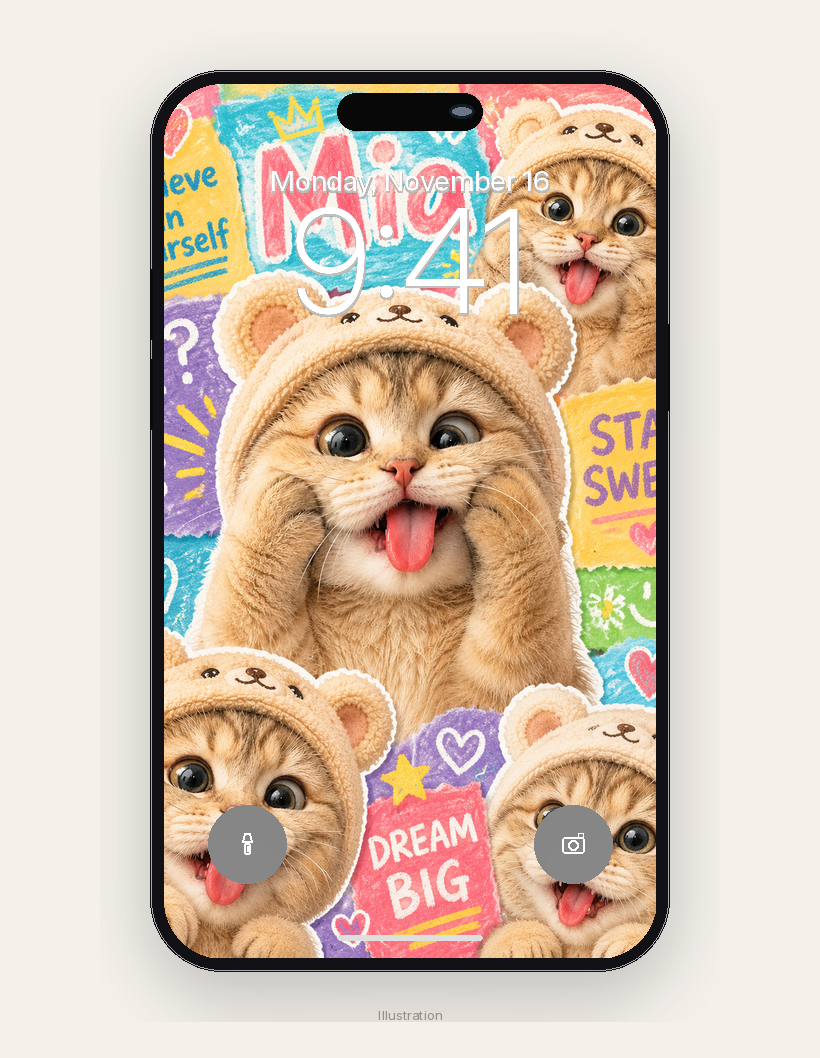
    On a lock screen the named file has to survive a clock, a date, and the camera pill. “Mia” still reads under a 9:41 overlay. That is the test a wallpaper product actually has to pass.

    An iPhone lock-screen illustration showing the Mia wallpaper at 9:41 on Monday, November 16, with the name still readable behind the clock.
    Illustration. A lock-screen crop of the Mia file. If the name disappears under the clock, the product is not finished.

    Personalize on demand with Orauria MCP

    The Studio module is how you design the first series and lock a style. A shop that takes a new name on every order needs a second door: a call you can run when the order arrives, without opening the browser again.

    Orauria’s MCP endpoint is http://orauria.com/api/mcp, with Bearer-token auth. In a chat client the same tools show up as list_models, generate_image, get_task, and get_wallet. You create an sk- key under Profile → API keys, put Authorization: Bearer YOUR_ORAURIA_TOKEN in the client config, and the agent can generate an image at the same Studio prices. The token in this post is a placeholder. Never paste a real key into a blog, a theme file, or a public repo.

    This is not a Shopify app Orauria ships. It is a workflow you can wire up: a Shopify order with a personalization field, a webhook to a small script or an AI agent, one generate_image call, then get_task until is_final is true, then a delivery step — an email with the PNG, a download in the customer account, or a hand-off to a print-on-demand provider for the case.

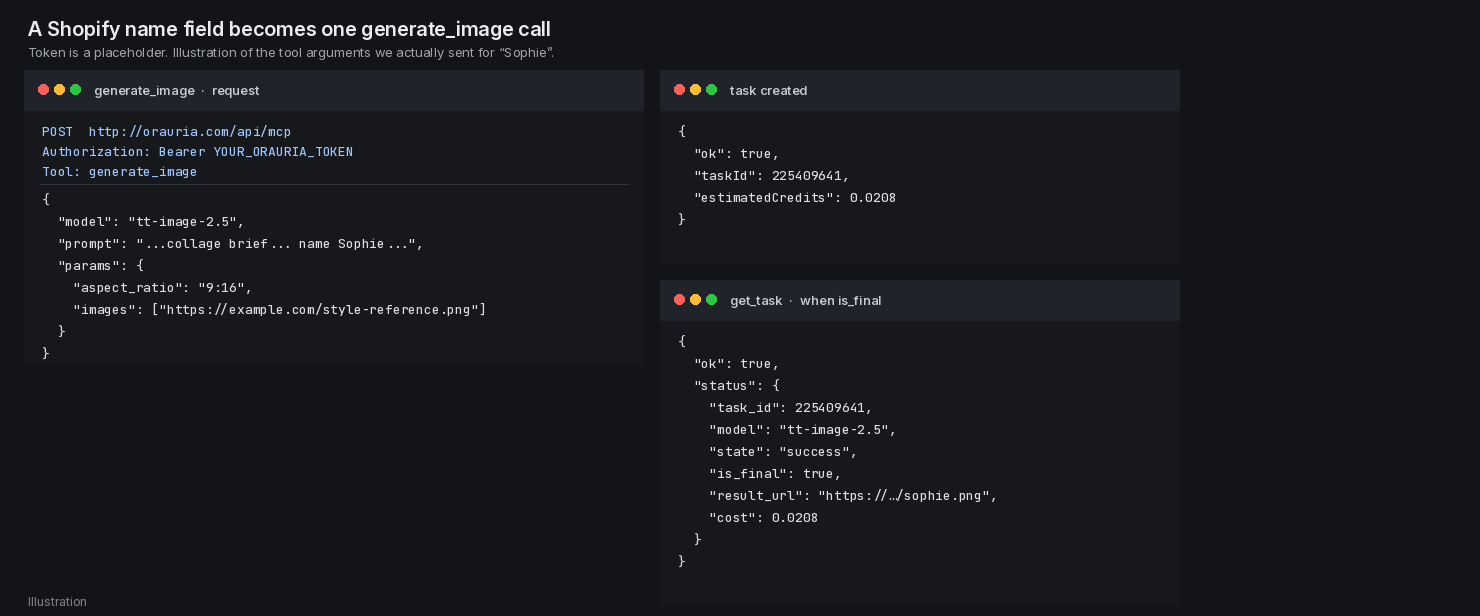
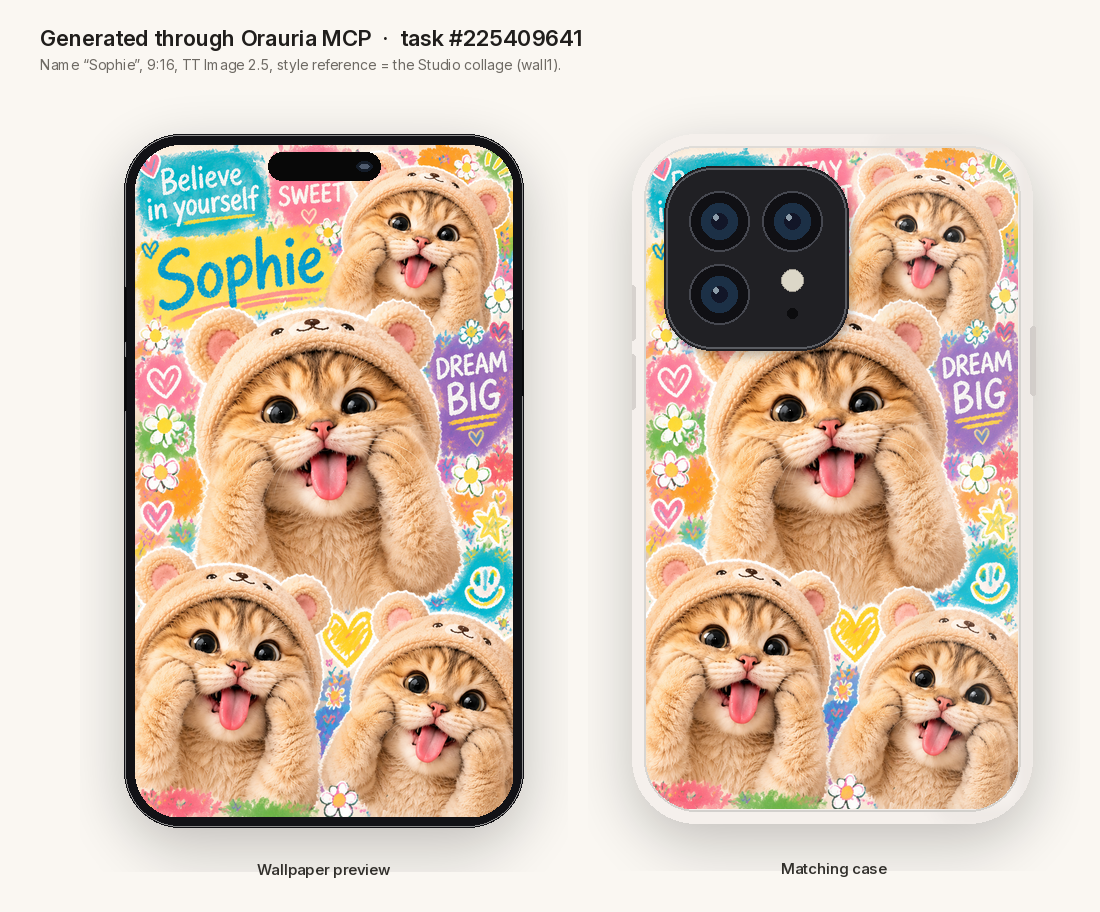
    We ran that generation for a sample name, “Sophie”, as if it had just been typed at checkout. The model was TT Image 2.5. The prompt was the same collage brief, with “Sophie” in large hand lettering. In params we sent aspect_ratio as 9:16, and we also passed the first Studio collage (wall1) as a style reference in params.images. That key is not listed as a first-class field on the public generate_image schema — params is an open object — but the call was accepted, billed at 0.0208 credits, and returned a 720×1280 wallpaper whose kitten, hood, and lettering language match the Studio series. Task #225409641. Official docs describe the tool as “a prompt and a model”; if a reference upload is not accepted in your client, write the character into the prompt in more detail and keep a house style document next to the script.

    A dark, screenshot-style illustration of the generate_image request with a YOUR_ORAURIA_TOKEN placeholder, the task-created response, and the get_task result for Sophie, task 225409641.
    Illustration of the tool arguments we sent for “Sophie”. The token is a placeholder. The task number is real.

    The file that came back is the one a customer named Sophie would have been waiting for: the same bear-hood kitten, the name spelled correctly, “Believe in yourself”, “STAY SWEET”, and “DREAM BIG” still readable, plus a matching case render of that same art.

    The Sophie wallpaper generated through Orauria MCP, task 225409641, shown as an iPhone preview and as a matching iPhone case.
    A real MCP result, not a mockup. Task #225409641. The phone and the case around it are product frames; the art is the generated file.

    A script that maps a Shopify name field onto that call can stay small. The important parts are the placeholder token, the template prompt, and a poll until the task is final:

    import time
    import requests
    
    MCP_URL = "http://orauria.com/api/mcp"
    TOKEN = "YOUR_ORAURIA_TOKEN"
    STYLE_REFERENCE_URL = "https://example.com/style-reference.png"
    
    TEMPLATE = """Create a tall vertical 9:16 handmade motivational collage poster
    with four fluffy golden-brown tabby kittens in cream plush bear hoods,
    paws at their cheeks, tongues out, on overlapping pastel paper blocks.
    Add a personalized name "{name}" in big, perfectly spelled hand lettering
    at the center top, plus "Believe in yourself", "STAY SWEET", and "DREAM BIG"."""
    
    def generate_wallpaper(customer_name: str) -> int:
        """Called from a Shopify webhook, or from an agent that reads the order."""
        # In an MCP host this is a generate_image tool call, not a hand-rolled
        # REST body. The arguments are the same either way.
        payload = {
            "model": "tt-image-2.5",
            "prompt": TEMPLATE.format(name=customer_name),
            "params": {
                "aspect_ratio": "9:16",
                "images": [STYLE_REFERENCE_URL],
            },
        }
        headers = {"Authorization": f"Bearer {TOKEN}"}
        # Send payload through your MCP client, then:
        # task_id = response["taskId"]
        # poll get_task until status["is_final"] is true
        # download status["result_url"] and deliver the PNG
        return payload

    Keep the key in an environment variable or a secret store, not in the theme. If the typography comes back misspelled, do not send the file; regenerate, or fall back to a manual Studio pass, before you mark the order fulfilled.

    List the files on a Shopify-style store

    Two products are enough for a first catalog: a digital wallpaper at $4.99, with a Name personalization field, and a matching iPhone case at $24.99, printed with the same art. Those prices are an example, not a rate card you have to use. The wallpaper is a file you can deliver as soon as the generation finishes. The case is a print-on-demand object, with a cost of goods and a shipping window — in this example, about five to eight business days — so the sticker price is not profit.

    The product pages below are Shopify-style illustrations for the fictional Kittyvibes shop. They are not a live checkout.

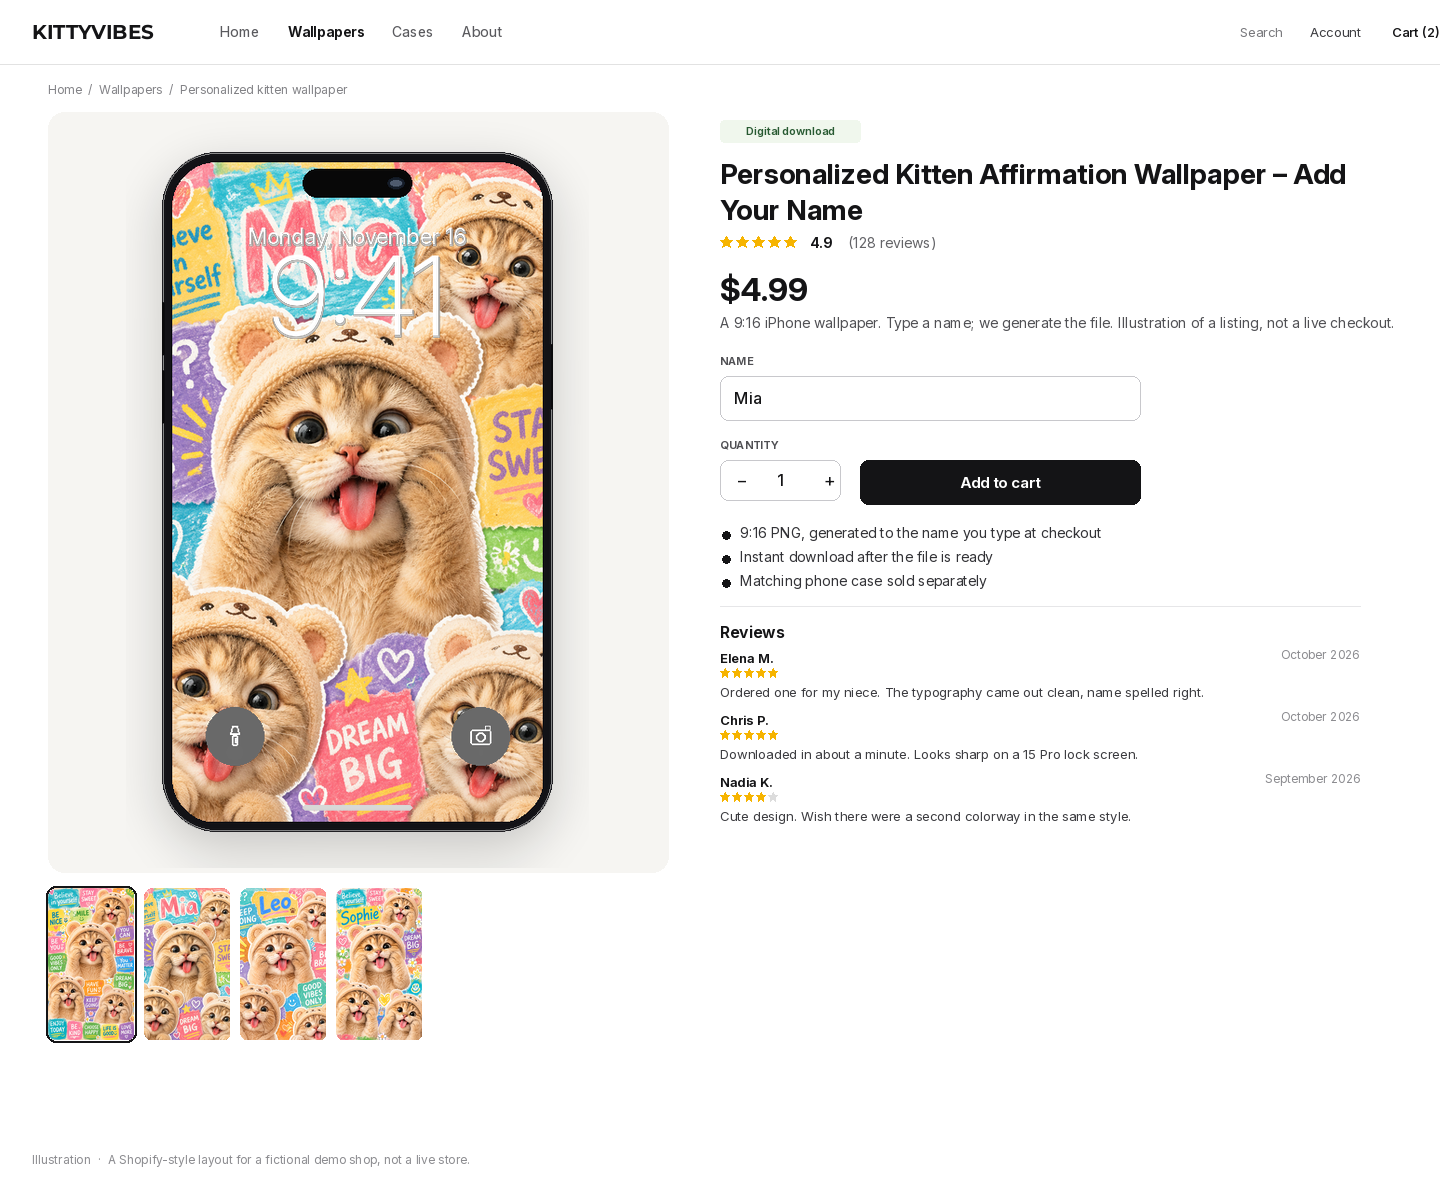
    A Shopify-style product page for Personalized Kitten Affirmation Wallpaper – Add Your Name, priced at $4.99, with a Name field set to Mia, a phone preview, star reviews, and a digital-download badge.
    Illustration. A $4.99 digital wallpaper with a Name field. The reviews and the 4.9 rating are invented for the mockup, in a natural range, not scraped from a store.

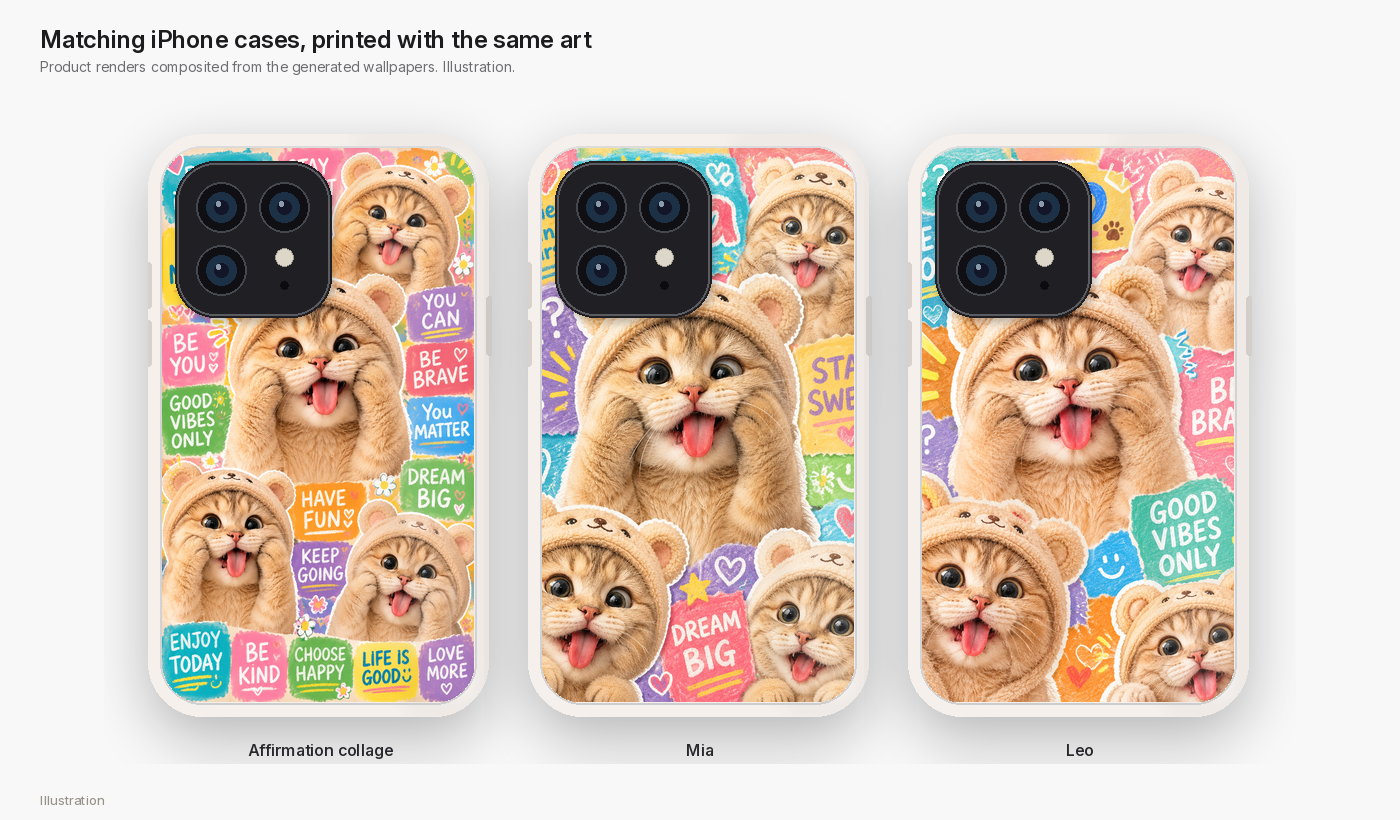
    The case is the same art, wrapped around a realistic iPhone back with a camera bump, a soft shadow, and a little gloss. That is a composite of the generated wallpaper onto a case shape, not a photograph of a manufactured sample. If you sell cases, fulfill them through a print-on-demand partner and show a real manufactured proof before you promise a material you have not held.

    Three iPhone case product renders printed with the affirmation collage, the Mia wallpaper, and the Leo wallpaper.
    Illustration. Three case renders, composited from wall1, wall2, and wall3.
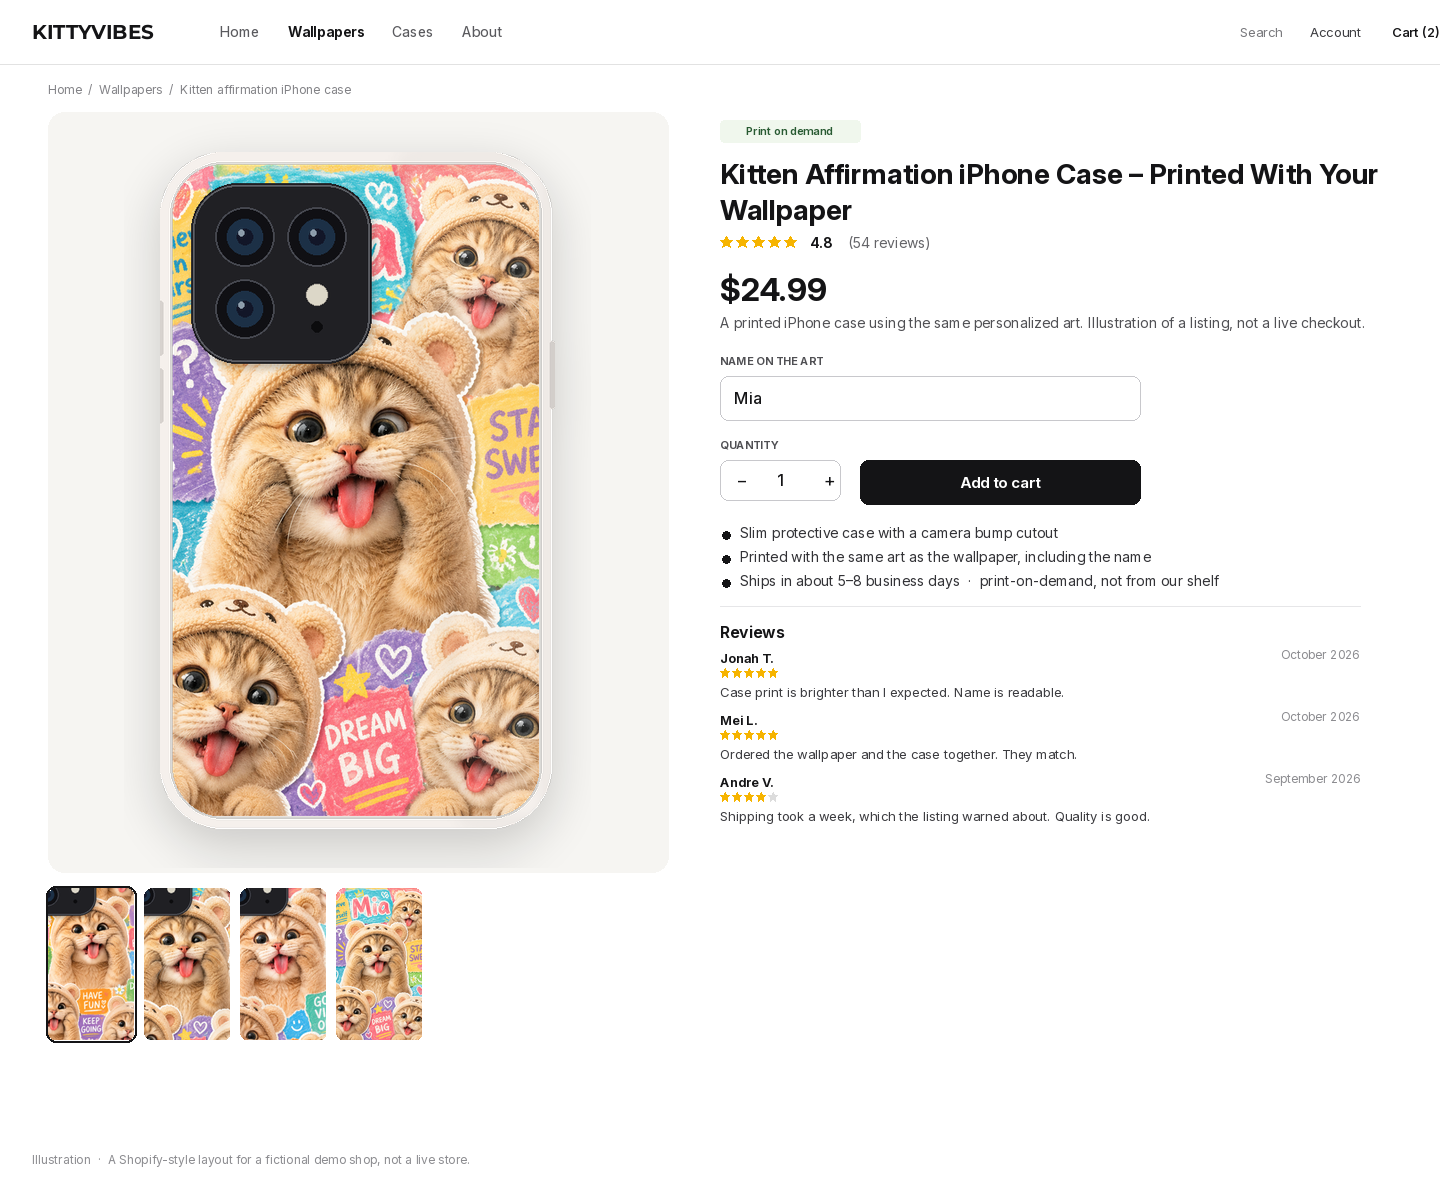
    A Shopify-style product page for a Kitten Affirmation iPhone Case at $24.99, with a Name on the art field set to Mia, a print-on-demand badge, and reviews.
    Illustration. A $24.99 print-on-demand case, same name, same art. Shipping time and print quality belong in the listing, not in a later apology.

    Post the work, then count only real orders

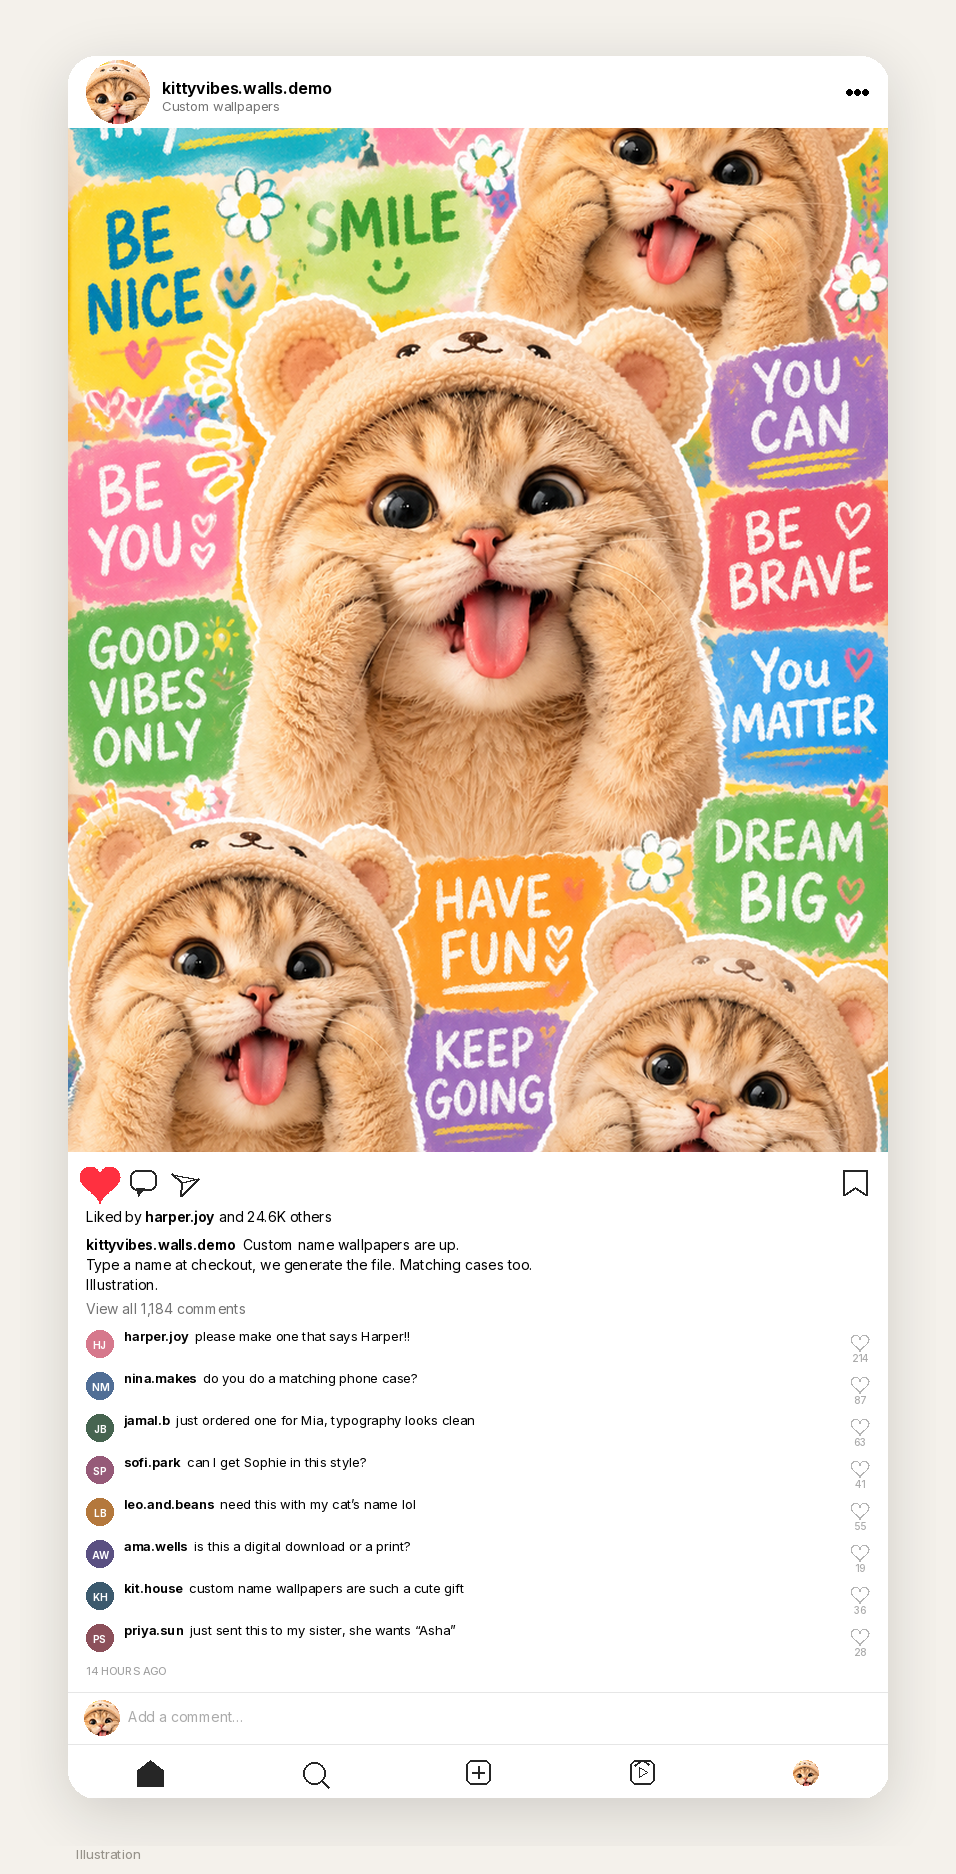
    A first audience for a name-your-wallpaper shop is people who will ask for their own name in the comments. The Instagram post below is an illustration for a demo account, kittyvibes.walls.demo: a dense crop of the collage, a caption that mentions custom name wallpapers, a lot of hearts, and comments that sound like questions a real shop would actually get. The 24.6K likes and the 1,184 comments are invented, in a natural range, and labelled on the mockup. They are not a borrowed pin count, and they are not a forecast.

    A realistic Instagram post illustration for kittyvibes.walls.demo, showing the kitten collage, 24.6K likes, and comments asking for custom names and a matching case.
    Illustration. Custom name wallpapers in the caption, and comments asking for Harper, Sophie, and a case. Not a live post.

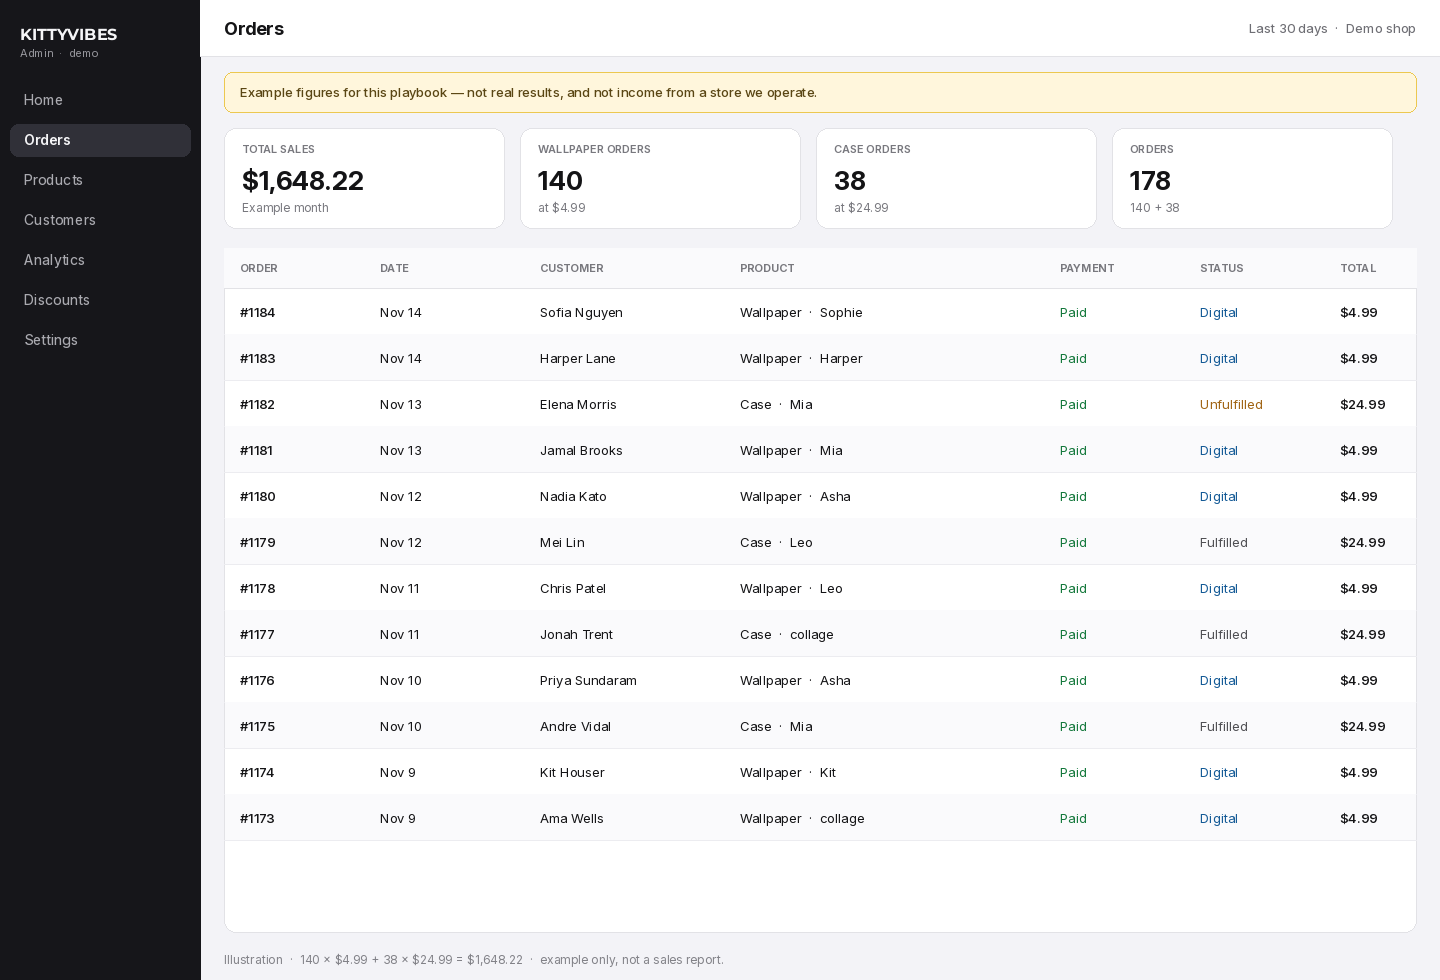
    If you want a picture of a first month, you can do the arithmetic in public and still be honest about it. In this example, 140 wallpaper orders at $4.99 and 38 cases at $24.99 add up to $1,648.22. That mix is constructed. It is not a dashboard we pulled from Shopify, and it is not a typical first month you are owed. Cases also have print-and-ship costs, so the sales total is not take-home. The admin screen below uses those example figures and says so on the page.

    A Shopify-style admin orders list for a demo shop, with example totals of $1,648.22, 140 wallpaper orders, and 38 case orders, plus a banner that the figures are not real results.
    Illustration. 140 × $4.99 + 38 × $24.99 = $1,648.22. Example figures only, labelled as such, not a sales report.

    Licensing, disclosure, and a short caution

    Use your own art, or art you generated for the shop, as the product. The pin was a style reference in this demo. It was not copied onto a listing, and it should not be. The pin is already labelled AI modified; even without that badge, you do not get to resell someone else’s wallpaper because you ran Image to prompt on it. Credit the creator — wallpapper or dpz — when you show the source, then ship a new file.

    If you sell, disclose that the wallpapers are AI-generated. Check every name before you fulfill: typography is the product, and a misspelled “Sophie” is a refund. Keep a human in the loop for the first orders, even if the webhook and the MCP call are automatic. And do not put a real Orauria token, a real Shopify secret, or a customer’s email into a public post or a theme file.

    What this playbook is not

    It is not a sales report, and it is not an income guarantee. We are not going to borrow the pin’s like count, invent a month of Shopify payouts, or treat $1,648.22 as a typical result. The Instagram engagement, the product-page reviews, and the admin totals are illustrations, labelled as such. It is not a shortcut around licensing. If the file you deliver is still the pin, or a lightly edited crop of it, you do not have a shop yet. You have a reprint. It is not a built-in Shopify app, and it is not a substitute for print-on-demand fulfillment, refunds, or a name you actually spelled correctly.

    Start here

    Install AI Assistant Copilot – Orauria from the Chrome Web Store, find a pin that teaches a style rather than a file to copy, and run Image to prompt. Paste the brief into Orauria’s AI Phone Wallpaper module, attach a reference you have the right to use, and generate a 9:16 you would actually put on a phone. Then add a Name field to a Shopify listing and, when you are ready, wire that name to Orauria MCP with a token you keep private. Only count a dollar when a real file has gone out.

    Start here: orauria.com, the AI Phone Wallpaper module, and the Chrome Web Store listing for AI Assistant Copilot – Orauria.
  • How to Build a $2,000-a-Month YouTube and TikTok Thumbnail Workflow With Image to Prompt

    How to Build a $2,000-a-Month YouTube and TikTok Thumbnail Workflow With Image to Prompt

    A YouTube thumbnail is a poster for a two-second glance. A TikTok cover has to do the same job in a vertical frame. The market for that work is real: mid-size creators, product accounts, and small agencies pay for files that still read at a small size — a face, a number, and a line of type you can finish in one look. The useful skill is not copying a trending pin. It is learning why a layout clicks, then writing a new face and a new title into that structure.

    This playbook starts from a Pinterest search for YouTube thumbnail design, runs Image to prompt on three pins, and generates three original covers in Orauria Studio — two 16:9 YouTube thumbnails and one 9:16 TikTok cover. The faces are new, fictional people. The topics were changed on purpose. What we kept is the layout energy: a tight crop, a high-contrast type block, a palette that still works when the file is 160 pixels wide.

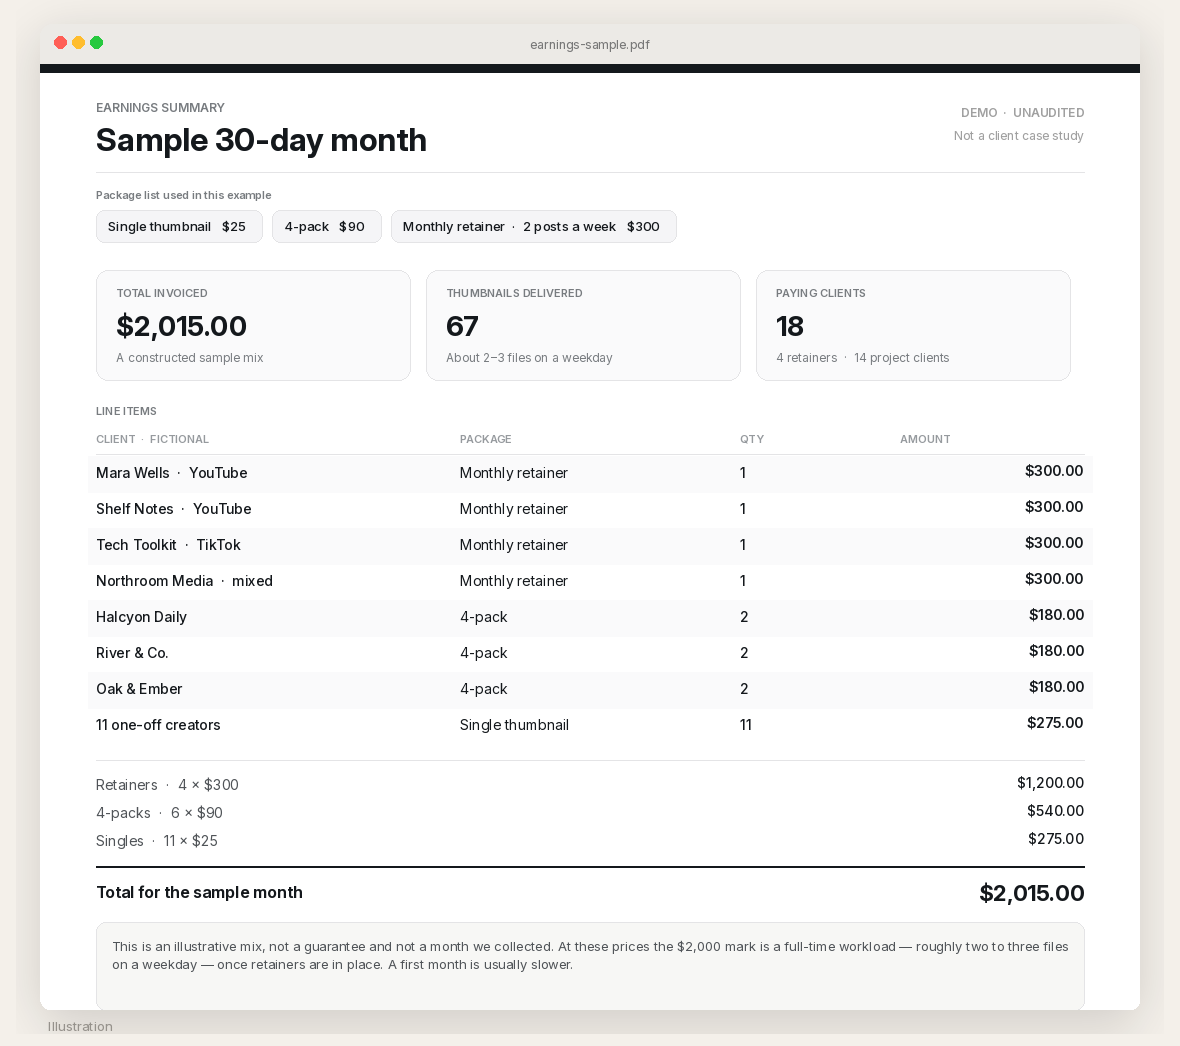
    It is also a pricing walkthrough. The packages in this post — $25 for a single thumbnail, $90 for a 4-pack, and a $300 monthly retainer for two posts a week — are an example, not a rate card you have to use. A sample month built from those numbers adds up to $2,015. That is a constructed mix, not a month we collected, and not a figure anyone is owed. At those prices it is a full-time workload once retainers are in place. A first month is usually slower.

    The playbook at a glance

    1. Install the Chrome extension.
    2. Search Pinterest for thumbnail design, not for a face to clone.
    3. Run Image to prompt on a few pins that teach layout — a type block, a crop, a contrast trick — and copy the briefs.
    4. Rewrite each brief. Change the face. Change the text and the topic. Keep only the structure.
    5. Generate the covers in Orauria Studio: 16:9 for YouTube, 9:16 for TikTok.
    6. Put a tight before-and-after portfolio in front of clients. Price a week, then a month. Do not promise a number you have not earned.

    First, install the extension

    Image to prompt only works after you install the Chrome extension AI Assistant Copilot – Orauria. Get it from the Chrome Web Store before you go looking for a reference. Once it is on, you can right-click a pin and pull a prompt from it.

    Start from a thumbnail search, not a face to copy

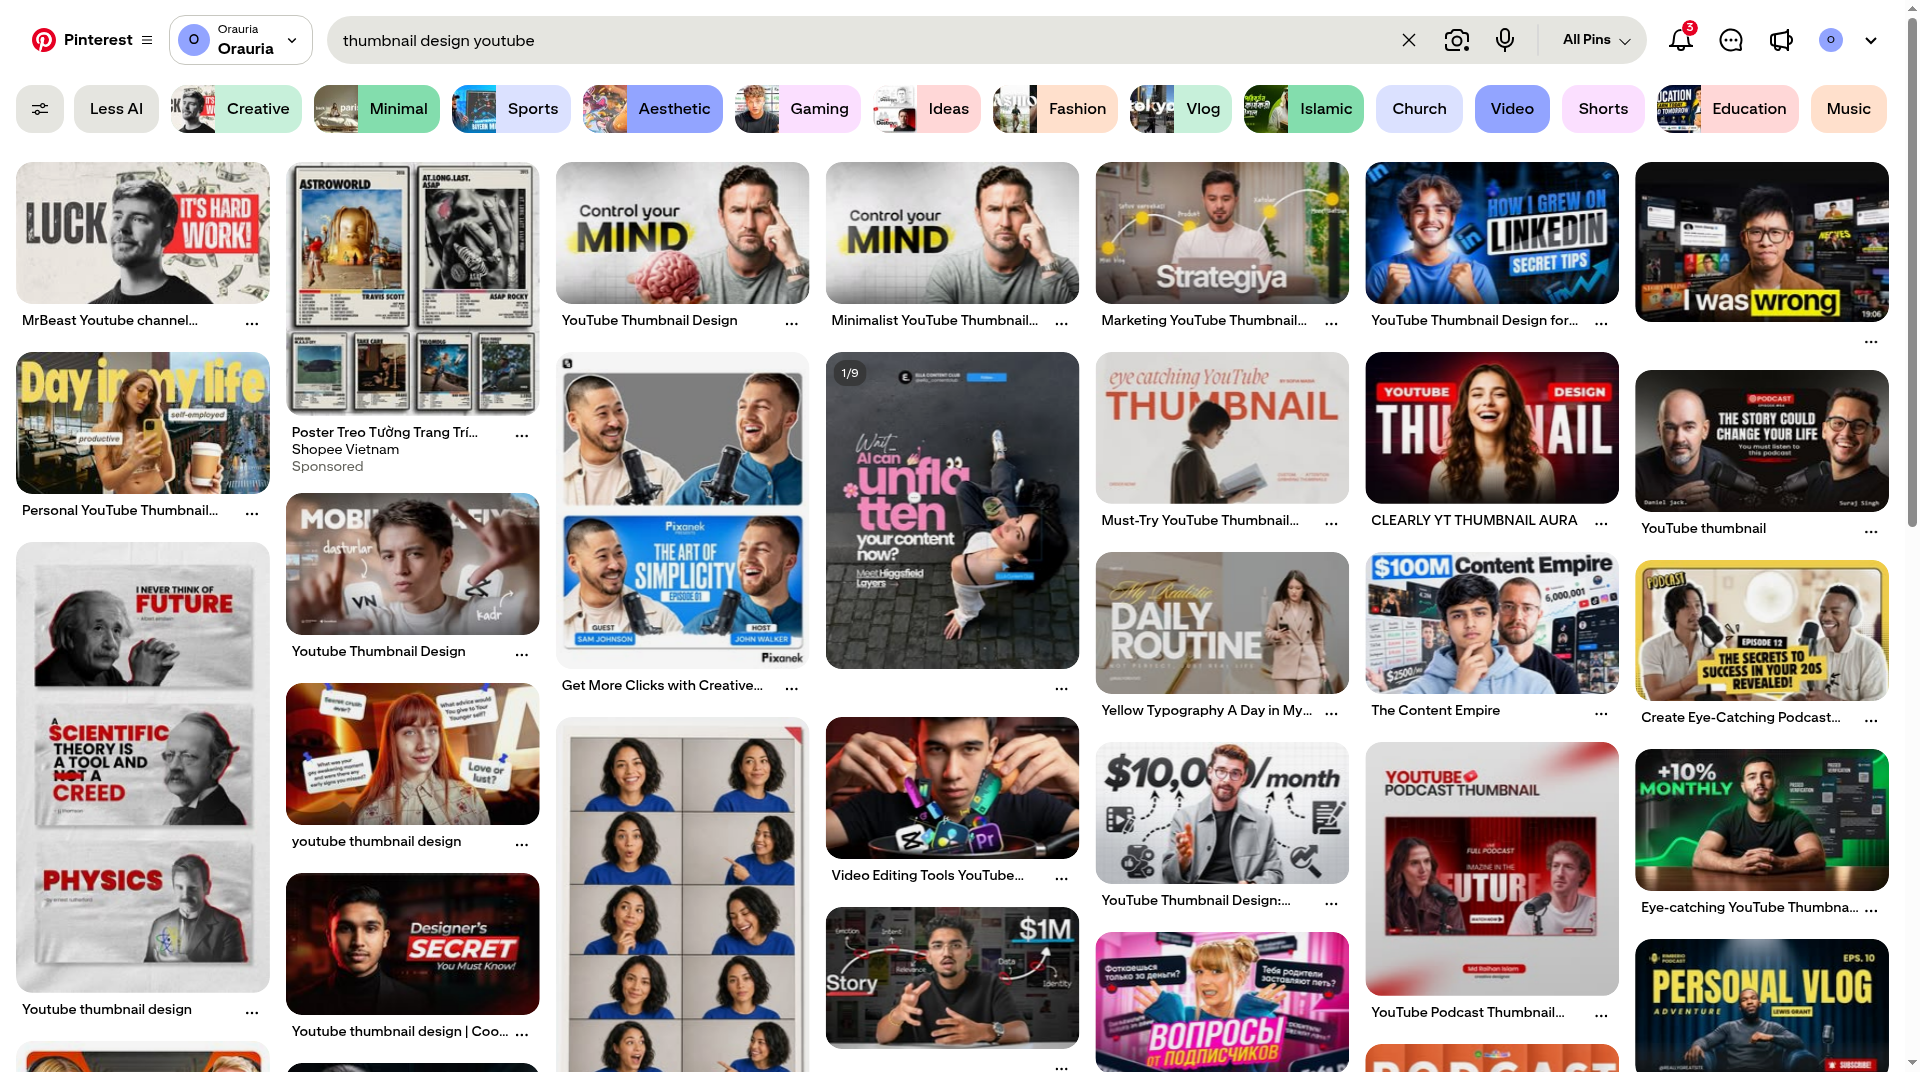
    The useful Pinterest search is not a creator’s name. It is a layout search. We used thumbnail design youtube, which surfaces a wall of high-contrast, type-heavy covers: a face, a short line, a color block. That wall is a classroom. It is not a catalog of people you are allowed to reprint.

    Pinterest search results for the query thumbnail design youtube, showing a dense grid of high-contrast YouTube thumbnail designs.
    A layout search, not a face search. The useful pins are the ones that teach crop, type, and contrast.

    Pick two or three that do different jobs. A single hero portrait with a red type panel is one lesson. Two hosts framing a milestone number is another. A vertical neon cover is a third, and it is already thinking in 9:16. Credit the people who posted them, then write someone else.

    Pin A: a distressed type panel, a new face, a new title

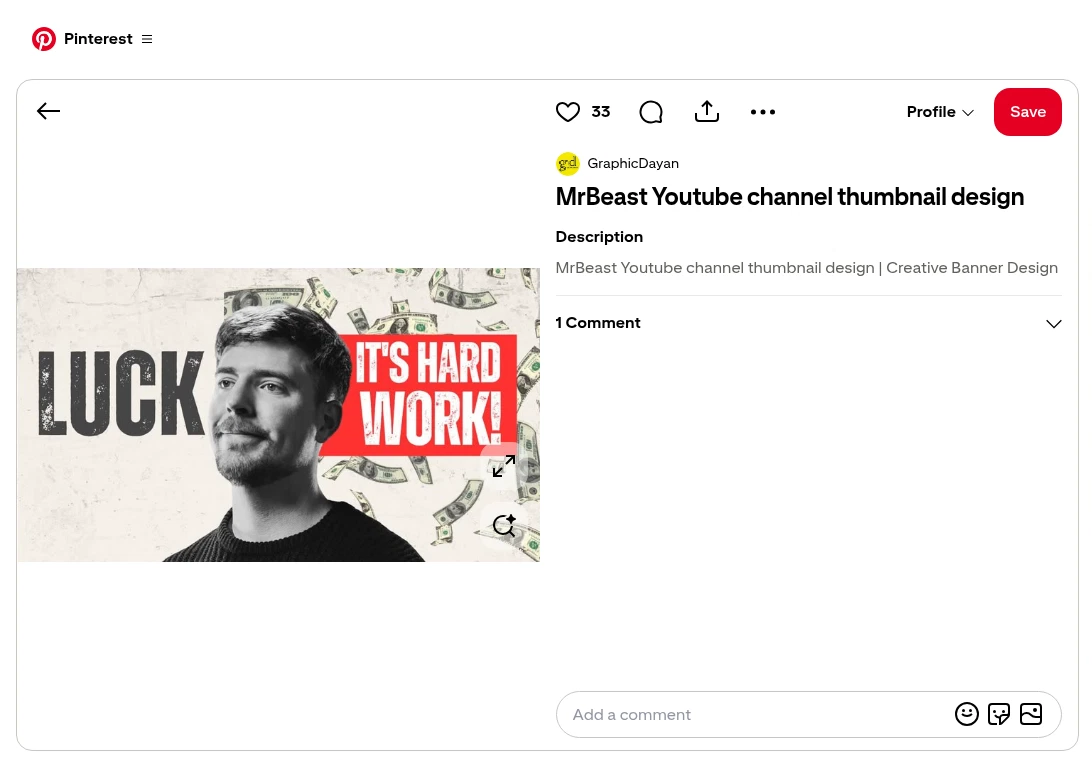
    The first reference is this pin by GraphicDayan, titled “MrBeast Youtube channel thumbnail design.” It is a 16:9 poster: a black-and-white chest-up portrait of a young man against cracked off-white paper, dollar bills in the background, the word “LUCK” in oversized distressed type, and a red panel that says “IT’S HARD WORK!” It is a strong thumbnail structure. It is also someone else’s face, someone else’s line, and a title that points at a real creator. None of that should travel into a file you sell.

    A Pinterest pin by GraphicDayan of a black-and-white portrait of a young man with the words LUCK and IT’S HARD WORK! in a red type panel.
    The reference pin by GraphicDayan. Keep the cracked paper, the red panel, and the tight crop. The person — and the original wording — are not the character of the new thumbnail.

    Right-click the image, open AI Assistant Copilot – Orauria, and then choose Image to prompt. In the frame below, the Copilot row is the one that is open; Image to prompt is the next click, in the extension’s submenu.

    Right-click menu on the GraphicDayan pin, with AI Assistant Copilot – Orauria highlighted and Image to prompt visible in the submenu.
    Right-click the pin, open the extension, then click Image to prompt.

    The panel analyzes the picture, then returns a prompt you can copy. Generation takes a few seconds; the result then appears in the same panel.

    The Orauria extension analyzing the pin, with the heading Analyze image, a preview of the LUCK poster, and the message Preparing image at 8 percent.
    Analyze image is the wait state. The prompt arrives in the same panel.
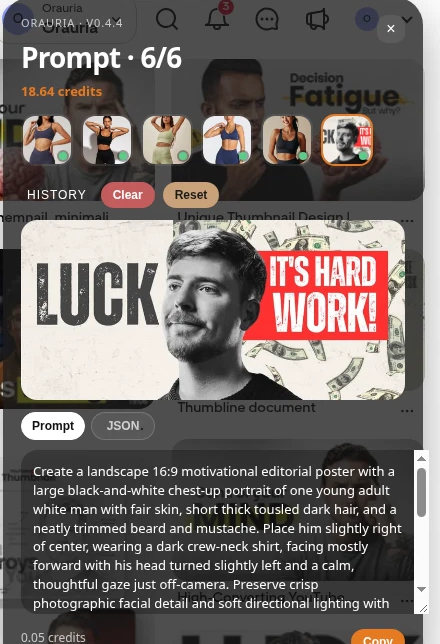
    The Image to prompt panel showing the extracted thumbnail brief for the GraphicDayan pin, with the Copy button visible.
    Copy the prompt, then take it somewhere you can edit it. Do not send this version to Studio unchanged.

    This is the brief the extension wrote from the pin, quoted in full:

    Create a landscape 16:9 motivational editorial poster with a large black-and-white chest-up portrait of one young adult white man with fair skin, short thick tousled dark hair, and a neatly trimmed beard and mustache. Place him slightly right of center, wearing a dark crew-neck shirt, facing mostly forward with his head turned slightly left and a calm, thoughtful gaze just off-camera. Preserve crisp photographic facial detail and soft directional lighting with gentle shadows. Set him against an off-white cracked, scuffed, speckled paper background, with scattered U.S. dollar bills floating behind him, especially across the top and right. Use the open space on the left for the oversized distressed black word “LUCK”. On the right, place a vivid red rectangular panel containing large distressed white capitals on two lines: “IT’S HARD” and “WORK!” Let the portrait overlap the central typography area while keeping the face and wording clear. Limit the palette to off-white, black, gray, and red; finish with gritty ink wear, subtle grain, and a bold screen-printed poster aesthetic.

    The useful part is the craft: a landscape 16:9 poster, a large chest-up portrait slightly right of center, a cracked off-white field, a left-hand type block, a vivid red panel of distressed white capitals, a limited palette, and a screen-printed finish. The part you owe the rewrite is the person, the floating dollar bills if they lock you to a money story you do not want, and the original wording — “LUCK,” “IT’S HARD WORK!” You are borrowing a structure. You are not reprinting a MrBeast-style poster, and you are not using that likeness.

    Two more layout teachers

    One pin will teach you one move. A small set will teach you a service. We ran Image to prompt on two more pins from the same search.

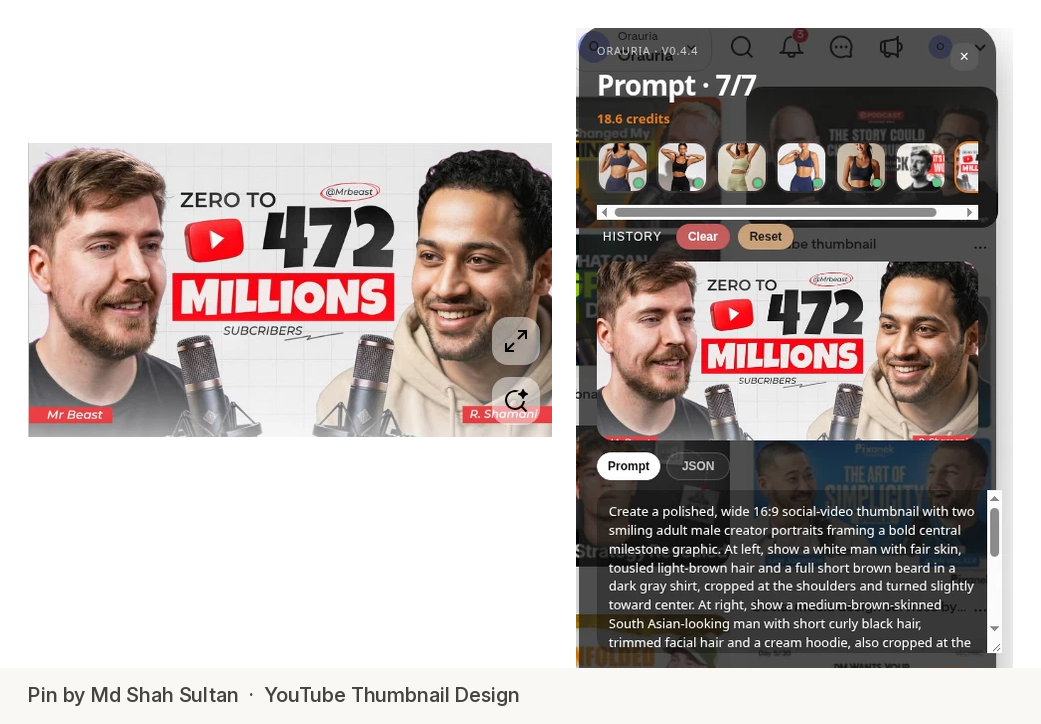
    The second is this pin by Md Shah Sultan: two smiling hosts framing a central milestone, “ZERO TO 472 MILLIONS,” studio microphones in the foreground, a pale tiled backdrop, and name strips in the corners. The original pin names real people. The brief the extension wrote does too. That is exactly why the rewrite has to be thorough.

    Side-by-side view of Md Shah Sultan’s YouTube thumbnail pin and the Image to prompt panel showing the extracted brief, with the Copy button visible.
    Pin by Md Shah Sultan. Keep the two-host frame, the central number, and the red band. Change both faces, and change the milestone.

    This is the brief, quoted in full:

    Create a polished, wide 16:9 social-video thumbnail with two smiling adult male creator portraits framing a bold central milestone graphic. At left, show a white man with fair skin, tousled light-brown hair and a full short brown beard in a dark gray shirt, cropped at the shoulders and turned slightly toward center. At right, show a medium-brown-skinned South Asian-looking man with short curly black hair, trimmed facial hair and a cream hoodie, also cropped at the shoulders and smiling inward. Place large central black text “ZERO TO” above an oversized “472”, with a red rounded play-button icon beside the number, then “MILLIONS” in heavy white letters on a vivid red rectangular band. Add smaller “SUBCRIBERS” below, a small circled “@Mrbeast” above, and red lower-corner name strips reading “Mr Beast” and “R. Shammi”. Put two silver studio microphones with dark mesh grilles in the bottom foreground. Use a pale gray tiled-grid background, soft bright frontal studio light, crisp realistic faces, balanced near-symmetry, strong red-black-white contrast and clean digital typography.

    The useful part is the symmetry: two shoulder-up portraits turned inward, a huge number in the middle, a red band, a small tag under the figure, and a simple studio prop in the foreground. The part that must not ship is the likeness, the “@Mrbeast” label, the name strips, and a subscriber claim you cannot stand behind. We kept the frame and wrote a different business story: “$0 to $10K: My First Store,” with two fictional creators and a phone and shipping boxes in the foreground instead of microphones.

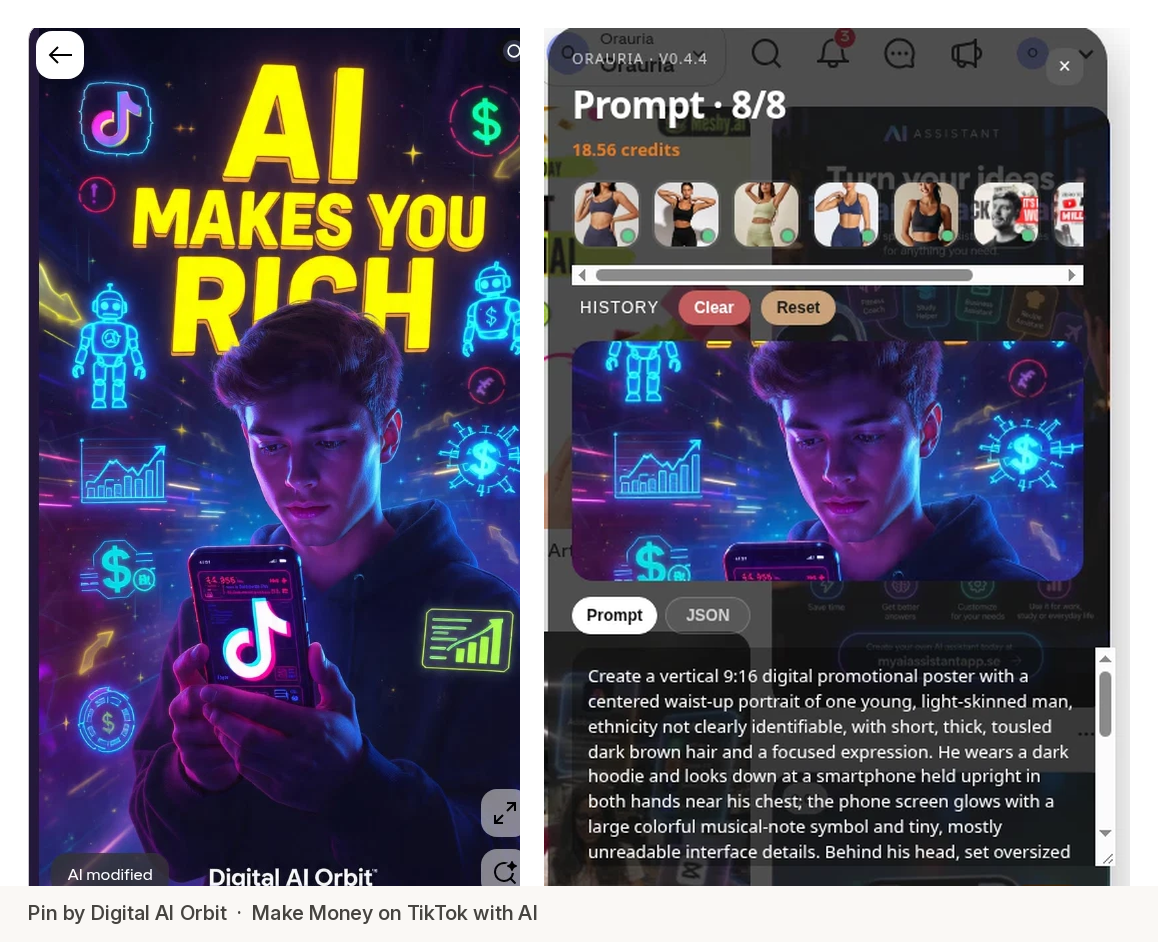
    The third is this pin by Digital AI Orbit: a vertical 9:16 poster of a young man looking down at a glowing phone, oversized yellow type that reads “AI MAKES YOU RICH,” and cyan neon graphics on a navy-purple field. It already thinks like a TikTok cover. The original also carries platform marks and a get-rich line you should not reprint.

    Side-by-side view of Digital AI Orbit’s vertical AI poster pin and the Image to prompt panel showing the extracted brief.
    Pin by Digital AI Orbit. Keep the vertical crop, the phone, the neon graphics, and the stacked yellow type. Change the face, drop the brand marks, and write a clearer title.

    This is the brief, quoted in full:

    Create a vertical 9:16 digital promotional poster with a centered waist-up portrait of one young, light-skinned man, ethnicity not clearly identifiable, with short, thick, tousled dark brown hair and a focused expression. He wears a dark hoodie and looks down at a smartphone held upright in both hands near his chest; the phone screen glows with a large colorful musical-note symbol and tiny, mostly unreadable interface details. Behind his head, set oversized bold dimensional yellow lettering in three stacked lines: “AI” at the top, “MAKES YOU” beneath, and “RICH” partly hidden by his hair and head. Add cyan neon outline robots, dollar signs, rising bar charts, arrows, and circular data graphics around both sides of the figure, floating against a deep navy-purple star-speckled digital background with fine light streaks. Use vivid magenta and electric-blue rim lighting on his face and hands, bright cyan graphic glow, and warm yellow headline illumination. Keep the portrait crisp, the graphics luminous but controlled, and place the small white footer “Digital AI Orbit” at the bottom.

    The useful part is the 9:16 stack: a waist-up figure, a lit phone, dimensional yellow type that sits behind the head and still reads, and controlled neon on a dark field. The rewrite drops the logos, drops the “makes you rich” promise, and gives the cover a title a tech channel can actually post: “5 AI Tools You Need,” with a fictional woman in a hoodie and a small “TECH TOOLKIT” footer.

    Rewrite the brief: new face, new text, same energy

    This is the whole method, and it is the same rule as the rest of this series. The pin is a teacher. It is not a source file.

    For each brief, change three things on purpose:

    • The person. Invent a fictional adult with a specific, original look — hair, skin, age, expression — and say clearly that this is not a real creator. If the source pin points at a public figure, that is a reason to rewrite harder, not a reason to get close.
    • The text and the topic. A thumbnail is a title you can see. If you keep the original line, you have a reprint. We turned “LUCK / IT’S HARD WORK!” into a 30-day cold-shower challenge, “ZERO TO 472 MILLIONS” into a first-store milestone, and “AI MAKES YOU RICH” into a tools-you-need cover.
    • Brand marks, name strips, and claims you cannot support. They do not belong in a client file.

    Keep the structure: the crop, the type hierarchy, the panel or the central number, the palette, the finish. That is the layout energy. It is inspiration, not a copy.

    Generate the covers in Orauria Studio

    Open Orauria Studio and paste the rewritten brief into the composer. For these three files we used Image, Single, TT Image 2.5, and Adaptive, at about 0.02 credit each. Set the aspect to match the platform: 16:9 Landscape for YouTube, 9:16 Portrait for TikTok. The site UI in these frames is in English.

    The Orauria Studio composer showing the rewritten 16:9 cold-shower thumbnail prompt, with Aspect 16:9 Landscape, Quality Adaptive, and TT Image 2.5 at about 0.02 credit.
    The rewritten brief, not the raw extract. Aspect 16:9, Adaptive, TT Image 2.5.

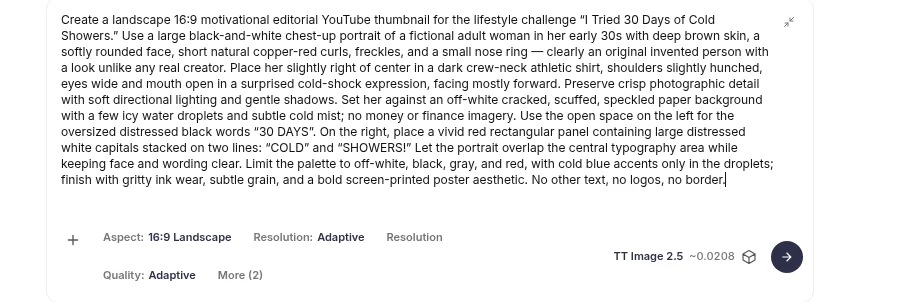
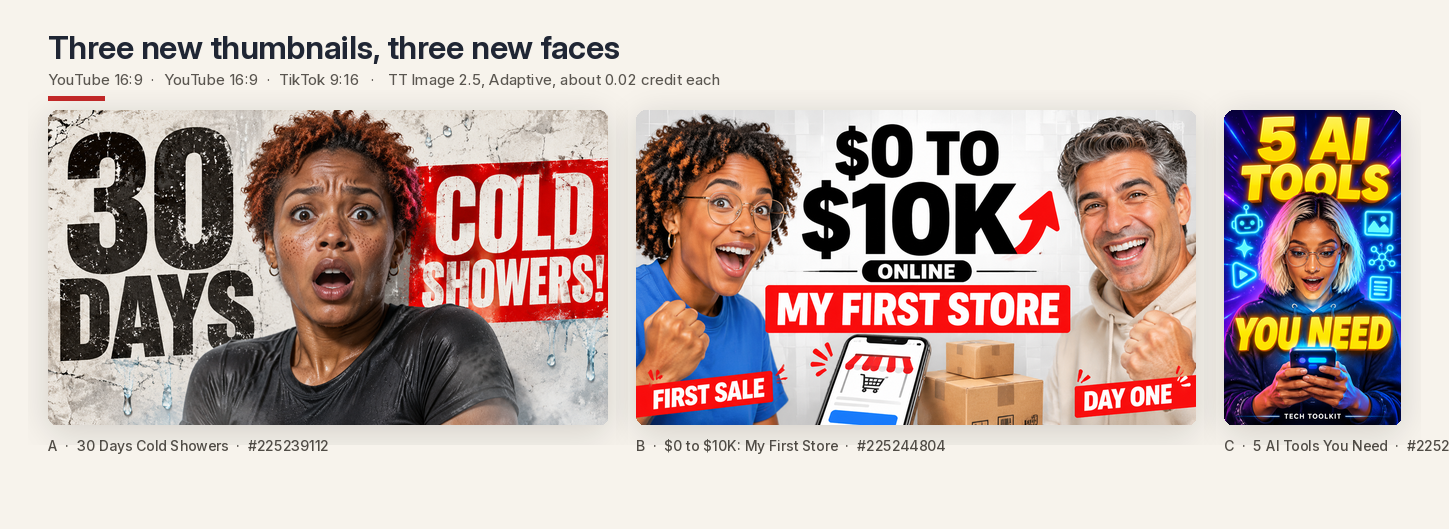
    The first result is a 16:9 YouTube thumbnail, task #225239112: a fictional woman in her early thirties with short copper-red curls and a cold-shock expression, “30 DAYS” in distressed black type, and a red panel that reads “COLD SHOWERS!” The cracked paper and the red panel came from pin A. The face and the title did not.

    Orauria Studio result for task 225239112, a 16:9 thumbnail of a fictional woman with the words 30 DAYS COLD SHOWERS!
    Task #225239112. Same poster structure as the GraphicDayan pin. A different person, and a different line.

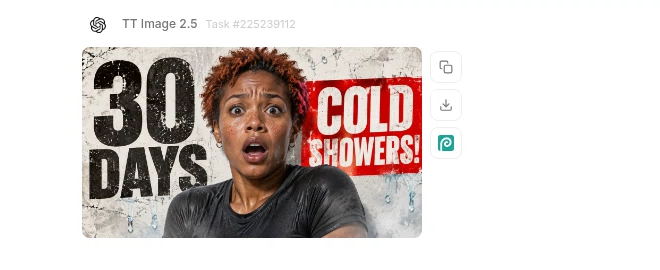
    The second is task #225244804: two fictional creators framing “$0 TO $10K” and a red band that says “MY FIRST STORE,” with a phone and shipping boxes in the foreground. The two-host symmetry came from pin B. The people, the names, and the milestone did not.

    Orauria Studio result for task 225244804, a 16:9 thumbnail of two fictional creators with the words $0 TO $10K MY FIRST STORE.
    Task #225244804. Same two-host frame as the Md Shah Sultan pin. New faces, a new business story.

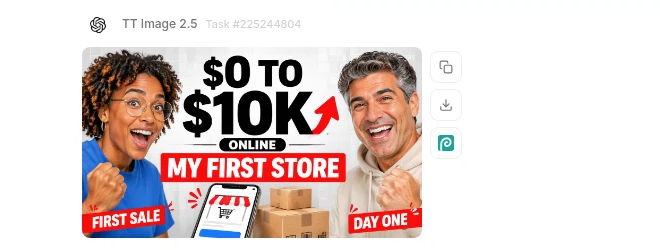
    The third is task #225249999, generated at 9:16 Portrait: a fictional woman in a navy hoodie looking down at a phone, stacked yellow type that reads “5 AI TOOLS YOU NEED,” and generic cyan tool icons on a navy-purple field. The vertical energy came from pin C. The face, the logos, and the original promise did not.

    Orauria Studio result for task 225249999, a 9:16 TikTok cover of a fictional woman with the words 5 AI TOOLS YOU NEED, and the composer set to 9:16 Portrait.
    Task #225249999. 9:16 Portrait, Adaptive, TT Image 2.5. A TikTok cover, not a cropped YouTube file.

    Together, the three files are a first portfolio: a lifestyle challenge, a business story, and a vertical tools cover. Three layouts, three fictional people, three titles you can actually stand behind.

    A board of the three finished thumbnails: 30 Days Cold Showers, $0 to $10K My First Store, and 5 AI Tools You Need.
    Three new thumbnails, three new faces. About 0.02 credit each in Studio.

    Show the rewrite, side by side

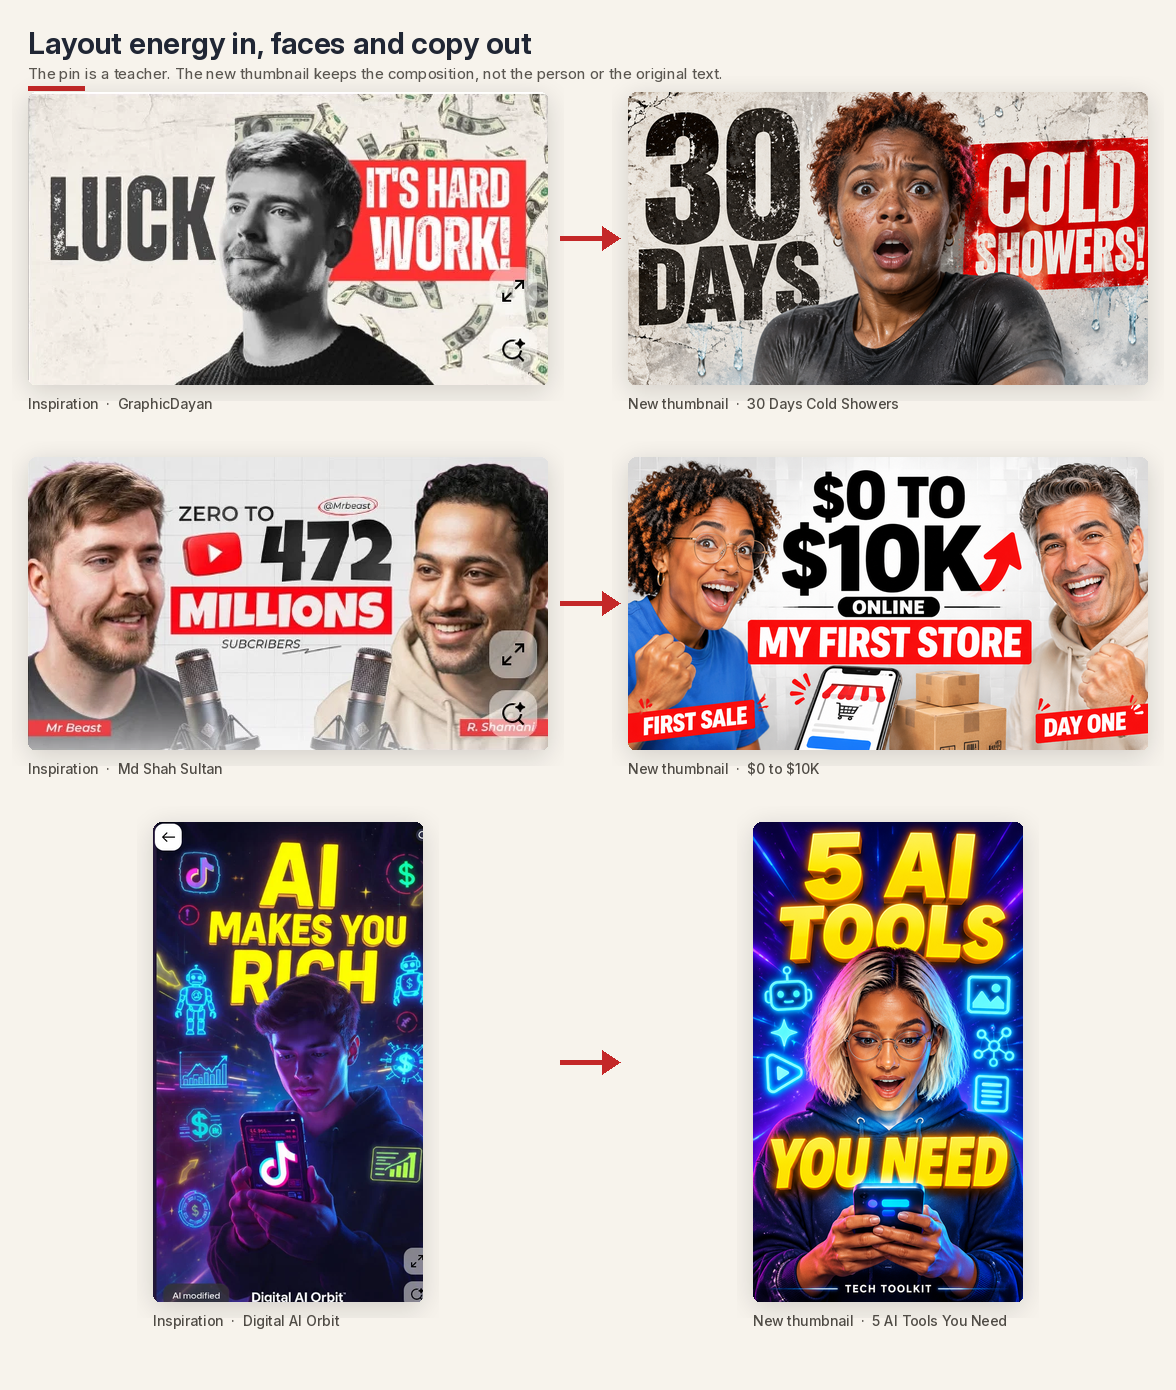
    A client does not need a lecture about prompts. They need to see what changed. A simple inspiration-versus-new comparison is the most honest portfolio piece you can put on a Fiverr gig, an Upwork proposal, or a cold email. The pin stays on the left, credited. The new file sits on the right. The face is different. The title is different. The structure is the thing that survived.

    A three-row comparison of the GraphicDayan, Md Shah Sultan, and Digital AI Orbit pins on the left and the new Orauria Studio thumbnails on the right.
    Layout energy in, faces and copy out. Credit the pin, then show the file you actually made.

    If the person on the right is still the person on the left, you do not have a portfolio yet. You have a reprint with cleaner margins.

    Put the files where a client can imagine them

    A thumbnail has to work in the interface it was made for. The frames below are illustrations, labeled as such, of fictional demo channels. The view counts, likes, and comments are not metrics we collected. They are there so you can see the files at the size a viewer actually sees them, in a crowded grid, with no empty cells.

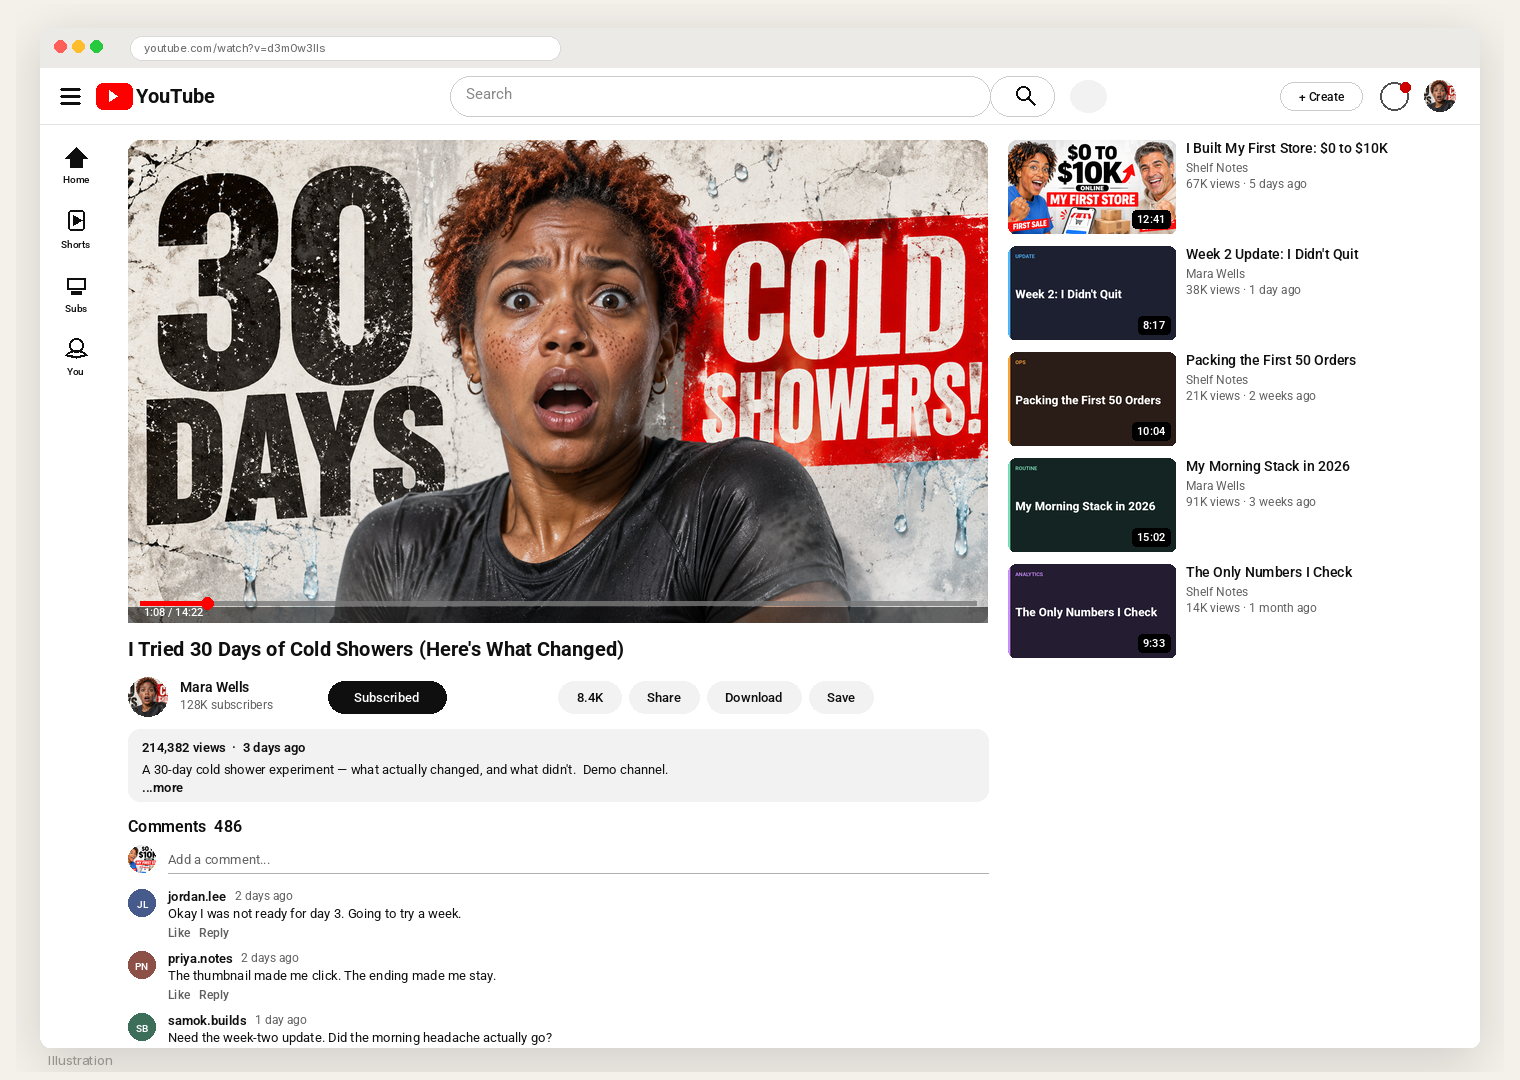
    The first is a YouTube watch page. The cold-shower thumbnail sits in the player for a demo channel, Mara Wells, with a natural view line — 214,382 views, three days ago. The first-store thumbnail sits in the suggested sidebar for a second demo channel, Shelf Notes, at 67K views, five days ago. The other suggested cards are simple typographic placeholders, so the sidebar looks like a real watch page and not a two-item gap.

    An illustrated YouTube watch page showing the 30 Days Cold Showers thumbnail in the player, with 214,382 views and 3 days ago, and the $0 to $10K thumbnail in the suggested sidebar.
    Illustration. A YouTube watch page for two fictional demo channels. The view counts are not a report.

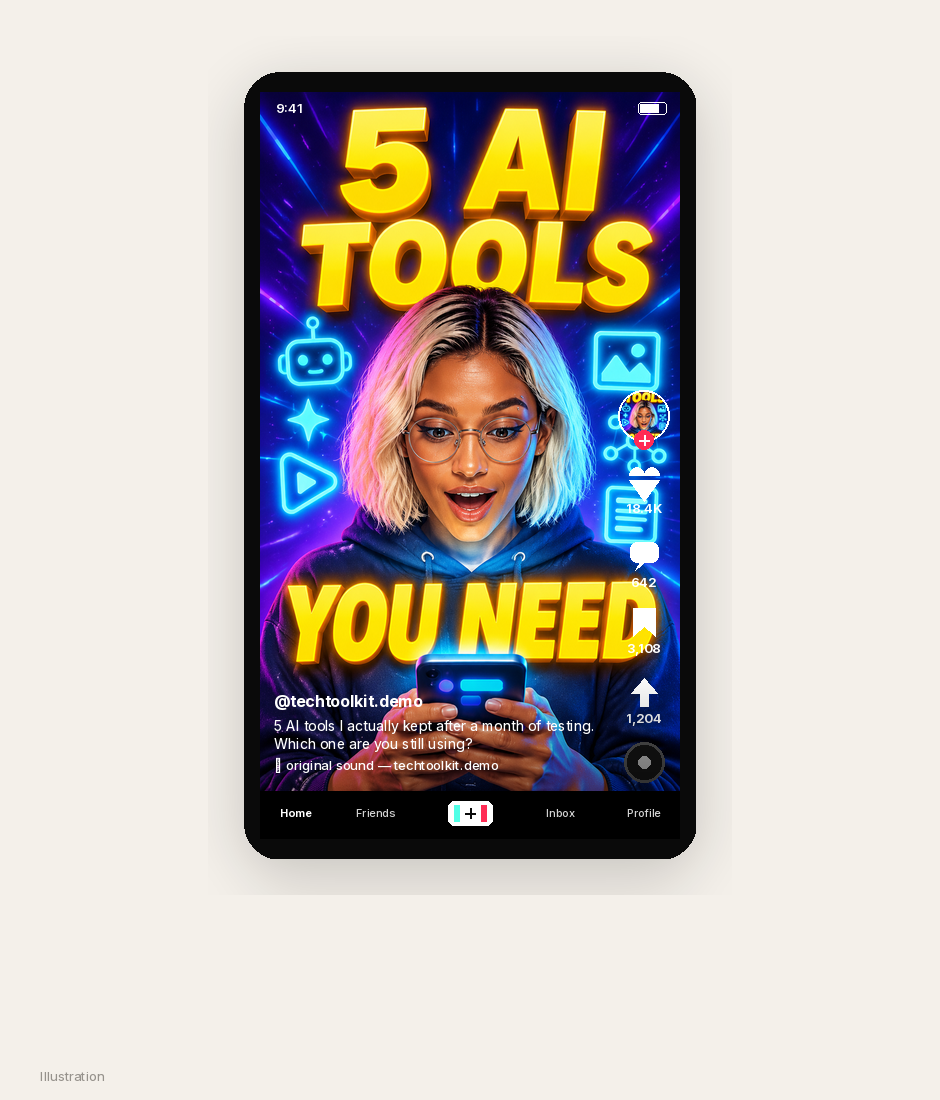
    The second is a TikTok video view, with the 9:16 cover filling the frame for @techtoolkit.demo. Engagement in the rail — 18.4K likes, 642 comments, 3,108 saves — is likewise an illustration. The point is the crop: a vertical cover has to hold a face, a title, and the interface chrome at the same time.

    An illustrated TikTok video view with the 5 AI Tools You Need cover filling the phone screen, the handle @techtoolkit.demo, and illustrated engagement counts.
    Illustration. A TikTok cover has to survive the captions, the rail, and the “For You” chrome.

    A small set like this is enough to start pitching: one lifestyle thumbnail, one business thumbnail, one vertical cover, and a side-by-side that shows how you work.

    How a $2,000 month can be priced

    The number in the title is a sample mix, not a guarantee. It is also not a month of revenue we collected. It is what these three packages add up to when the calendar is full.

    A simple, plausible list looks like this:

    • A single thumbnail at $25, useful for one-off YouTube or TikTok jobs and for first-time clients who want to test you.
    • A 4-pack at $90, which is a small discount for a batch — a week of uploads, or a set of A/B variants.
    • A monthly retainer at $300 for two posts a week, which is eight thumbnails in a 30-day month, with a weekly delivery and a revision window.

    Those are starting prices, on the modest side, for a designer who can turn a file around in a sitting. You can charge more as the book gets stronger. You should not charge these rates and then expect $2,000 from a handful of jobs. The arithmetic only reaches that mark if the month is busy.

    One constructed month, using exactly those packages, looks like this:

    • Four retainers at $300 — $1,200. That is the stable base: two YouTube channels, one TikTok account, and one mixed client, each at two posts a week.
    • Six 4-packs at $90 — $540. Batch jobs from three project clients.
    • Eleven singles at $25 — $275. One-off covers and first-time tests.

    That is $2,015, and 67 files. At two posts a week, the four retainers already account for 32 of them. The rest is project work. Spread across a weekday calendar, it is about two to three deliveries a day. The speed of Image to prompt plus Studio is what makes that volume possible. It does not make the month light, and it does not make the first month look like this. A realistic start is a few singles and a first 4-pack, then a retainer once a client has seen you hit a date.

    An unbranded earnings-summary illustration for a sample 30-day month, with package prices, line items for fictional clients, and a total of $2,015.
    Illustration. An unbranded sample ledger totaling $2,015. It is a mix you can price toward, not a month we invoiced, and not a promise.

    Where the work comes from

    The clients for this kind of file are not mysterious.

    YouTube creators in the middle of the graph — often in the 10K to 200K range — already upload on a schedule and often have thumbnails that do not match the quality of the edit. A tight before-and-after of one of their public titles, redrawn with a new face and a clearer type block, is a more useful note than a generic “I make thumbnails” pitch.

    TikTok shops and product or tools accounts need 9:16 covers that still read under captions and a like rail. The vertical file in this post is the sample you send them, not a YouTube thumbnail cropped on the sides.

    Fiverr and Upwork still work if the gig is specific: YouTube 16:9 and TikTok 9:16, a two-revision window, a quoted turnaround, and a portfolio of before-and-after prompt variations rather than a moodboard of other people’s pins.

    Cold DMs are slower, and they should be polite. A useful note is short, names the layout problem you actually see, and offers one original redraw — a new face, a new line — not a copy of a pin they did not ask for. If they did not invite a sample, ask first.

    A/B tests, variants, and turnaround

    A retainer is easier to keep if you deliver options. For a title that has to perform, generate two or three prompt variations: the same person and the same promise, with a different crop, a different panel color, or a calmer expression. The client can run YouTube’s own thumbnail test, or post one version for 24 to 48 hours and swap if the click-through is soft. Put that in the package so you are not arguing about “one more try” after the invoice.

    Turnaround should be written down. A plausible set for this workflow is a single in 24 hours, a 4-pack in two to three days, and a retainer delivered as a weekly batch, with revisions inside 48 hours. The Studio generation is the short part. The time is in the rewrite, the typography check, and the pass where you ask whether the file still reads at the size of a phone search result.

    Keep the portfolio honest. Every sample should show the inspiration pin, credited, and the new file with a changed face and a changed title. If you cannot point to what you changed, you are not ready to sell the method.

    What this playbook is not

    It is not an income report, and it is not a guarantee. We are not going to borrow a pin’s like count, invent a client who paid these invoices, or treat $2,015 as a typical first month. The YouTube views, the TikTok likes, and the ledger are illustrations, labeled as such. It is not a shortcut around the face-and-copy rewrite. If the woman in the red panel is still the man from the pin, or if the milestone still names a real creator, you do not have a product yet. You have a reprint. And it is not a license to use a celebrity likeness, a platform logo, or a claim you cannot support, even if the layout came out well.

    Start here

    Install AI Assistant Copilot – Orauria from the Chrome Web Store, search Pinterest for thumbnail layouts rather than faces, and run Image to prompt on two or three pins that teach a different job — a type panel, a two-host frame, a vertical cover. Rewrite the person. Rewrite the title. Generate a 16:9 and a 9:16 in Orauria Studio. Then price a week you can actually deliver, and let a month add up from work you have already done, not from a number in a headline.

    Start here: orauria.com, and the Chrome Web Store listing for AI Assistant Copilot – Orauria.
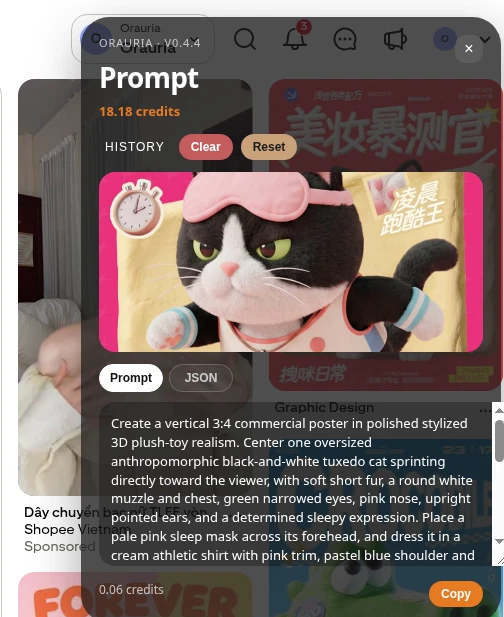
  • How to Turn One Pinterest Pin Into a $1,000 Activewear Shop

    How to Turn One Pinterest Pin Into a $1,000 Activewear Shop

    A small activewear shop does not start with a warehouse. It starts with pictures a stranger can believe: a consistent model, a short color story, and clothes you can actually read on a phone. This playbook uses one studio pin — and the related sports pins beside it — to build a first collection for a fictional shop we named SOLVA. It is a four-week example of how that catalog could be listed, posted, and sold up to a first $1,000.

    It is not a revenue report. The Image to prompt steps and the Studio stills are real; we ran them, and the task numbers are below. The Instagram likes and the $1,012 checkout window are an illustration of a plausible first month for a very small shop — about 28 orders at an average of $36 — not figures from a store we operate, and not a promise that the same numbers will show up in yours.

    The reference is this pin by Sesa Kemularia: a vertical studio shot of a woman in a dark slate-purple sports bra and matching biker shorts, against a seamless warm gray backdrop, with small lowercase “mauv” logos on the bra and shorts. It is a clean e-commerce frame. It is also someone else’s face and someone else’s mark. The woman in the SOLVA catalog is a different, fictional model, on purpose, in a different color story, under a brand we invented.

    The playbook at a glance

    1. Install the Chrome extension.
    2. Find a strong activewear pin that teaches light, crop, and fabric — not a face or a logo to clone.
    3. Run Image to prompt, then repeat it on related sports pins to collect a color and pose story.
    4. Rewrite the character. Replace the source brand — here, the “mauv” logos — with your own fictional mark.
    5. Generate the first look in Studio, attach it as a reference, and build the rest of a short catalog.
    6. List the pieces, post them, and treat the first month as a small, measurable shop — not a guaranteed income.

    First, install the extension

    Image to prompt only works after you install the Chrome extension AI Assistant Copilot – Orauria. Get it from the Chrome Web Store before you go looking for a reference. Once it is on, you can right-click a pin and pull a prompt from it.

    Week 1: Find the pin and extract the prompt

    A first activewear drop rewards clothes you can read: a clear three-quarter or mid-thigh crop, a seamless studio, fabric that looks like fabric, and a model who can come back in more than one color. This pin already thinks that way. Soft broad frontal light, a confident three-quarter pose, one hand at the strap and the other at the hip, and enough negative space that the frame would still hold on a product page. Those are the useful parts.

    The original face should not travel into the shop, and neither should the logo. Treat the pin as a lighting and composition teacher. Credit the person who posted it — here, Sesa Kemularia — and then write a different character in a brand that is yours.

    A Pinterest pin by Sesa Kemularia of a woman in a dark slate-purple sports bra and matching biker shorts, with small mauv logos, standing against a seamless warm gray studio backdrop.
    The reference pin by Sesa Kemularia. Keep the seamless studio, the mid-thigh crop, and the soft frontal light. The person — and the “mauv” logos on the bra and shorts — are not the character or the brand of the shop.

    Right-click the image, open AI Assistant Copilot – Orauria, and choose Image to prompt.

    Right-click menu on the activewear pin, with AI Assistant Copilot – Orauria and Image to prompt visible in the submenu.
    Right-click the pin, open the extension, then click Image to prompt.

    The panel analyzes the picture, then returns a prompt you can copy. Generation takes a few seconds; the result appears in the same panel.

    The Orauria extension analyzing the pin, with Analyze image, a progress bar at 8 percent, and the message Preparing image.
    Analyze image is the wait state. The prompt arrives in the same panel.
    The Image to prompt panel showing the extracted activewear brief, with the Prompt tab, History, and Copied highlighted.
    Copy the prompt, then take it somewhere you can edit it. Do not send this version to Studio unchanged.

    Scroll to the end of the brief. That is where the source brand is named, and it is the part that is easiest to miss if you only copy the first lines.

    The same Image to prompt panel scrolled to the end of the brief, where small lowercase “mauv” logos are named on the bra and shorts, with Copied highlighted.
    The end of the extracted brief names the “mauv” logos. That mark stays with the pin. The shop you are about to invent needs a different one.

    This is the brief the extension wrote from the pin, quoted in full:

    Vertical 9:16 realistic commercial activewear fashion photograph of one adult female model with medium warm brown skin, an athletic curvy build, dark wavy shoulder-length hair parted near the center, natural luminous makeup, softly flushed cheeks, groomed brows, and glossy neutral lips. She stands against a seamless warm light-gray studio background in a confident three-quarter pose, torso angled toward the camera, head turned and eyes looking toward the right edge. Her left hand lightly pinches the thin strap of a fitted dark slate-purple scoop-neck sports bra, while her other hand rests at her hip, creating an elegant asymmetrical silhouette. She wears matching high-waisted dark slate-purple biker shorts with a smooth matte stretch performance fabric, subtle panel seams, clean hems, and small lowercase “mauv” logos visible on the bra and shorts. Frame her from the top of the head to below the shorts with the legs cropped, using a slightly low camera angle and centered composition. Soft broad frontal studio lighting gives warm highlights, gentle shadows, realistic skin texture, crisp fabric detail, moderate contrast, and a polished premium e-commerce campaign finish.

    The useful part is the craft: a vertical commercial crop, a seamless warm gray studio, soft broad frontal light, a readable view of a matching set, crisp fabric detail. The part you owe the rewrite is the person — the medium warm brown skin, the dark wavy shoulder-length hair, the glance off to the right — and the brand. The “mauv” logos are in the brief because they are in the picture. They are not a logo you get to keep.

    A first collection is easier if you do not stop at one frame. On the same Pinterest page, the related sports pins already suggest a short color story: a black ribbed set, a pale sage set, a navy set, a darker black look. We ran Image to prompt on four of them, in the same way, and kept the briefs as a palette — not as faces to reprint.

    That last label is worth taking seriously. A pin is not automatically a photograph, and it is not automatically yours. Credit the people who posted these frames, steal the homework on light and color, and leave their faces — and anyone else’s mark — where you found them.

    A four-panel figure showing Image to prompt run on related sports pins by Kailainny, Aurely, linda, and Crazy Kushal, each with the extracted brief and the Copy button.
    Week 1, continued: the same extension, four related sports pins, four briefs. The faces stay with their pins. The color story comes with you.

    By the end of the week you should have a copied brief, a short list of colors and poses, and a clear decision about what will change: the model, the logo, and, in this example, the slate-purple of the original set.

    Week 2: Build a consistent model and a first catalog

    A catalog is easy to get wrong in both directions. If you keep the pin’s face, or the “mauv” wordmark, you do not have a shop; you have a reprint. If you only change the outfit and hope the model “gets” a new person from a paragraph, the face will drift from look to look, and a shopper will not believe it is the same collection.

    So we changed the person and the brand, then locked both.

    The new character is a fictional woman in her late twenties with light olive skin, a defined athletic build, and a sleek high dark-brown ponytail. She is not the woman in the Kemularia pin. The wavy shoulder-length hair, the medium warm brown skin, and the original features stay with the pin. The shop is SOLVA, a name we invented; a small white wordmark sits on the waistband where the source brief had called for “mauv.”

    Open Orauria Studio:

    • Image, then Single
    • Aspect ratio, Resolution, and Quality: Adaptive
    • Model: TT Image 2.5
    • Generate with the send button, or Ctrl+Enter

    Each of the stills below cost about 0.02 credits on that setting.

    This is the rewritten brief we used for the first look, a dusty sage set in the same kind of studio. The opening matches the prompt visible in Studio; the close matches the composer. The middle follows the original pin’s pose and lighting, with the new face and the new mark written in:

    Vertical 4:5 realistic commercial activewear photograph of one adult female model in her late twenties with light olive skin, a sleek high dark-brown ponytail, a defined athletic build, and a calm closed-mouth smile as she looks into the camera. She is a fictional character, not the woman from any reference pin; do not copy another model’s face, hair, or body. She stands against a seamless warm light-gray studio background in a confident three-quarter pose, torso angled toward the camera. Her left hand lightly pinches the strap of a fitted dusty sage scoop-neck sports bra, while her other hand rests at her hip. She wears matching high-waisted dusty sage biker shorts in smooth matte stretch fabric, with subtle panel seams and a small white “SOLVA” wordmark on the waistband. Framed from head to mid-thigh, slightly low camera angle, soft broad frontal studio lighting, realistic skin texture, crisp fabric detail, polished premium e-commerce finish.

    That is Studio task #225195243.

    Orauria Studio showing the rewritten sage-set prompt, TT Image 2.5, task 225195243, and the first generated still of the fictional SOLVA model.
    The first look, generated in Studio on Image, Single, and TT Image 2.5. The face is not the face from the pin.
    A high-resolution studio still of the fictional SOLVA model in a dusty sage sports bra and matching biker shorts, with a small white SOLVA wordmark on the waistband.
    The first catalog still: a dusty sage set, a new face, a fictional mark. This is the frame we attached as a reference for every look that followed.

    Keep that still. In the composer, attach it with the plus control beside the prompt so the next jobs are not guessing at a face from text alone. Leave the thumbnail there, change only the outfit and the setting, and say, plainly, that you want the same model as the reference.

    The Orauria Studio composer with the sage still attached as a reference thumbnail, Aspect ratio, Resolution, and Quality set to Adaptive, and TT Image 2.5 at about 0.02 credits.
    The difference that keeps a catalog consistent: the first still is attached in the composer, on Image, Single, and Adaptive, with TT Image 2.5. The brief on screen is already the next look — a black ribbed set — not a second guess at the face.

    From there, the rest of the week is a short, repeatable loop. Same model, same wordmark, new clothes:

    • A black ribbed set, both arms raised against a white wall with long diagonal sunlight — task #225200376, the pose the Kailainny pin had taught
    • A cream long-sleeve crop and matching leggings — task #225204552
    • A navy sports bra and navy leggings, this time with an open smile — task #225207213, the color the linda pin had suggested
    • A packed-order flat lay on warm linen: the sage set, the black set, a kraft SOLVA box, a thank-you card, and a shipping label — task #225210039

    You do not need a dozen looks for a first drop. Five frames are enough to prove the person comes back, the mark holds, and an order can be photographed as well as a model can.

    A six-cell catalog spread titled Five frames, one fictional shop: dusty sage set, black ribbed set, cream long-sleeve set, navy set, a packed SOLVA order, and a demo brand card.
    The first SOLVA collection, assembled from five Orauria Studio stills of the same fictional model, plus a demo brand card so the grid stays complete.

    Week 3: List the products and post

    The catalog gets you the pictures. It does not get you the business. A real shop still has to do the unglamorous work: actual garments, sizes, a way to take payment, a way to ship, and a line that tells a shopper the images are AI-generated. None of that is optional because the stills came out well.

    In this example, the first drop is four sets and the packed-order photograph that can sit on a shipping or “in the box” page. We priced the short sets at $38 and the long-sleeve or legging sets at $42 — ordinary mid-range activewear numbers, not a fantasy margin, and not a price we charged anyone. Then we treated Instagram and TikTok as the shop window, with the same model in every frame so the account looks like one collection rather than a moodboard.

    The post below is an illustration of how that window could look for a demo account, solva.active.demo, using the black ribbed set. The likes, the comments, and the “18.7K others” are fictional. The caption on the post, and the small Illustration label under it, say so.

    Illustration of a realistic Instagram-style post for the demo account solva.active.demo, showing the black ribbed SOLVA set, a filled heart, the line Liked by mira.lane and 18.7K others, several natural English comments, a caption that notes it is an illustration, and a small Illustration label.
    Illustration. A demo post of the black ribbed set, with fictional engagement and comments. The likes and comments are not a result we got, and the caption on the post marks it as an illustration.

    If you use these images to sell, say that they are AI-generated, in the caption, on the product page, or both. “AI-generated catalog images of a fictional model” is clearer than a mood that implies a sitting you did not have. Some platforms and advertising rules expect that disclosure; even when they are quiet, the customer deserves it.

    Week 4: Orders, up to a first $1,000

    This is the part that is easiest to overclaim, so here is the honest version.

    If the clothes exist, the listings are live, and people start to buy, a very small first month can be counted in ordinary units: a few dozen orders, a mid-thirties average ticket, a total that crosses $1,000 without anyone becoming a phenomenon. In this example we mapped that as 28 orders, an average of $36.14, and $1,012.00 in total sales over 30 days. The short sets at $38 and the long sets at $42 get you close to that average on their own; a couple of single-piece or discounted tickets would explain the rest. It is arithmetic, not a forecast.

    The dashboard below is an illustration of that window for the same fictional shop. Weeks 1 and 2 are catalog work, so the chart stays at zero until the listings go up. The first orders arrive on day 16. The table shows eight of the 28. The small Illustration label sits under the frame on purpose.

    Illustration of an unbranded store dashboard for the fictional shop SOLVA, showing $1,012.00 in total sales, 28 orders, a $36.14 average order, a 30-day chart that stays flat until day 16, and a recent-order list, with a small Illustration label.
    Illustration. A demo sales window for SOLVA — $1,012 over 30 days, 28 orders, a $36.14 average. These are not figures from a live checkout. They are a worked example of how a small first month could look if the garments exist and people buy them.

    Pictures do not ship products. The extension and Studio can get you a catalog in a week. They cannot invent inventory, a return policy, or a customer who actually receives a parcel. If you do not have the clothes, you do not have $1,000. You have a lookbook.

    A responsible note, before you publish or sell

    Two rewrites are the point of this workflow, and both have to happen before the first listing.

    First, change the face. A trending pin of a model is not a model release. It is not permission to reprint that likeness on a product page, in a paid ad, or on a shop grid, even if you change the shorts. The SOLVA model is a generated character, not the woman in the Kemularia pin, and not the women in the related frames.

    Second, change the mark. The extracted brief named “mauv” because the logos were in the photograph. That is useful information. It is not a license. We replaced it with a fictional wordmark, SOLVA, and we would do the same with any other brand that happened to be readable in a pin.

    If you sell, disclose that the catalog images are AI-generated. Keep the styling adult and commercial, as these briefs already ask. And if a pin is already labelled AI modified, as Crazy Kushal’s was, believe the label. You are looking at a picture of a picture, not a sitting you can claim.

    What this playbook is not

    It is not a sales report, and it is not an income guarantee. We are not going to borrow the pin’s like count, or pretend that $1,012 landed in a checkout we run. The mockups’ engagement and the dashboard totals are illustrations, labeled as such. It is not a shortcut around the face rewrite or the logo rewrite. If the woman in the sage set is still the woman from the pin, or if the waistband still says “mauv,” you do not have a shop yet. You have a reprint with a new backdrop. And it is not a substitute for making, sizing, and shipping a real garment. The catalog is the start of the month. It is not the month.

    Start here

    Install AI Assistant Copilot – Orauria from the Chrome Web Store, find an activewear pin that is really a clothing picture, and write a fictional model and a mark you actually own. Generate the first look in Orauria Studio. Attach that still as a reference. Then build a short catalog from that same face, not from the original portrait, and only count a dollar when a real order can ship.

    Start here: orauria.com, and the Chrome Web Store listing for AI Assistant Copilot – Orauria.
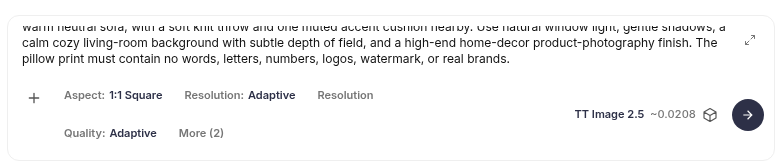
  • What Orauria AI Assistant Does in Your Browser

    What Orauria AI Assistant Does in Your Browser

    Most people who work on the web keep an AI chatbot open in another tab. They copy a paragraph, switch tabs, paste it, write a prompt, wait, copy the answer, switch back, and paste again. Orauria AI Assistant is a Chrome extension that removes most of those trips. It opens an AI side panel next to whatever page you are reading, so you can chat, rewrite a selection, ask about the page, snip part of the screen, generate an image or a video, and keep notes without leaving the tab. This guide walks through what it actually does, who it suits, how to set it up, and how to get better answers from it over a few weeks.

    Everything below about the extension comes from three public sources, checked on November 12, 2026: the Orauria AI Assistant product page, the Chrome Web Store listing (version 0.4.4, updated October 22, 2026) and the extension privacy policy. The story is an illustrative example, not a customer case study. The laptop screens in the photos are real screenshots from the store listing, placed onto the photos; the sample page in them is a demo product page.

    Key takeaways. Orauria AI Assistant is a side panel for Chrome that also installs on Microsoft Edge from the same store listing. You sign in with Google to your Orauria account, and AI usage is billed as credits from your Orauria wallet, the same wallet used by Orauria Studio. It offers multi-model chat (the product page names GPT, Claude and Gemini), right-click Ask, Rewrite, Translate and Summarize on selected text, an optional Page toggle that attaches the page URL, title and description, screen snips, image and video generation, rich notes with AI rewrite, and a Clipboard History stored on your device. The store listing also describes bilingual video subtitles and an optional New Tab daily brief that is off by default.

    Over-the-shoulder view of an online shop owner working on a laptop showing the Orauria AI Assistant side panel chat next to a product page (real store screenshot)

    Twelve tabs and one product launch

    Meet Mai. She is an example character: a Vietnamese woman in her early thirties who runs a small online linen clothing shop from a studio in Hanoi. She sells through her own site and two marketplaces, writes her own product descriptions in Vietnamese and English, answers customers in chat, and checks what similar shops are doing before every new collection.

    On a launch week, her browser looks like this: three marketplace seller dashboards, a supplier’s fabric page, two competitor product pages, a Google Doc with draft descriptions, her email, a translation tool, a chatbot tab, and an image tool for banner ideas. Twelve tabs, and the chatbot sits in the middle of all of them. Every time she wants help, she copies text out of one tab into the chatbot and back again. When she asks the chatbot about a competitor page, she has to paste the whole page or describe it, because the chatbot cannot see where she is.

    The before feeling is not that AI is useless. It is that using AI costs a context switch every time, so she uses it less than she could. Small jobs, like tightening one sentence or translating one customer message, do not feel worth the trip.

    The after picture, which this guide works toward, is simple. The assistant lives in a panel on the right side of the browser. On a competitor page, she turns on Page context and asks what the page promises. On her own draft, she highlights a sentence and picks Rewrite from the right-click menu. When a customer writes in English, she highlights the message and picks Translate. Her notes and the snippets she copied during research stay in the same panel. The chatbot tab is gone, and most small jobs take one click instead of six.

    Over-the-shoulder view of an online shop owner working on a laptop showing the Orauria AI Assistant right-click menu with Ask, Rewrite, Translate and Summarize (real store screenshot)

    What a better week looks like, and how to measure it

    It is tempting to promise numbers like “save ten hours a week”. We will not, because we have no measured data for your work, and neither does any honest vendor. What you can do is measure your own week before and after, with three simple checks.

    1. Count the round trips

    For one normal day, keep a tally every time you copy something into an AI tab and copy the answer back. That number is your baseline. After a week with the side panel, count again. The goal is not zero; some jobs still belong in a full chat window. The goal is that small jobs, such as one sentence, one message or one paragraph, stop needing a separate tab.

    2. Track the jobs you used to skip

    Write down the small tasks you usually do not bother asking AI for: translating a short customer message, checking the tone of a reply, summarizing a long supplier email, turning a product page into three bullet points. If the panel is working, some of those move from “skip” to “done in a click”. This is often the bigger win than speed.

    3. Watch your credit spend

    Because the extension bills your Orauria wallet, you can see what your usage costs. Orauria credits are top-ups, not a subscription. On the pricing page on November 12, 2026, packages ran from $5 to $100, with bonus credits on larger packages, and each generation shows an estimate before you submit it. Note what one ordinary week costs you, then decide whether it is worth it. We do not list per-action prices here because the extension pages do not publish them; models differ in cost and the price can change.

    Keep the three numbers in a note. After two or three weeks you will know, from your own data, whether the panel earns its place in your browser.

    Over-the-shoulder view of an online shop owner working on a laptop showing the Orauria AI Assistant chat panel with Read page and Page toggle (real store screenshot)

    How the side panel works

    Orauria AI Assistant is built as a Chrome side panel (the product page calls it “Side panel · MV3”, meaning it uses Chrome’s current extension platform). It opens beside the page and stays there while you scroll, switch tabs or read. Here is what each part does, in plain terms.

    Chat with a choice of models

    The main view is a chat. Replies stream in as they are written, and you can keep several conversations. The product page says you can chat with GPT, Claude and Gemini, and the model picker loads the list from Orauria’s APIs, with fallbacks if the list fails. In the store screenshots the model chip reads gpt-4o, and there are two tabs, Chat and Agent (marked New). Conversation history is stored on your device, in the browser’s IndexedDB storage, according to the store listing.

    Selection actions

    Highlight any text on a website, right-click, and you get four actions: Ask, Rewrite, Translate and Summarize. The result appears in the side panel. This is the feature most people use first, because it fits into what they already do: read something, want help with that exact piece.

    Page context and page tools

    A toggle labelled Page attaches the current page’s URL, title and description to your question, so the answer knows where you are. The store listing also mentions tools for the active tab, such as summarizing the page and extracting structured insights, with results shown in chat for you to review. The chat screenshot shows quick buttons for Search, Read page and Ask selection.

    Snips, images and video

    You can capture a region of the page and send it to chat as an image when you need help with something visual, or attach an image directly. Separately, you can generate images and videos from the panel; those jobs are billed to your Orauria credits.

    Notes and Clipboard History

    The panel has a rich-text notes editor where you can ask AI to rewrite a whole note or only the part you selected. Clipboard History saves text you copy so you can find and reuse it later. Both are stored locally. One thing to know before you switch Clipboard History on: according to the privacy policy, it can record text you copy in other apps too, while Chrome is running, so do not use it for passwords or other secrets.

    Where your data goes

    The privacy policy is specific. Chats, notes, clipboard items and settings stay on your device by default. When you send a chat message or run a selection action, the request goes directly to a chat API at api.lk888.ai. Sign-in, credits, the model list, and image or video jobs go to orauria.com. Page context is only attached if you turn on the Page toggle. If your work involves confidential client data, read the policy before you start and set a rule for what you will and will not send.

    Over-the-shoulder view of an online shop owner working on a laptop showing the AI Assistant and Copilot Orauria listing on the Chrome Web Store (real page capture)

    Setting it up in five minutes

    The setup has four steps. A detailed walkthrough with screenshots and troubleshooting has its own guide in this series; here is the short version.

    1. Install from the Chrome Web Store. Open the official listing (it appears under the name “AI Assistant & Copilot – Orauria”) and click Add to Chrome. On Microsoft Edge, open the same listing and click Get. Chrome shows the permissions the extension asks for; read them before you confirm.
    2. Pin the icon. Click the puzzle-piece Extensions icon in the toolbar and pin Orauria AI Assistant so the panel is one click away.
    3. Sign in with Google. Open the side panel and choose Continue with Google. This connects to your Orauria account and syncs your credit balance. If you already use Orauria Studio, it is the same account and the same wallet.
    4. Try one thing on a real page. Highlight a paragraph on any site, right-click, and choose Summarize. If the result appears in the panel, you are set.

    Common pitfalls

    • “401” errors. The product page says a 401 means you need to sign in again. Open the panel and continue with Google.
    • “402” errors. A 402 means you are out of credits; the product page sends you to Pricing to top up.
    • Answers ignore the page. Check that the Page toggle is on. Without it, the model only sees what you type or select.
    • Too much in Clipboard History. If you copy passwords or one-time codes, clear those items or keep Clipboard History off on that machine.
    • Wrong account. Your session is stored in that browser. On a shared or work computer, sign out from the panel when you are done; the privacy policy says signing out clears the local session.
    Over-the-shoulder view of an online shop owner working on a laptop showing a brief saved in Orauria AI Assistant Notes (real store screenshot)

    From v1 to v3: how Mai’s prompts improved

    Having the panel is step one. Getting answers you can use without heavy editing takes a few rounds. Here is how Mai’s use evolved over three weeks, as an example of the pattern.

    v1: generic asks

    In week one, Mai used the panel the way she used her chatbot tab. On a competitor’s product page she asked, “Summarize this page.” The answer was accurate but bland: a paragraph that repeated the product description. She also used Rewrite on her own drafts with no instructions, and the rewrites came back in a generic marketing voice that did not sound like her shop.

    v2: page context plus a clear output

    In week two she turned on the Page toggle and asked for a specific shape of answer: “From this product page, list the three main claims the seller makes, the price, and anything about fabric or care. Use bullet points.” Now the answer was something she could compare across three competitor pages. For her own descriptions, she stopped using bare Rewrite and instead highlighted a paragraph, chose Ask, and wrote, “Rewrite this in a calm, warm voice, under 60 words, keep the fabric details exact.”

    v3: a saved brief in Notes

    In week three she wrote a short brand brief in the panel’s Notes: who her customers are, the words she likes (soft, breathable, everyday), the words she avoids (luxury, premium), and her standard product description structure. Before writing a new description, she copied the brief from Notes or Clipboard History into the chat with the product details. She also kept a small checklist note for competitor research, so every page got the same questions. The descriptions now needed one light edit instead of a rewrite.

    What changed was not the tool. It was that every request carried the context the model needs: where she is, what shape of answer she wants, and what her brand sounds like. That is the habit worth copying. Always read the output before you use it; AI answers can be wrong, and claims about fabric or care should be checked against your own product facts.

    What to try this week

    • Install the extension from the Chrome Web Store, pin it, and sign in with Google.
    • Tally your AI round trips for one normal day before you start, so you have a baseline.
    • Use right-click Summarize or Translate on three real pieces of text you would usually skip.
    • On one competitor or supplier page, turn on Page and ask for a fixed list of facts in bullets.
    • Write a five-line brief in Notes for your most common writing task, and paste it in front of your next request.
    • Read the privacy policy once and decide whether Clipboard History stays on.

    The extension is one part of Orauria. If you sell products online, the same account and credits work in Orauria Studio; see what Orauria is and how the AI product image generator works. If your team needs something the panel does not do, such as a custom AI tool wired into your own systems, Orauria builds those too: see AI outsourcing. To start, open the Orauria AI Assistant page.

  • How to Set Up MausBot, the Open-Source Grok Bot Alternative

    How to Set Up MausBot, the Open-Source Grok Bot Alternative

    Orauria’s blog has spent the last few weeks on Grok Bot: what Grok Bot is, how to run a multi-bot team, and how to teach a Bot a task by showing it once. Many readers asked a follow-up question: is there an open-source version I can run on my own machine, with the AI subscriptions I already pay for? The best-known answer right now is MausBot. This guide explains what MausBot is, how it compares to Grok Bot at the level of ideas, and how to set it up, first on your laptop and then on a small virtual server that never sleeps.

    Everything about MausBot below comes from its public website mausbot.com, its documentation at docs.openmausbot.com, and its GitHub repository, all checked on 12 November 2026. Orauria has no partnership with MausBot, xAI, or any hosting provider mentioned here, and no affiliate links. We have not run the full server setup below end to end ourselves; the commands are quoted from the official docs, and the project moves fast (the latest desktop release on the day we checked was v0.1.154), so check the docs before you copy anything. The screens on the laptops in this article are MausBot’s own published screenshots from its website and docs, plus one terminal rendered from the documented commands.

    Key takeaways. MausBot is a free, open-source (Apache 2.0) desktop app where you run a team of AI bots in a chat interface. It does not sell you a model: each bot runs on an agent CLI you already have, such as Claude Code, Codex or the Grok CLI, with your own login. It runs on macOS, Windows and Ubuntu, and keeps its data in a folder on your own disk. Bots on a laptop stop when the laptop sleeps, so for always-on routines you either move the MausBot server to a Linux VPS (the docs give a one-command installer for Ubuntu) or pay for the optional MausBot Cloud. Start with one bot, one engine, and one small task.

    Over-the-shoulder view of a freelancer working on a laptop showing the MausBot desktop app chat (MausBot published screenshot)

    A laptop that kept falling asleep on its bots

    Meet Khoa. He is an example persona, not a client: around thirty, a freelance growth marketer in Da Nang who looks after four small clients. Every Monday he pulls numbers into a report for each one, checks what competitors changed on their pricing pages, and writes follow-up emails to leads who went quiet. He already pays for a Claude subscription and a ChatGPT subscription, and he liked the idea of Grok Bot: a roster of named bots, each with a job, that come back when something needs him.

    What held him back was the model question. He wanted his research bot on one model and his writing bot on another, using the accounts he already had. So he installed MausBot on his laptop, connected Claude Code, made a “Monday Report” bot and a “Follow-up” bot, and for a week it felt like a small team. Then he noticed the gap: the routine he scheduled for 7:00 on Monday had not run, because his laptop had been closed in his bag. The MausBot FAQ says this plainly: bots hosted on a computer cannot work while it is asleep, offline or shut down.

    The “after” picture is not dramatic. Khoa moves the MausBot server onto a small Ubuntu VPS, signs his engines in there once, pairs his laptop and phone to it, and his bots keep their schedule while his laptop is closed. He still reviews every client email before it goes out. The difference is that the work is waiting for him, instead of him waiting for the work. That is the setup this guide walks through.

    Over-the-shoulder view of a freelancer working on a laptop showing a new MausBot bot asking what it should help with (MausBot published screenshot)

    What MausBot is, and how to tell whether it is working for you

    In its own words, MausBot is “your own team of AI bots, in a chat app. Free, open source, and running on your own machine.” The site calls it “the open source Grok Bot alternative”, and the docs say it has no tie to xAI. It is made by Omkar Satpute and Milind Soni with outside contributors. The GitHub repository was created in August 2026 and showed more than 21,000 stars when we checked; installer files still use the project’s earlier name, OpenMausBot.

    The core ideas, as documented:

    • Bots as contacts. Each bot has a name, a job, instructions, a working folder and its own chat. You can pin, duplicate, hide or group them like a messaging app. A new install starts with one bot called MausBot that acts as your chief of staff.
    • Bring your own brain. Bots run on agent CLIs installed on your computer, using your logins: Claude, Codex, Grok, Cursor, GitHub Copilot, Kimi, Droid, Antigravity, OpenCode, Qwen, Hermes, Pi and others, plus API connections such as OpenRouter or Mistral. Each bot can use a different engine and model.
    • Local first. A single local server on 127.0.0.1 runs every agent process, and transcripts, keys and events live in ~/.openmausbot. The FAQ is careful to add that your prompts still go to the model provider you choose.
    • Optional extras. Connected apps through Composio, a computer for each bot, automations on a schedule or webhook, voice calls with your own OpenAI key, and Android and iOS companion apps shared through the project’s Discord.

    How it compares to Grok Bot, conceptually. Both give you a roster of named bots that take on jobs, use apps and computers, run routines, and ask before risky actions. The differences are about who supplies what. Grok Bot is a hosted product from xAI where the model and the cloud computer are provided for you. MausBot is software you run: you pick the engine per bot and pay that provider directly, and you decide where it runs (your laptop, your server, or the paid MausBot Cloud). MausBot also documents a Move from Grok Bot import: you send each Grok Bot Bot a message, it writes out its own instructions, skills, routines and memories, and MausBot reads that file. Chats, files, passwords and app sign-ins do not come over, and imported routines arrive paused.

    Who it suits. People who already pay for one or more AI coding agents, are comfortable installing a CLI and signing it in, and want control over models and data. If you have never opened a terminal, the desktop app is still approachable, but the server part of this guide is technical.

    How to measure whether it works for you. We are not going to give you productivity numbers; we have none we could verify, and your results depend on your tasks and model. Keep a simple log for two weeks instead: how many tasks each bot finished without you redoing them, how long your review took, how many scheduled runs actually ran, how many approval requests you got and how many you rejected, and what your provider bill or usage meter says. If a bot’s output needs heavy rework every time, its instructions or its model are wrong, not just its schedule.

    Over-the-shoulder view of a freelancer working on a laptop showing the MausBot model picker where each bot can use a different engine and model (MausBot published screenshot)

    How MausBot works: engines, the harness, computers and approvals

    It helps to picture four layers.

    1. The engine (the brain). MausBot does not proxy every message through its own model account. It starts the agent CLI you chose for that bot and lets it run its own loop: read the request, plan, call tools, look at the results, and continue until it has an answer or needs you. The Agent engines page lists each engine and how it signs in. Claude is described as having strong support for tools, approvals, sessions and local computer use; many others connect through ACP, a protocol for talking to coding agents.

    2. The harness (the switchboard). One server, listening on 127.0.0.1:8799 by default, owns every agent process and turns each provider’s native output into one event stream that the app shows as chat messages, tool progress, approval cards and results. The docs are firm that this port should never be exposed to the internet directly. Remote access goes through pairing (more on that in the setup section).

    3. The computer (the hands). A bot can work with no computer at all, on the computer running MausBot, in a Local VM (a Docker or Podman desktop container on the same machine, 2 CPUs and 4 GiB of memory by default), on a Boat cloud computer (a third-party paid service from boat.dev), or in a hardened container on your own Linux VPS over SSH. You choose per bot. A live screen preview does not give a bot control by itself; local input needs a separate opt-in.

    4. Apps, automations and approvals (the rules). Connected apps such as Gmail, Slack, GitHub and Notion come through Composio with OAuth. Automations turn a prompt into recurring work on a schedule, on a webhook, or when something happens in a connected app; the site says Gmail is checked every 15 minutes. Supported actions show approval requests in chat. The FAQ adds an important caveat: approval coverage depends on the engine and tool, so it is not a guarantee that every action will pause. That is why your instructions should still say “draft, do not send” for anything that leaves your business.

    Two more pieces matter for planning. Memory and skills: bots keep a memory file and can have skills, which is what the Grok Bot import fills in. Human in the loop: when a bot needs you to sign in to a website, it shows a “Sign in needed” card and lets you take control of its browser instead of asking for a password in chat.

    Over-the-shoulder view of a freelancer working on a laptop showing a terminal with the documented MausBot VPS installer, check, pairing and update commands

    Step-by-step setup: desktop first, then a server that never sleeps

    Do the setup in two stages. Get one bot working on your own computer first; only then move it to a server. Debugging an engine login and a server at the same time is no fun.

    Stage 1: the desktop app

    1. Download. From mausbot.com/download: a .dmg for Apple silicon or Intel Macs, a per-user .exe for 64-bit Windows, or a .deb (recommended) or AppImage for x86-64 Ubuntu. On Ubuntu the docs suggest sudo apt install ./OpenMausBot-amd64.deb. The Windows installer is not code-signed yet, so SmartScreen may warn about an unknown publisher; check that the file came from the official releases repository before you continue.
    2. Connect one engine. Install one agent CLI from its official provider, run it once in a terminal and finish its sign-in, then restart MausBot. The onboarding check, or App settings → Agent engines, shows what is installed and what is missing. If a bot later reports a 401, finish that CLI’s own login again; authentication belongs to the CLI.
    3. Create a bot. New or share → New bot (Ctrl+N, or ⌘N on a Mac). Give it a name, pick the engine and model, and set a dedicated working folder if the job touches files; the folder becomes its starting context and limits accidental edits elsewhere.
    4. Send one small task. The docs’ own starter is a good test: ask it to plan two hours tomorrow morning for emails, a project update and meeting prep. Review the answer before you give it anything bigger.

    Stage 2: move the MausBot server to a VPS

    The Deploy on a VPS guide moves the whole MausBot server and its agents to a Linux machine, so bots keep working while every laptop is closed. It estimates about twenty minutes. Here is the documented path, condensed.

    Pick a server. For the one-command installer: a fresh Ubuntu 22.04 or 24.04 server, x86-64, at least 2 CPU cores, 4 GB of memory (8 GB suggested) and 20 GB of free disk, with ports 80 and 443 free. The docs mention Hetzner, DigitalOcean and Lightsail as fine choices, and record a launch check on a Hetzner CX43. Our companion guide compares VPS providers for MausBot, including Asia and Vietnam latency.

    Pick a way in. The docs describe three:

    • A. Public address, no domain. npx openmausbot login once (an emailed code reserves an address), then npx openmausbot serve --tunnel, which connects a Cloudflare tunnel. Needs Node 24 or newer.
    • B. Your own domain, with Docker and Caddy. Point an A record such as maus.example.com at the server. This is what the one-command installer sets up.
    • C. Your Tailscale network only. npx openmausbot serve --tailscale. Nothing is public, which the docs call a very good property for a server that can run tools.

    Run the installer (path B on Ubuntu). Check first; the check changes nothing:

    curl -fsSL https://raw.githubusercontent.com/milind-soni/OpenMausBot/main/deploy/install.sh | sudo sh -s -- --check --domain maus.example.com

    Then install:

    curl -fsSL https://raw.githubusercontent.com/milind-soni/OpenMausBot/main/deploy/install.sh | sudo sh -s -- --domain maus.example.com

    The installer checks the OS, CPU, memory, disk, Docker version, ports, DNS, outbound access and the bots’ sandbox before touching anything, asks before installing Docker, puts everything under /opt/openmausbot, and ends with MausBot answering on your domain over HTTPS. It sends no telemetry, according to the docs. As always with a curl | sh command, read the script first if you are unsure.

    Sign in as the first admin. In a terminal the installer prints a one-time link. To make one yourself:

    cd /opt/openmausbot && sudo docker compose exec omb openmausbot pair --label "First admin"

    Open the link, or paste it into the desktop app under + → Connect to a server. Pairing is the login: there is no password. A pairing code works once, for 10 minutes; a paired device stays signed in for 30 days, renewed on use up to 180 days.

    Sign the engines in on the server. The server runs the same CLIs as your laptop, signed in once on the server. On path B you run them inside the container, for example docker compose exec omb claude. For Codex on a headless server, the docs use codex login --device-auth.

    Optional: give bots a browser. Path B ships Chrome in the image; turn the browser on under Settings → Experimental and per bot. On Ubuntu 24.04 with paths A or C, Chrome may report “No usable sandbox!”; the docs give a narrow AppArmor fix and warn against --no-sandbox.

    Keep it updated and backed up. sudo /opt/openmausbot/update.sh copies your data, moves to the stable version, checks health, and rolls back if the new version fails. Apps are built to work with servers that were stable within the last 90 days, so update at least that often. Back up /opt/openmausbot/data with the documented commands and keep the archive private: it contains every chat, key and session.

    Pitfalls worth knowing

    • Never publish port 8799 yourself or put a proxy in front that rewrites the Host header. Use one of the three ways in.
    • Engine logins live in the service user’s home (for example ~/.claude and ~/.codex); keep that home when you rebuild or upgrade.
    • The one-command installer is x86-64 only. ARM64 images exist for the Docker path by hand, with at least 4 GB of memory.
    • Building your own image needs about 6 GB of memory; on smaller servers use the published image.
    • Browsers on cloud computers do not open Reddit, per the docs, because Reddit blocks bots browsing from cloud IPs.
    • Want only a remote desktop for one bot, while MausBot stays on your laptop? That is a different setup: Your own VPS (BYO), which controls Docker on an x86_64 server over an SSH alias.

    Do not want to run a server? MausBot Cloud is the paid hosted option: Starter $15, Pro $49 and Max $99 a month in USD (prices on mausbot.com on 12 November 2026), each with an always-on cloud machine and a monthly allowance of cloud-computer hours. Model usage is not included on any plan; you still bring your own Claude or ChatGPT account or an API key.

    Over-the-shoulder view of a freelancer working on a laptop showing the MausBot Automations schedule screen (MausBot published screenshot)

    From v1 to v3: tightening your first bot

    Here is how Khoa’s “Follow-up” bot might evolve. The prompts are examples to adapt, not a tested recipe.

    v1: a one-off chat. “Look at these five leads and draft a follow-up for each.” The drafts were fine, but every Monday he pasted the same context again, and the tone drifted between models.

    v2: a real bot with a job. He gave the bot a working folder with a leads.csv and a tone.md, and wrote instructions: “You draft follow-ups for leads with no reply in 7 days. Read leads.csv and tone.md. Write each draft into drafts/ with the lead’s name. Never send email. List anything you were unsure about at the end.” He kept the bot on Ask so file changes waited for his approval, chose one model and stuck with it for two weeks, and logged how many drafts he sent with only light edits.

    v3: scheduled on the server, with a review step. Once v2 was steady, he moved the bot to the VPS and created an automation for weekday mornings at 8:00. He connected Gmail through Connected apps so the bot could read replies, but kept the rule that it only drafts; he reads and sends. He added a second line to the instructions: “If a lead replied, move them to replied.csv and do not draft.” When he wanted to try another model, he duplicated the bot, switched the engine on the copy, and compared a week of drafts side by side instead of changing the working bot.

    What changed between versions was not the model. It was the context the bot could rely on, the boundary on what it may do, and a schedule that does not depend on a laptop being open. If you already have Grok Bot Bots with good instructions and skills, the Move from Grok Bot import is a shortcut to v2; remember to turn each routine off in Grok Bot before you turn it on in MausBot, so it does not run twice.

    What to try this week

    Install the desktop app and connect one engine you already pay for. Create one bot with a dedicated folder and a narrow job, and give it the morning-plan starter task. Use it daily for a week and keep the log described above. If you find yourself wishing it ran while your laptop was closed, rent a small Ubuntu server, run the installer with --check first, pair your laptop and phone, sign your engine in on the server, and move that one bot. Keep anything that sends email, posts or pays behind your own approval, whatever the approval cards promise.

    For the hosting decision, read our VPS provider comparison for MausBot. For ideas on what to give your bots, see the multi-bot team guide, webhook-driven lead triage, and how MCP, cloud computers and tools fit together; the patterns carry over even though those posts use Grok Bot. If you want a team of agents wired into your own systems, with the hosting, approvals and monitoring handled for you, send Orauria a brief and we will help you scope it.

  • How to Choose a VPS for MausBot and Other Self-Hosted AI Agents

    How to Choose a VPS for MausBot and Other Self-Hosted AI Agents

    In our MausBot setup guide we showed how to move MausBot, the open-source Grok Bot alternative, from a laptop to a small Linux server so your bots keep working while the laptop is closed. The next question is practical: which server? This article compares virtual server (VPS) providers that fit this kind of AI agent, on specs, price, regions, latency from Asia and Vietnam, ease of setup, and whether you need a GPU, and then suggests picks by use case.

    How we built this comparison: requirements come from MausBot’s documentation (Deploy on a VPS, Cloud computer and your own VPS, Local VM). Prices and specs come from each provider’s official pricing page or public pricing API, checked on 12 November 2026, in each provider’s own currency and excluding tax. Prices change, regions sell out, and some plans vary by location, so treat every number here as “as of Nov 2026” and confirm before you buy. We did not benchmark these servers, and we give no latency figures, because we could not measure them fairly from every Vietnamese network; the article shows you how to measure your own. Orauria has no partnership or affiliate deal with MausBot or any provider below.

    Key takeaways. A MausBot server does not need a GPU, because the bots’ “brains” are cloud models reached through engine CLIs such as Claude Code or Codex. The documented minimum for the one-command installer is Ubuntu 22.04 or 24.04 on x86-64 with 2 CPU cores, 4 GB of memory and 20 GB of disk; 8 GB is suggested. That puts most readers in the 2 vCPU / 4 GB class, which costs roughly USD 20 to 24 a month in Singapore at Vultr, DigitalOcean, Akamai (Linode) and AWS Lightsail, and EUR 26.99 at Hetzner Singapore. Move to 4 vCPU / 8 GB when several bots work at the same time or browse the web. If you never want to touch a server, MausBot’s own Cloud plans start at USD 15 a month, without model usage.

    Over-the-shoulder view of a shop operations lead working on a laptop showing the MausBot Connected apps screen (MausBot published screenshot)

    The day the shop’s bots went quiet

    Meet Thu, an example persona rather than a client: mid-thirties, she runs operations for a small online clothing shop in Ho Chi Minh City. After reading about MausBot, she set up three bots on the office laptop: one that drafts replies to customer emails for her to approve, one that checks a supplier’s stock page every morning, and one that writes a short sales summary each evening. For a week it felt like having two extra people.

    Then the office laptop went home with a colleague over a long weekend, and nothing ran. On Monday, a freelance IT contact suggested “a proper AI server with a GPU” and quoted a price that made her wince. She was not sure whether she needed it, which region to pick when none of the big providers seemed to list Vietnam, or whether the cheapest European offer would feel slow from Saigon.

    What she needed was smaller and cheaper than the GPU quote: a 2 vCPU, 4 GB Ubuntu server in Singapore, the documented installer, and a habit of checking the bill once a month. The rest of this article explains how to reach that kind of decision for your own business, and when a bigger or different option is worth it.

    Over-the-shoulder view of a shop operations lead working on a laptop showing a terminal with the MausBot installer requirements and the documented --check and install commands

    What an agent server actually needs, and how to judge the result

    Start from what MausBot itself asks for. The one-command installer checks, before installing anything:

    • Ubuntu 22.04 or 24.04, x86-64, 2 CPU cores or more;
    • 4 GB of memory or more (8 GB suggested) and 20 GB of free disk;
    • Docker 24 or newer with the Compose plugin (it can install Docker for you after asking);
    • ports 80 and 443 free, a domain whose A record points at the server, and outbound HTTPS to the image registries and Let’s Encrypt.

    The docs’ own launch check ran on a blank Hetzner CX43, and the VPS guide says “2 CPUs and 4 GB of RAM is plenty” and names Hetzner, DigitalOcean and Lightsail as fine hosts. Three more numbers from MausBot’s site and docs help you size up:

    • Memory per working bot. MausBot’s Cloud pricing notes that a bot at work uses about 0.5 to 1 GB of memory. On a 4 GB server, that leaves room for a few bots working at the same moment, not dozens.
    • Desktops are heavier. If you run a Local VM desktop for a bot, each one gets 2 CPUs and 4 GiB of memory by default. Desktop-heavy work on the same machine pushes you to 8 GB or more, or to a separate computer such as a Boat cloud computer.
    • Updates need disk headroom. Container images, your data folder and the backups you keep all take space over time, so leave headroom beyond the 20 GB minimum. If you build MausBot’s image yourself, the docs say building needs about 6 GB of memory; on a smaller server, add swap or use the published image.

    Do you need a GPU? For MausBot with Claude, Codex, Grok or other hosted engines, no: the model runs at the provider, and your server only runs the harness, the CLIs, Docker and maybe a browser. A GPU only becomes relevant if you want to run open models locally on the server. That is a different project with different hardware, and it is out of scope here; we did not price GPU servers for this article.

    How to judge the result. Pick a few things you can check yourself after a month: did every scheduled routine run on time; how does the app feel from your phone on 4G; did the server ever run out of memory (check docker compose logs or the journal); what was the total bill including any extra bandwidth; and how long did updates and backups take you. If routines run and the bill is predictable, the server is good enough. Speed of replies depends mostly on the model provider, not on your VPS.

    Over-the-shoulder view of a shop operations lead working on a laptop showing the MausBot Computer panel for choosing where a bot's computer runs (MausBot published screenshot)

    How the pieces fit: three ways to host MausBot

    MausBot’s docs describe three hosting patterns, and they need different things from a provider.

    1. The whole MausBot server on a VPS. This is the “Deploy on a VPS” path from our setup guide. The harness, engine CLIs, chats, routines, connected apps and webhooks all run on the server, and your laptop, browser and phone connect to it after pairing. This is what you want if routines must run with every laptop closed. You need an x86-64 Ubuntu server for the installer (ARM64 images exist if you install the Docker path by hand).

    2. MausBot on your computer, a bot’s desktop on your VPS. The Your own VPS (BYO) backend keeps MausBot and its engine sign-ins on your computer, and only runs a desktop container on an x86_64 Linux server with Docker, over an SSH alias. It is useful for giving a bot an isolated computer to browse and click in, but it does not keep routines running when your computer sleeps. The docs warn that Docker access is root-equivalent on that server, so use a dedicated VPS and allow inbound SSH only.

    3. Managed: MausBot Cloud, or Boat for computers. MausBot Cloud runs your bots on an always-on cloud machine for you (Starter USD 15, Pro USD 49, Max USD 99 a month on 12 November 2026), with cloud computers included and model usage billed separately by your provider. Boat (boat.dev) is the third-party service MausBot uses for hosted cloud desktops; its site lists plans from USD 20 a month with a 7-day trial, and a “small” 2 vCPU / 4 GB sandbox at USD 0.018 an hour. Boat is for bot computers, not for hosting the MausBot server itself.

    Where latency matters, and where it does not. Most of a bot’s waiting time is spent on the model provider and on the websites it visits, both of which are far from you anyway. Latency between you and your server mostly affects how responsive the app feels, the live screen when you “take control” of a bot’s desktop, and webhooks from local services. For readers in Vietnam: none of the international providers below listed a data center in Vietnam on the pages we checked. Singapore is the closest region they all share, followed by places such as Tokyo, Osaka, Seoul, Jakarta or Mumbai depending on the provider. Vietnamese providers such as BizFly Cloud run servers inside the country. If you need data to stay in Vietnam, that matters more than milliseconds.

    Measure it yourself. Most providers bill by the hour. Create the smallest server in two candidate regions, run ping and mtr to each from your office and from your phone’s mobile network at a busy hour, then delete them. That costs little and replaces guesswork with your own numbers.

    Over-the-shoulder view of a shop operations lead working on a laptop showing a table of 2 vCPU / 4 GB VPS prices in Singapore and Helsinki as of 12 Nov 2026

    Provider comparison for MausBot (as of November 2026)

    The table compares the plan closest to MausBot’s documented baseline (2 vCPU, 4 GB) at each provider, in the region nearest to Vietnam where available. Prices are monthly, excluding tax, from official pages or public APIs on 12 November 2026.

    Provider and plan vCPU / RAM / disk Price per month Included transfer Asia regions listed
    Hetzner Cloud CPX22 (Regular Performance) 2 AMD / 4 GB / 80 GB NVMe EUR 26.99 in Singapore; EUR 16.99 Helsinki; EUR 19.99 Nuremberg 1 TB in Singapore; 20 TB in EU Singapore
    Hetzner Cloud CX23 (Cost-Optimized) 2 / 4 GB / 40 GB NVMe EUR 5.99 20 TB None (Nuremberg, Helsinki only)
    Vultr Regular Cloud Compute (vc2-2c-4gb) 2 / 4 GB / 80 GB USD 20 3 TB Singapore, Tokyo, Osaka, Seoul, Mumbai, Delhi, Bangalore
    Vultr High Performance (vhp-2c-4gb) 2 / 4 GB / 100 GB NVMe USD 24 5 TB Same as above
    DigitalOcean Basic Droplet 2 / 4 GiB / 80 GiB USD 24 4,000 GiB Singapore, Bangalore, Sydney
    Akamai (Linode) Shared 4 GB 2 / 4 GB / 80 GB USD 24 (USD 28.80 in Jakarta) 4 TB Singapore, Tokyo, Osaka, Jakarta, Mumbai, Chennai
    AWS Lightsail Linux 4 GB bundle 2 / 4 GB / 80 GB SSD USD 24 4 TB (half in Jakarta, Malaysia, Mumbai, Hong Kong) Singapore, Tokyo, Seoul, Jakarta, Malaysia, Mumbai, Hong Kong
    Oracle Cloud Always Free (Ampere A1, Arm) Up to 2 OCPU / 12 GB in total USD 0 within free limits Per OCI terms Your home region only
    Contabo Cloud VPS 4 4 / 8 GB / 100 GB SSD EUR 4.40 (EUR 5.50 incl. VAT on the page) Not confirmed Not confirmed on the page we read
    BizFly Cloud (Vietnam), Cloud Server “Gói Large” 6 cores / 4 GB / 100 GB 945,100 VND Not confirmed Vietnam
    MausBot Cloud Starter / Pro (managed) 2 shared / 2 GB; 4 shared / 4 GB USD 15 / USD 49 Not a VPS; includes cloud-computer hours Not stated

    Notes and caveats per provider.

    • Hetzner. Strong value in Europe, and MausBot’s docs used a Hetzner server for their launch check. In Singapore the same CPX22 costs more and includes far less traffic (1 TB versus 20 TB, with extra traffic at EUR 7.40 per TB there). The cheapest CX23 is EU-only, and Hetzner’s page showed several plans as currently unavailable when we checked.
    • Vultr. The lowest Singapore price for the 2 vCPU / 4 GB class in our list, and the widest choice of Asian regions. Figures come from Vultr’s public plans API; its pricing page did not render for our fetch, so confirm regional pricing at checkout.
    • DigitalOcean. Simple, flat pricing and a Singapore region. A good choice if you value documentation and a clean console.
    • Akamai (Linode). Same price class with two Singapore locations plus Jakarta (at a higher price), Tokyo, Osaka, Mumbai and Chennai, from Linode’s public API.
    • AWS Lightsail. Fixed monthly bundles inside AWS, with many Asian regions; note the halved transfer allowance in some of them. Mentioned by name in MausBot’s docs as a fine host.
    • Oracle Always Free. Free Arm capacity (1,500 OCPU hours and 9,000 GB hours a month, which Oracle equates to 2 OCPUs and 12 GB) in your home region. Two catches for MausBot: the one-command installer is x86-64 only, so you would follow the Docker path by hand with the ARM64 image; and the BYO-VPS desktop backend requires x86_64. Good for experiments, not our first recommendation for a business.
    • Contabo. Very high specs for the price. We could not confirm from the page we read whether Asian locations are available for this plan or what surcharge applies, so check before you buy.
    • Vietnamese providers. BizFly Cloud’s price list (excluding VAT) shows several tiers and tabs; the figure above is from the default tab of the page, and we could not confirm which CPU family or disk type it maps to. VNG Cloud, Viettel IDC and FPT Cloud also operate in Vietnam; we did not collect their prices. Choose a local provider when data residency or domestic network quality matters most, and check that Ubuntu 22.04 or 24.04 on x86-64 is offered.

    Ease of setup, in practice. Every option above offers Ubuntu images, so the MausBot installer runs the same way. The steps that differ are around the server: add your SSH key when creating it; open only ports 22, 80 and 443 in the provider’s firewall (or only 22 if you use the Tailscale path); create the DNS A record; then run the installer with --check first. Providers with hourly billing let you try, delete and retry without a monthly commitment.

    Over-the-shoulder view of a shop operations lead working on a laptop showing a terminal with the documented ssh my-vps and docker -H ssh://my-vps info commands and sizing notes

    Picks by use case, and how Thu’s setup evolved

    These are our suggestions based on the documented requirements and the prices above, not on benchmarks.

    • First always-on server for a small team in Vietnam or Southeast Asia: a 2 vCPU / 4 GB server in Singapore. Vultr is the lowest-priced in our list; DigitalOcean, Linode and Lightsail cost a little more and may suit you better if you already use them.
    • Several bots working at once, or bots that browse: step up to 4 vCPU / 8 GB, which matches the docs’ “8 GB suggested”. In our data that is USD 40 at Vultr (vc2-4c-8gb), USD 48 at DigitalOcean and Linode, or EUR 49.49 for Hetzner CPX32 in Singapore.
    • Lowest cost, latency not critical: Hetzner in Europe (CPX22 from EUR 16.99, or CX23 at EUR 5.99 when available). Measure it from your network first.
    • Data must stay in Vietnam: a Vietnamese provider, after checking OS, CPU architecture and support.
    • Free experiments: Oracle Always Free on Arm, if you are comfortable with the manual Docker path.
    • No server administration at all: MausBot Cloud. According to MausBot’s pricing page, Pro adds priority support and a free 30-minute setup call.
    • Isolated computers for browser-heavy bots: Boat, or a separate dedicated VPS through the BYO backend, rather than piling desktops onto your MausBot server.

    How Thu’s hosting might evolve. v1: bots on the office laptop; routines skipped whenever the laptop left the office. v2: a 2 vCPU / 4 GB Singapore server, created with an SSH key and a firewall allowing only 22, 80 and 443; the installer run with --check and then for real; her laptop and phone paired; a monthly reminder to run the update script and copy a backup off the server. She keeps the email bot on “draft only”. v3: after a month of logs, she sees memory close to full when the stock-check bot opens its browser while the others work, so she resizes to 4 vCPU / 8 GB rather than adding a GPU. She tries a Vietnamese provider on hourly billing for a week to compare how the app feels, and keeps whichever is steadier for her team.

    What to try this week

    Write down what your bots must do while your laptop is closed, and how many work at the same time. Create one hourly 2 vCPU / 4 GB Ubuntu server in Singapore at a provider you trust, and another in a second region or at a Vietnamese provider; ping both from your office and your phone, then delete the slower one. Run the MausBot installer with --check, fix anything it reports, install, pair your devices and sign your engine in. Put a monthly note in your calendar to update, back up and look at the bill. Re-check prices on the provider’s page before you commit, because the numbers in this article are a snapshot from November 2026.

    For the full installation walkthrough, read how to set up MausBot. For ideas on scheduled work worth hosting, see daily competitor price and stock monitoring and webhook-driven lead triage, and for the architecture behind agents, tools and cloud computers, this integration overview. If you would rather have the servers, agents and approvals set up and maintained for you, send Orauria a brief.

  • How to Build a Kidswear Catalog from One Pin—With One Fictional Character

    How to Build a Kidswear Catalog from One Pin—With One Fictional Character

    A kidswear catalog has a quiet problem that a grown-up fashion carousel does not. The clothes have to look like a set, and the child in them has to look like the same child, from the first pinafore to the last winter coat. If the face drifts, the lookbook falls apart. If you copy a face from a trending pin, you have a different problem entirely.

    This playbook uses one kids-fashion pin as a starting point, then builds a six-look catalog — and, if you want one, a kids’ fashion channel — around a single fictional character. The useful difference from earlier posts in this series is not a cleverer rewrite. It is a separate reference image, generated first, then attached in Orauria Studio so the same child comes back in every look. It is a workflow for selling children’s clothes and for growing a “for your little one” channel. It is not a sales report. We are not going to invent a unit we sold or a follower count we do not have.

    The reference is this pin by Little dream journey: a vertical 4:5 portrait of a young East Asian girl in a plush cream beret, two small side buns, a strand of pale pearls, and an ivory quilted jacket with a gray floral print, standing inside a black car, with a snowy yard, a Christmas tree, presents, and a small deer through the window. It is a tender, finished kids-fashion picture. It is also someone else’s child. The girl in the catalog we generated is a different, fictional 8-year-old, on purpose, in different clothes, in different settings. She is an AI character, not the child in the pin.

    The playbook at a glance

    1. Install the Chrome extension.
    2. Find a kids-fashion pin that teaches styling, light, or a seasonal mood — not a face to clone.
    3. Run Image to prompt and copy the brief.
    4. Do not use the pin’s child. Invent a fictional character and generate a clean reference portrait of her.
    5. Attach that reference image in Studio, then rewrite the brief as a catalog shot of the same girl.
    6. Generate the first look. Keep the reference attached, change only the outfit and setting, and build the rest of a six-look series.
    7. Assemble a catalog spread. If you are growing a channel, put the same character on a shop grid. If you are selling, disclose that the images are AI-generated.

    First, install the extension

    Image to prompt only works after you install the Chrome extension AI Assistant Copilot – Orauria. Get it from the Chrome Web Store before you go looking for a reference. Once it is on, you can right-click a pin and pull a prompt from it.

    Find a kids-fashion pin, not a face to copy

    A catalog rewards clothes you can read: fabric, cut, color, a full-length or a clear three-quarter, and a child who can wear more than one look. A single festive portrait can still be a good teacher. This pin already knows how to hold a child’s outfit in frame, how to keep the styling modest and practical, and how to give the clothes a finished seasonal atmosphere. Those are the useful parts.

    The original child should not travel into the catalog. Treat the pin as a starting brief, not as a model booking. Credit the person who posted it — here, Little dream journey — and then write a different character.

    A Pinterest pin by Little dream journey of a young East Asian girl in a cream beret and ivory quilted floral jacket, standing inside a black car with a snowy Christmas yard visible through the window.
    The reference pin by Little dream journey. Keep the idea of a finished, modest kids-fashion portrait. The child in the cream beret is not the character of the catalog.

    Right-click the image, open AI Assistant Copilot – Orauria, and then choose Image to prompt. In the frame below, the Copilot row is the one that is open; Image to prompt is the next click, in the extension’s submenu.

    Right-click menu on the kids-fashion pin, with AI Assistant Copilot – Orauria highlighted.
    Right-click the pin, open the extension, then click Image to prompt.

    The panel analyzes the picture, then returns a prompt you can copy. Generation takes a few seconds; the result then appears in the same panel.

    The Orauria extension analyzing the pin, with a progress bar at 94 percent and the message that this can take up to a minute.
    Analyze image is the wait state. The prompt arrives in the same panel.
    The Image to prompt panel showing the extracted kids-fashion brief, with Copy highlighted.
    Copy the prompt, then take it somewhere you can edit it. Do not send this version to Studio unchanged.

    This is the brief the extension wrote from the pin, quoted in full:

    Vertical 4:5 realistic children’s fashion portrait photographed from inside a modern black car: one young East Asian-looking girl with fair skin stands centered in the cabin, shown from her plush cream beret to below her knees, looking directly at the camera with a gentle closed-mouth smile and her head tilted slightly toward one shoulder. Her dark hair is styled into two small side buns with wispy bangs, decorated with a vertical strand of pale pearls beneath the beret. She wears an ivory quilted jacket covered in a subtle gray floral print, a rounded Peter Pan collar, pale gray round buttons down the front, gathered puff sleeves, and white ribbed leggings. Black leather upholstery, the left seat, dark door panel, silver handle, and window frame create a strong foreground border. Through the side window, show a bright snowy yard with a softly blurred snow-covered Christmas tree decorated with red and white ornaments, red and cream wrapped presents, and a small spotted deer. Use soft cool winter daylight, gentle facial shadows, natural rosy cheeks, moderate portrait-lens compression, selective background focus, crisp clothing texture, tender festive atmosphere, and polished but believable photographic realism.

    The useful part is the craft: a vertical 4:5 kids-fashion portrait, a clear view of the outfit, soft daylight, crisp clothing texture, a polished but believable photograph. The part you owe the rewrite is the person — the East Asian girl, the cream beret, the pearl strand, the two side buns, the ivory quilted jacket, the car interior, and the Christmas yard. None of that should be reprinted as a catalog of “your” clothes.

    Invent a fictional child, then make a reference of her

    A kidswear catalog is easy to get wrong in both directions. If you keep the pin’s child, you do not have a lookbook; you have a reprint, and you have used a likeness that is not yours. If you only change the outfit and hope the model “gets” a new girl from a paragraph, the face will drift from look to look, and a shopper will not believe it is the same collection.

    So we did the extra step first. Before any catalog clothing was written, we generated a simple studio reference of a fictional 8-year-old Black girl: a round childlike face, warm medium-brown skin, dark brown eyes, short tight natural dark curls, and a small teal hair clip. She wears a coral tee, a denim skirt, and white sneakers against a plain gray studio — everyday clothes, not a look from the pin. She is not the girl in the beret. The fair skin, the side buns, the pearls, and the original features stay with the pin.

    This is Studio task #222186938, and it is the still we attached to every later job.

    A studio portrait of a fictional 8-year-old Black girl with short tight natural dark curls, a small teal hair clip, a coral tee, a denim skirt, and white sneakers, standing against a plain gray background.
    The fictional child reference — a generated character, not the child in the Little dream journey pin. This is the face the six catalog looks have to keep.

    Write that character once, in enough detail that you would recognize her in a different outfit. Then keep the still. The prompt is no longer the only thing holding the series together. The picture is.

    Attach the reference, then rewrite the brief as a catalog shot

    Open Orauria Studio:

    • Image, then Single
    • Aspect ratio, Resolution, and Quality: Adaptive
    • Model: TT Image 2.5
    • Generate with the send button, or Ctrl+Enter

    This is the step that earlier posts in the series did not lean on. In the composer, attach the reference still of your fictional child — the plus control beside the prompt, with the thumbnail of her coral tee sitting on the brief — so the model is not guessing at a face from text alone. Leave that thumbnail there for every look in the series.

    Orauria Studio with Image and Single selected, the fictional child reference thumbnail attached to the composer, and Adaptive settings highlighted.
    The difference that keeps a six-look catalog consistent: the fictional child reference is attached in the composer, on Image, Single, and Adaptive, with TT Image 2.5.

    Then rewrite the brief as a clothing catalog photograph of the same girl. Name her as the child in the attached reference. Say, plainly, that she must not copy any other girl’s face, hairstyle, outfit, or pose. Change the clothes, the crop, and the setting into something you would actually sell or post: a clean studio, true-to-life color, modest age-appropriate styling, no extra props trying to redo the Christmas car.

    This is the catalog prompt we used for the first look, quoted in full:

    Vertical 4:5 full-length children’s clothing e-commerce catalog photograph of the SAME fictional 8-year-old Black girl shown in the attached reference image, preserving her recognizable round childlike face, warm medium-brown skin, dark brown eyes, and short tight natural dark curls with the small teal hair clip. Keep this clearly different fictional child: do not copy any other girl’s face, hairstyle, outfit, or pose. She stands relaxed facing the camera with a cheerful natural smile, arms easy at her sides and feet comfortably apart. Outfit: a soft sky-blue corduroy pinafore dress over a white long-sleeved cotton tee, matching blue tights, and clean white sneakers; subtle embroidered star accents, tasteful practical kidswear. Seamless clean pale buttercream studio background, full body with comfortable margin, balanced centered composition, bright diffuse softbox light, gentle floor shadow, crisp fabric texture, true-to-life colors, realistic children’s apparel catalog photography, modest age-appropriate styling, no text, logos, or extra props.

    The sky-blue corduroy pinafore, the white tee, the matching tights, the white sneakers, and the pale buttercream studio are the first outfit. The face, the hair, the teal clip, and the instruction to stay with the attached reference are the lock. Keep both.

    Paste the rewritten prompt. Keep the reference attached. Generate. Generation takes a few seconds; the result then appears in the chat. Stay on TT Image 2.5 and let it finish.

    Orauria Studio chat showing the fictional child reference, a prompt that asks for the same girl from the attached reference image, and the first catalog result: a sky-blue star pinafore on a buttercream studio background, task 222189812.
    The first catalog look, Studio task #222189812, with the reference still above it and the attached-reference brief in the prompt bubble. Same child, new clothes.

    What you want to see is not a reprint of the pin. You want a recognizable match to the reference: the same round face, the same warm medium-brown skin, the same short tight curls and teal clip, now standing in a sky-blue corduroy pinafore with subtle embroidered stars. If the girl in the pinafore does not look like the girl in the coral tee, do not build a five-look series on top of it. Fix the lock first.

    Build the rest of the catalog with the reference still attached

    A one-look catalog is a product shot. A six-look catalog is a collection. The second job is not a new character. It is a new outfit, and maybe a new setting, for the child you already have.

    Keep the reference image attached. Keep the sentence that she is the same fictional 8-year-old in that still. Then change only what should change: the clothes, sometimes the place, never the person. One look, one job. A studio pinafore, a winter puffer, and a garden jacket are three briefs, not one prompt with a wardrobe list.

    We kept that lock and generated five more looks of the same girl:

    • Look 2, task #222191048 — a mustard floral sweater, a forest-green pleated corduroy skirt, navy tights, and brown boots, still in the studio
    • Look 3, task #222192627 — a lilac hooded jacket, a white tee, mint leggings, and white sneakers, waving on a garden path
    • Look 4, task #222194617 — a red puffer over a cream cable knit, cream mittens, charcoal leggings, and tan winter boots on a snowy path
    • Look 5, task #222196889 — denim overalls, a yellow long sleeve, teal sneakers, and white socks, seated on a white bench against a mint wall
    • Look 6, task #222198653 — a yellow gingham pinafore over a white tee, white socks, and tan sandals, standing at the doors of a greenhouse

    The outdoor looks are still catalog photographs of clothes, not a new child on a holiday card. The snow in look 4 is a setting for a winter coat, not a recreation of the pin’s Christmas yard, deer, and cream beret. The face should survive the jump from buttercream paper to a garden path and back.

    A six-look catalog spread of the same fictional 8-year-old in a sky-blue pinafore, a mustard sweater and green skirt, a lilac garden jacket, a red winter puffer, denim overalls, and a yellow gingham pinafore.
    Six looks, one fictional character, assembled from the Studio stills. This is a catalog spread we laid out from the generated photographs, not a live shop page and not a sales result.

    If a later look drifts — a different haircut, a different age, a face that only vaguely resembles the reference — stop and tighten the brief, or generate that look again with the reference still attached. A collection that cannot hold a face cannot hold a customer either.

    Use the same catalog to sell clothes, or to grow a kids-fashion channel

    The six stills can do two jobs, and they do not have to pick only one.

    If you are selling children’s clothes, treat the set like a lookbook you would send a factory or put on a product page: consistent lighting where you can, true color, a full view of the garment, a child who is clearly the same child in look 1 and look 6. A studio drop and an outdoor drop can live in the same catalog if the character holds. Write the product information in your own shop copy, not as text baked into the picture. And say, where a shopper will see it, that the images are AI-generated illustrations of a fictional child, not photographs of a real girl wearing the sample.

    If you are growing a kids-fashion channel, the same set becomes a grid. A shop bio, a small run of seasonal looks, and a caption that can point to a product are enough of a start. The discipline is the same as the catalog: one character, modest styling, clothes a parent can actually imagine putting on a child, not a new face every time the algorithm wants a hook.

    The two screens below are illustrations of how that grid and a single post might look, built from the stills we actually generated of this character. The handle meadow.kids.demo, the follower counts, the “Liked by lila.james and 36.4K others,” and the comments — “Where can I get this set?? 😍”, “Link please!”, “Those embroidered stars though” — are fictional. They are not a shop we run, not a campaign we ran, and not a result this workflow produced. The small Illustration label, and the caption on the post itself, are there for the same reason.

    Illustration of a realistic Instagram-style shop profile for a demo kidswear account, with the bio Kidswear for little ones, a six-image grid of the generated catalog looks, fictional follower counts, and a small Illustration label.
    Illustration. A demo shop profile — meadow.kids.demo — with a kidswear bio and a six-image grid of the same fictional character. The follower counts are fictional. This is not a live account.
    Illustration of a realistic Instagram-style post of the sky-blue pinafore look, with a filled heart, the line Liked by lila.james and 36.4K others, natural English comments asking for a link, a caption that notes it is an illustration, and a small Illustration label.
    Illustration. A demo post of the first catalog look, with fictional high engagement and comments. The likes and comments are not a result we got, and the caption on the post marks it as an illustration.

    A real shop would still have to do the unglamorous work: sizes, fabric, shipping, a product a person can actually buy. The catalog gets you the pictures. It does not get you the business.

    A responsible note, before you publish or sell

    Two rules are worth stating plainly, because this is children’s clothing, not another adult street-style carousel.

    First, use a fictional AI character rather than a real child’s face. A trending pin of a child is not a model release. It is not permission to reprint that likeness in a catalog, a paid ad, or a shop grid, even if you change the jacket. Generating your own character — and attaching a reference so you do not have to go looking for a real child to photograph — is the point of this workflow. If you do have a real child model, that is a different job, with parents, a release, and a photographer. Do not mix the two, and do not present a generated girl as a photograph of a particular real child.

    Second, if you use these images to sell, disclose that they are AI-generated. A shopper should not have to guess whether a real child wore the sample. A short line on the product page, in the caption, or beside the lookbook — “AI-generated catalog images of a fictional character” — is clearer than a mood that implies a sitting you did not have. Some platforms and advertising rules expect that disclosure; even when they are quiet, the customer deserves it.

    Keep the styling modest and age-appropriate, as the brief already asks. A kidswear catalog should look like clothes for a child, not like a smaller version of an adult campaign.

    What this playbook is not

    It is not a sales report. We are not going to borrow the pin’s like count, or invent a unit sold, a revenue figure, or a follower number for a shop we have not opened. The mockups’ engagement is an illustration, labeled as one. It is not a shortcut around the face rewrite. If the girl in the pinafore is still the girl from the car, you do not have a catalog yet. You have a reprint with better lighting. And it is not a license to skip disclosure, or to use a real child’s likeness because the clothes came out well.

    Start here

    Install AI Assistant Copilot – Orauria from the Chrome Web Store, find a kids-fashion pin that is really a clothing picture, and write a fictional child who can come back in six looks. Generate a reference of her first. Attach that still in Studio. Then build the catalog from that same face, not from the original portrait.

    Start here: orauria.com, and the Chrome Web Store listing for AI Assistant Copilot – Orauria.
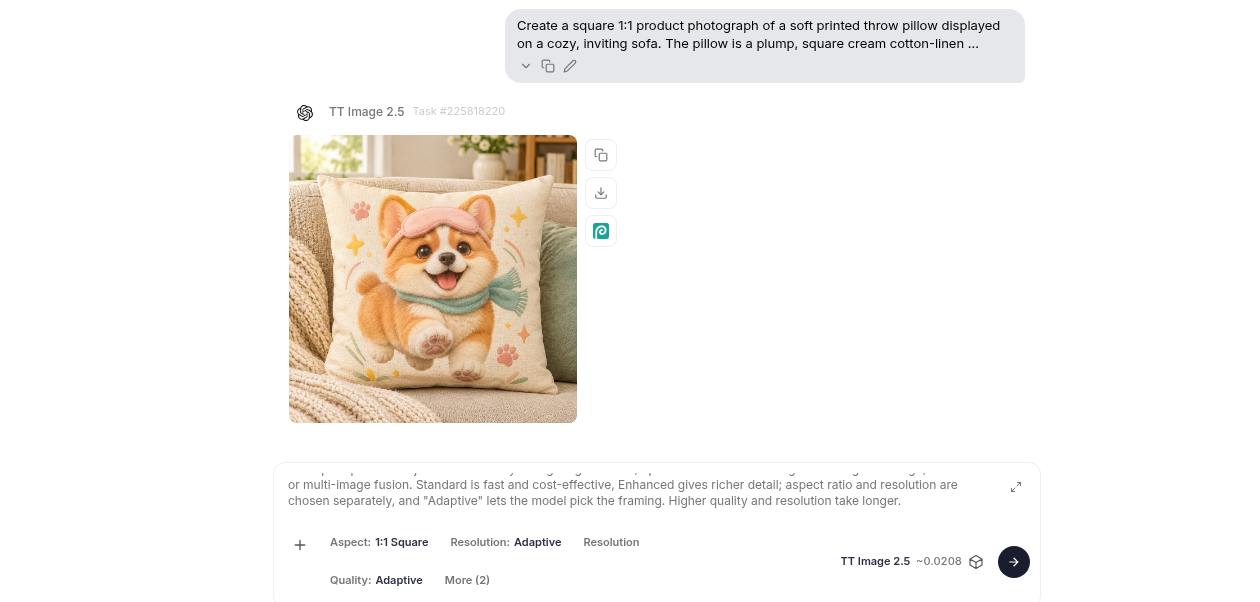
  • How to Build a Model Portfolio When You Don’t Have Brand Bookings

    How to Build a Model Portfolio When You Don’t Have Brand Bookings

    A model book is not a client list. Bookers and brand teams look first at whether they can see you: a clean headshot, a full-length, a three-quarter, a second look, all of the same person, lit and styled with some discipline. Campaign credits help later. They are not what you need to start.

    If you do not yet have brand bookings, the useful work is a first profile: a tight shot list, test-shoot concepts you actually intend to make, and a face that stays the same from frame to frame. This playbook uses one trending Pinterest pin as a lighting and composition teacher, then builds an original test-shoot still — and a small set of matching book shots — in Orauria Studio. It is a workflow, not a placement report. We are not going to invent a booking we do not have.

    The reference is this pin by ifAIwere: a vertical full-length studio portrait of an East Asian woman with a chin-length bob, a white ruffled blouse, a beige skirt, and nude heels, seated sideways on a simple white bench in a warm off-white room. It is a clean hero frame for a comp card. It is also someone else’s face and someone else’s look. The woman in the still we generated is a different person, on purpose, in a different outfit, in the same kind of studio.

    The playbook at a glance

    1. Install the Chrome extension.
    2. Find a pin that is really a test-shoot frame — full-length or three-quarter, simple light, generous negative space — not a face to clone.
    3. Run Image to prompt and copy the brief.
    4. Rewrite the character. Restyle the look. Keep the studio, the pose, and the crop.
    5. Generate the hero still in Studio, then fill the rest of a first book with the same person: a headshot, a serious close-up, a standing full-length, a simple commercial look.
    6. Put a short, consistent profile in front of brands. Pitch with the book you actually have.

    First, install the extension

    Image to prompt only works after you install the Chrome extension AI Assistant Copilot – Orauria. Get it from the Chrome Web Store before you go looking for a reference. Once it is on, you can right-click a pin and pull a prompt from it.
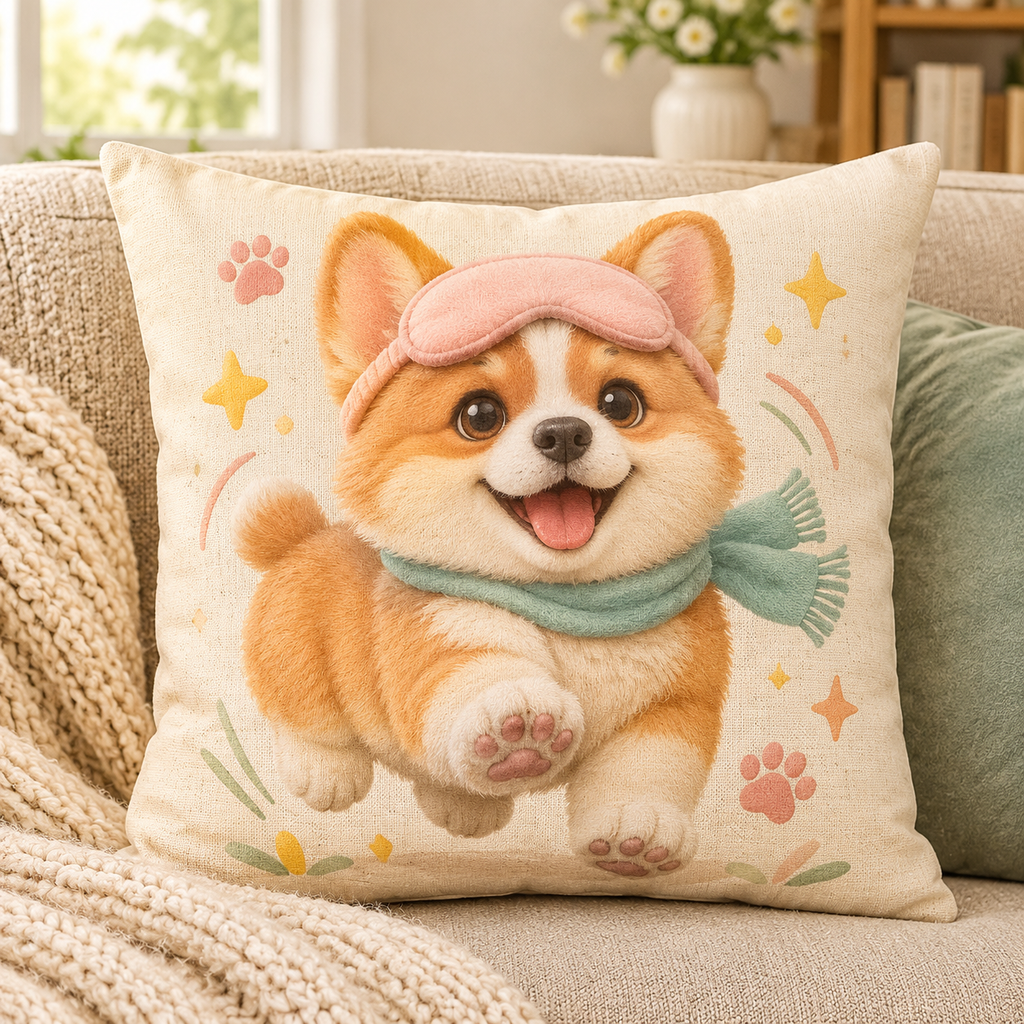
    Find a test-shoot frame, not a face to copy

    A first book rewards simple pictures. Bookers are trying to read proportion, posture, and a face, not a location they cannot rebook. This pin already thinks that way: a vertical full-length, almost eye-level, bright diffuse studio light, a pale room, a white bench and a low block, and enough negative space that the frame would still hold on a comp card. Those are the useful parts.

    The original face should not travel into the book, and neither should the exact outfit if you want the test to be yours. Treat the pin as a lighting and posing reference. Credit the person who posted it — here, ifAIwere — and then write a different character.

    A Pinterest pin by ifAIwere of an East Asian woman with a chin-length bob, white ruffled blouse, beige skirt, and nude heels, seated sideways on a white bench in a minimal off-white studio.
    The reference pin by ifAIwere. Keep the pale studio, the bench, the crop, and the soft frontal light. The person — and the white ruffles and beige skirt — are not the character of the book.

    Right-click the image, open AI Assistant Copilot – Orauria, and choose Image to prompt.

    Right-click menu on the studio portrait, with AI Assistant Copilot – Orauria and Image to prompt highlighted.
    Right-click the pin, open the extension, then click Image to prompt.

    The panel analyzes the picture, then returns a prompt you can copy.

    The Orauria extension analyzing the pin, with Analyze image and a progress bar at 8 percent.
    Analyze image is the wait state. The prompt arrives in the same panel.
    The Image to prompt panel showing the extracted studio-portrait brief, with Copy highlighted.
    Copy the prompt, then take it somewhere you can edit it. Do not send this version to Studio unchanged.

    This is the brief the extension wrote from the pin, quoted in full:

    Create a realistic vertical full-length studio portrait of one East Asian-looking adult woman with fair skin, seated sideways on a simple white bench in a minimal warm off-white room. She has a neat chin-length dark brown bob with a side part, natural makeup, and a warm, relaxed smile as she looks directly at the camera. Dress her in a white short-sleeved blouse with soft cascading ruffles down the front, a light beige knee-length skirt, and nude pointed-toe high heels. Her shoulders are relaxed; her hands rest gently over her legs, one knee lifted and bent toward a low white rectangular block on the right, the other leg extending down toward the floor. Keep her figure centered slightly left, with the bench visible behind her and the block supporting the raised heel; include both shoes and leave generous pale negative space around her. Use a nearly eye-level camera, straightforward perspective, bright diffuse frontal studio light, low contrast, soft shadows, even skin tones, natural proportions, crisp but gentle photographic detail, and a restrained palette of warm white, beige, and dark brown. No visible text or decorative props.
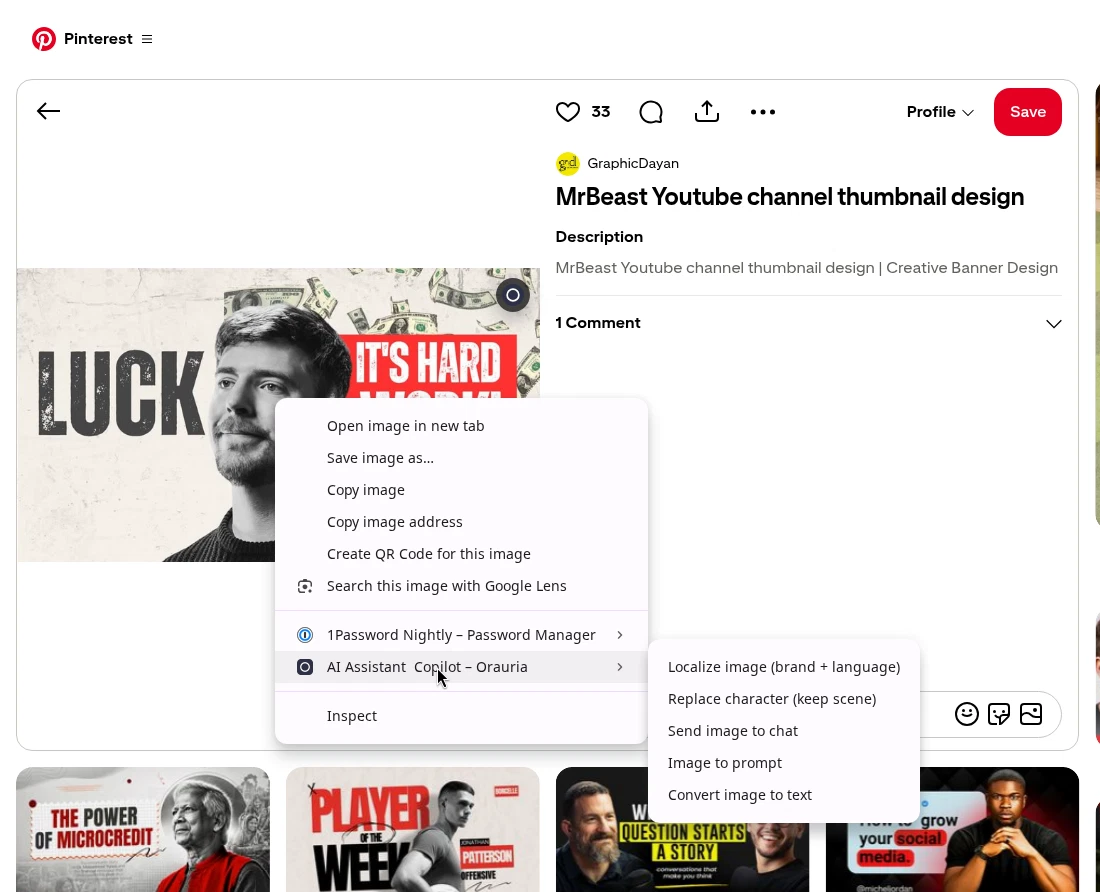
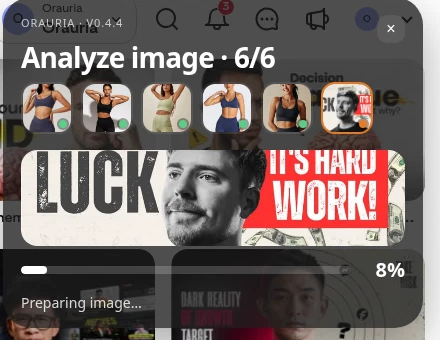
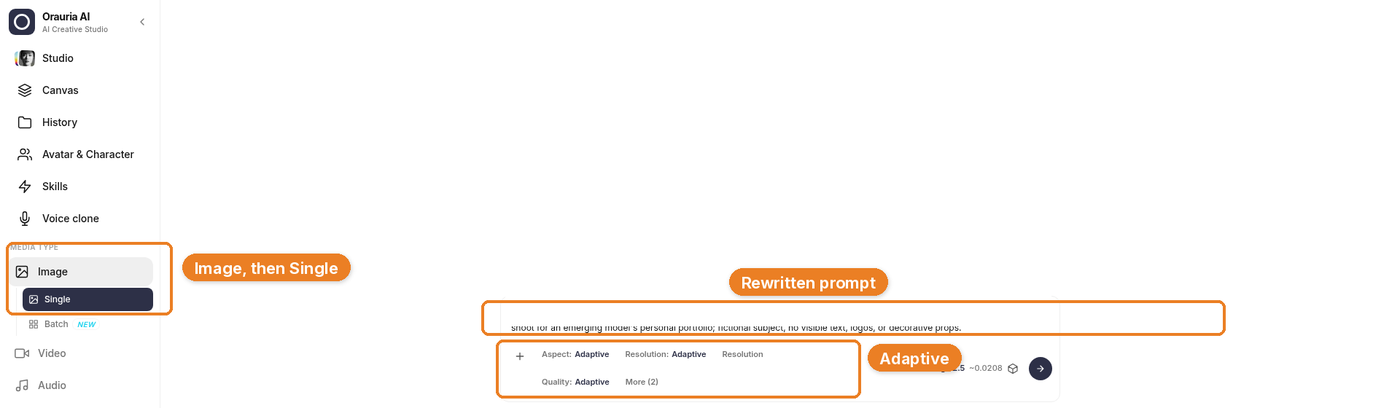
    The useful part is the studio: the warm off-white room, the white bench and the low rectangular block, the almost eye-level camera, the bright diffuse frontal light, the low contrast, the pale negative space, the vertical full-length crop. The part you owe the rewrite is the person — and, for a first test look, the clothes.

    Change the face, then restyle the test look

    A portfolio is easy to get wrong in both directions. If you keep the pin’s face, you do not have a book; you have a reprint. If you keep every stitch of the outfit and only tweak a hairstyle, you are still too close. So we changed both.

    The new character is a fictional adult Black woman with deep espresso-brown skin, a softly angular oval face, dark brown eyes, and short natural tightly coiled hair in a cropped tapered shape. She is not the woman in the pin. The chin-length bob, the fair skin, and the original features stay with the pin.

    Then we restyled the test look, the way you would if you were planning an original sitting in this same studio: a dusty-rose long-sleeved wrap blouse, a deep teal knee-length A-line skirt, and dark chocolate pointed-toe heels. The white ruffles, the beige skirt, and the nude heels stay with the pin too. The pose is the one worth keeping — seated sideways, one knee lifted onto the block, hands easy over the legs, a calm smile into the lens — because that is the composition the pin taught, not the identity of the sitter.

    Create a realistic vertical full-length fashion portfolio test-shot of a fictional adult Black woman with deep espresso-brown skin, a softly angular oval face, dark brown eyes, and short natural tightly coiled hair in a cropped tapered shape. She is seated sideways on a simple white bench in a minimal warm off-white studio, facing the camera with a calm, easy smile. Keep the same relaxed editorial pose: her shoulders rest naturally, her hands lie gently over her legs, one knee is lifted and bent toward a low white rectangular block on the right, and the other leg extends down toward the floor. Dress her in a dusty-rose long-sleeved wrap blouse with soft gathered details, a deep teal knee-length A-line skirt, and dark chocolate pointed-toe high heels. Keep her figure centered slightly left, with the bench visible behind her and the block supporting the raised heel; show both shoes and leave generous pale negative space around her. Use a nearly eye-level camera and straightforward perspective, bright diffuse frontal studio light, low contrast, soft shadows, even skin tones, natural proportions, and crisp but gentle photographic detail. Restrained warm-white, dusty-rose, deep-teal, and dark-brown palette. An authentic, polished test shoot for an emerging model’s personal portfolio; fictional subject, no visible text, logos, or decorative props.

    That is the ethical move, and it is also the practical one. A booker who has already seen the original pin should not meet the same face again with your name under it. They should meet a consistent person who can show up in a headshot and a full-length and still be recognizable.

    Generate the hero still in Studio

    Open Orauria Studio:

    • Image, then Single
    • Aspect ratio, Resolution, and Quality: Adaptive
    • Model: TT Image 2.5
    • Generate with the send button, or Ctrl+Enter

    Paste the rewritten prompt. The vertical full-length is already in the brief; with Adaptive on, the model can pick up that framing.

    Orauria Studio with Image then Single, the rewritten prompt, and Adaptive settings highlighted.
    The composer is holding the rewritten brief — here scrolled to the closing line about an emerging model’s personal portfolio. The first line of the prompt, quoted above, is the face change.

    This job is TT Image 2.5, task #222172135. The still that came back kept the pale room, the bench, the block, the lifted knee, the soft frontal light, and the generous negative space. The woman is not the woman in the pin, and the outfit is not the pin’s outfit.

    The generated still in Studio under TT Image 2.5, task 222172135: a Black woman with short cropped natural coils, a dusty-rose wrap blouse, a deep teal skirt, and dark chocolate heels, seated on a white bench in a warm off-white studio.
    Frame one, in the Studio chat. Same studio and pose, a different character, a different test look.
    The downloaded high-resolution result: the new character seated on the white bench in the dusty-rose blouse and teal skirt.
    The downloaded result, at full resolution. This is the hero frame we used in the profile illustration below.

    What belongs on a first comp card

    A classic comp card is a short, portable book: one strong headshot on the front, two to four more images on the back, plus the facts a booker actually needs — height, measurements, hair, eyes, and a way to reach you. You do not need twelve locations and a fog machine. You need a set of pictures in which the same person is easy to read.

    A practical first shot list, whether you will later shoot it with a photographer or storyboard it like this, usually includes:

    • A clean beauty headshot, smiling, cropped at the upper chest
    • A serious or editorial close-up, no smile, so the face can be read two ways
    • A three-quarter or waist-up
    • A full-length standing, simple posture, shoes in the frame
    • One second look that is more commercial than editorial — jeans and a tank, not another gown

    Keep the lighting family consistent. If the hero is a bright, low-contrast studio, do not follow it with a neon street and a wind machine. The point of a first book is recognition. Hair, makeup, and skin should feel like the same sitting, or at least the same person a week later.

    We used the hero still as a character reference and generated the rest of that list of the same woman: a smiling headshot, a serious close-up, a three-quarter, a standing full-length in the dusty-rose and teal look, and a cleaner commercial frame in a white tank and indigo jeans. Those frames are in the profile illustration below. They are test-shoot stills of a fictional character, not photographs from a booked campaign.

    Build test-shoot concepts from trending pins

    This is the habit to keep, even after you have a photographer. When a pin has the crop, the light, or the posture you want, run Image to prompt, keep the studio notes, and rewrite the person. Do that before you book the test, and you have a brief you can hand to a team. Do it in Studio, and you have a storyboard you can hold against the final selects.

    A few rules keep the concepts honest:

    • Steal light, crop, and pose. Do not steal a face, and do not reprint a look stitch for stitch.
    • Prefer pins that already look like book frames: simple backgrounds, full-length or three-quarter, space around the figure.
    • Write the character once, in enough detail that later prompts can match her. If the model supports a reference image, use the hero still so the face does not drift.
    • One concept, one job. A seated studio hero, a standing full-length, and a commercial look are three briefs, not one prompt with a wish list.

    The pin by ifAIwere was a good teacher because it was already a test-shoot picture. A cluttered lifestyle crop would have taught the wrong lesson for a first card.

    Keep the look consistent, then put it on a profile

    A profile is just the book, held still long enough for someone to scroll it. The handle, the bio, and the grid should agree with each other. “Model | Available for bookings” is enough of a bio when that is the actual ask. The grid should be the same person in the same lighting family, not a moodboard of other people’s jobs.

    The mockup below is an illustration of how that profile might look, built from the stills we actually generated of this character. The handle amara.demo, the name, the follower counts, and the engagement are fictional. They are not a channel we run and not a result this workflow produced. The small Illustration label is there for the same reason.

    Illustration of a realistic Instagram-style profile for a demo model account, with the bio Model | Available for bookings, a six-image grid of the generated character, fictional follower counts, and a small Illustration label.
    Illustration. A demo profile — amara.demo — with a booking bio and a six-image grid of the same generated character. The follower counts are fictional. This is not a live account.

    If you are a real person building a real book, the same grid logic applies, with photographs you actually sat for. Use Image to prompt to plan the sitting. Do not swap a generated face for yours and send it to an agency as a photograph of you.

    How to pitch brands when the book is short

    A short, consistent book is easier to send than a folder of forty mixed looks. Lead with three to five frames that belong together, a simple comp card or a tight PDF, and a short note that says who you are, what you shoot, and why you are writing to this brand. Specific is kinder than flattered: a product you actually wear, a campaign whose lighting you can match, a date you are free for a test.

    Do not pad the email with bookings you do not have. “Available for tests and lookbooks” is a clear sentence. An invented campaign credit is a fast way to end the conversation. If all you have are tests, say they are tests. The work in the frames will do more than a list of names.

    One more practical point: the same face has to survive the jump from a hero still to a headshot to a commercial look. If the person in the jeans frame does not look like the person on the bench, you do not have a book yet. You have a moodboard. That is why the rewrite happens once, up front, and every later prompt or sitting refers back to it.

    What this playbook is not

    It is not a placement report. We are not going to borrow the pin’s like count, or invent a booking, a rate, or a follower number for a profile we have not published. The mockup’s engagement is an illustration, labeled as one. It is not a shortcut around the face rewrite. If the woman on the white bench is still the woman from the pin, you do not have a portfolio yet. You have a reprint with better margins. And it is not a substitute for a real sitting if you are pitching yourself as a photographable person — in that case, this is a way to plan the test, not a way to skip it.

    Start here

    Install AI Assistant Copilot – Orauria from the Chrome Web Store, find a pin that is really a test-shoot frame, and write a person who can come back in a headshot and a full-length. Generate the hero still in Studio. Then build the rest of the card from that same face, not from the original portrait.

    Start here: orauria.com, and the Chrome Web Store listing for AI Assistant Copilot – Orauria.